Exploded View
For exploded view of rear door regulator, refer to Exploded View.
Removal and Installation
REMOVAL
CAUTION:
Never damage rear door glass and rear door panel.
Remove rear door glass. Refer to Removal and Installation.
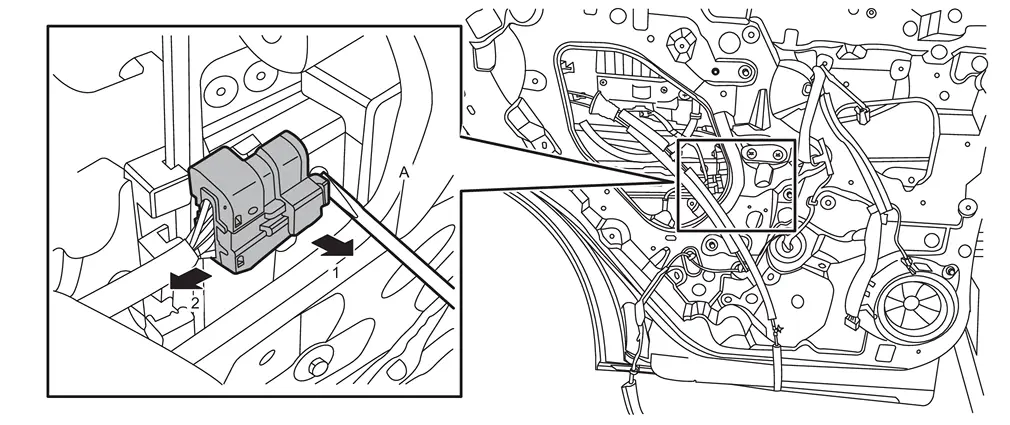
Disengage fixing portion using a remover tool (A) according to numerical order 1→2 as shown in the figure, and then disconnect rear door power window motor harness connector.
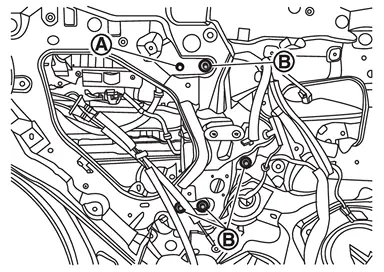
Remove mounting nut  and bolts
  , and then remove rear door regulator assembly.
INSTALLATION
Note the following items, and then install in the reverse order of removal.
CAUTION:
-
Check rear door regulator parts for lubrication. If necessary, apply body grease.
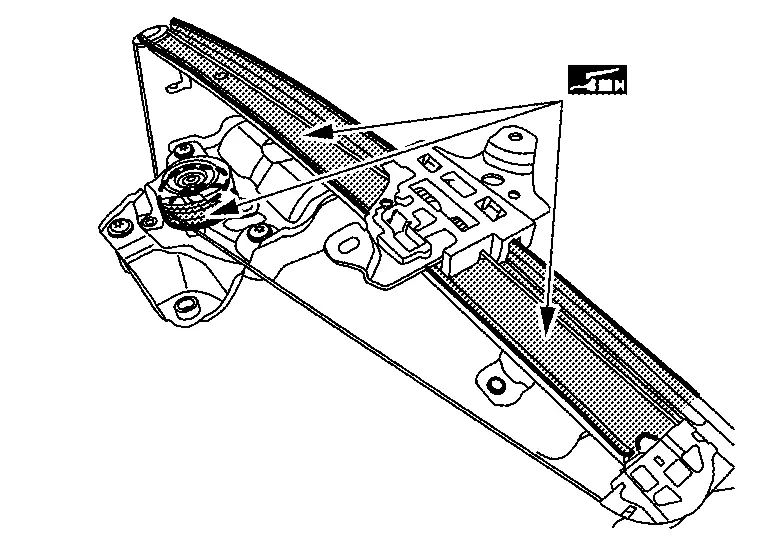

: Body grease -
Tighten rear door regulator assembly mounting bolts to the specified torque. Refer to Exploded View.
-
After installing rear door regulator, perform inspection and adjustment. Refer to Inspection and Adjustment.
Disassembly and Assembly
DISASSEMBLY
Remove rear door regulator assembly. Refer to Removal and Installation.
Remove rear door power window motor mounting bolts, and then remove rear door power window motor.
ASSEMBLY
Note the following item, and then assemble in the reverse order of disassembly.
CAUTION:
After assembly, perform the inspection and adjustment. Refer to Inspection and Adjustment.
Inspection and Adjustment
SYSTEM INITIALIZATION
Perform additional service for operating the power window control system normally after installing rear door regulator assembly. Refer to Work Procedure.
FITTING INSPECTION
-
Check that the glass is fitted securely into the sash groove.
-
Lower the glass slightly [approximately 10 to 20 mm (0.39 to 0.79 in)], and check that the clearance to the sash is parallel. Loosen each mounting bolt to correct the glass position if the clearance between the glass and sash are not parallel.
Other materials
Abs Actuator and Electric Unit (control Unit)
Exploded View
ABS actuator and electric unit (control unit)
Bracket
ABS actuator and electric unit (control unit) harness connector
To electrical brake control unit primary side
To electrical brake control unit secondary side
To front RH caliper
To front LH calipe ...
Automatic Back Door Close Switch Assembly
Removal and Installation
REMOVALRemove automatic back door switch finisher. Refer to Removal and Installation.
Disengage automatic back door close switch assembly fixing pawls using a remover tool (A), and then remove automatic back door close switch assembly from automatic back door switch finishe ...
Washer Level Switch
Exploded View
Washer tank
Packing
Washer level switch
Removal and Installation
WARNING:
REMOVALCAUTION:
When washer level switch is removed, washer fluid may come out so prepare a container to receive washer fluid and never allow washer fluid to be sprinkled.Remove fender protector RH. R ...