
Nissan Armada 2025-2026 Service and Repair Manual: Refilling
WARNING:
| Recommended fluid and fluid capacity | Refer to Fluids and Lubricants. |
CAUTION:
Use only recommended A/T fluid. Never mix with other A/T fluid.
Lift up the vehicle.
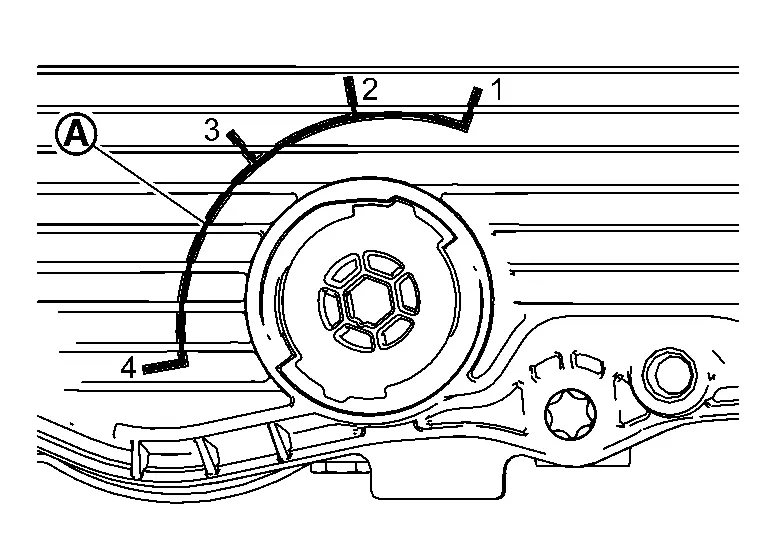
When the drain plug is installed to the oil pan, remove it with OFT position change wrench (SST: NI-52972–2).
Insert OFT position change wrench (SST: NI-52972–2) into the overflow tube, and check that the overflow tube is in position (1) (close).
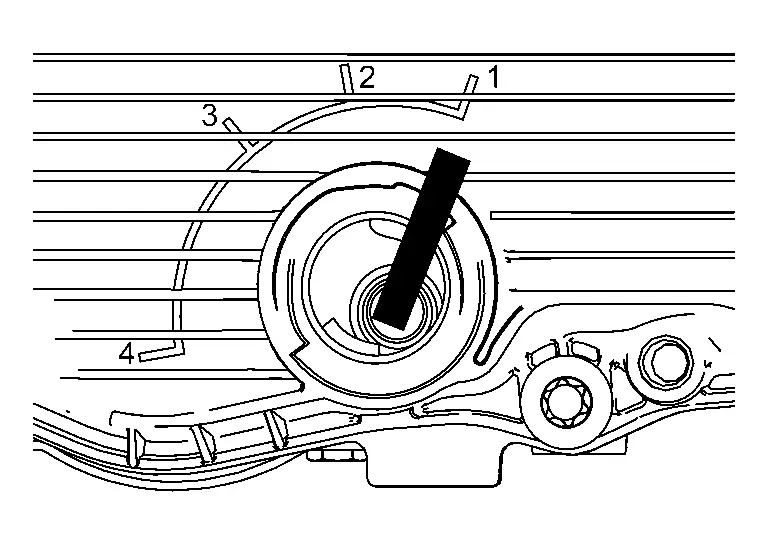
| (1) | : Closed |
| (2) | : Slow drain |
| (3) | : Overflow |
| (4) | : Drain |
 NOTE:
NOTE:
Install the A/T fluid injection plug (SST: NI-52972–1) and charge pipe adapter set (SST: NI-52584) to the oil pan.
Install the drain plug and tighten it to the specified torque.
| Drain plug | : 6 N·m (0.61 kg-m, 53 in-lb) |
CAUTION:
Replace with new O-ring of drain plug after adjusting A/T fluid level.
Never overtighten the drain plug.
Check ATF degradation level. (When the control valve & TCM are not replaced.)
Select "Data Monitor" in "TRANSMISSION" using CONSULT.
Select “ATF degradation level�.
When ATF degradation level is 77,000 or less, adjust A/T fluid level. Refer to Adjustment.
When ATF degradation level is 77,001 or more, change A/T fluid into fresh one. Refer to Changing. (Start the procedure from step 13 of "Changing.")
 Draining
WARNING:
Start the engine and let it run to warm up transmission.
Stop the engine.
Lift up the vehicle.
(1) : Closed (2) : Slow drain (3) : Overflow (4) : Drain
NOTE:
(1) : Closed (2) ...
 Changing
WARNING:
Recommended fluid and fluid capacity Refer to Fluids and Lubricants.
CAUTION:
Use only recommended A/T fluid. Never mix with other A/T fluid.
Start the engine.
Adjust the A/T fluid temper ...
Other materials:
Diagnosis Procedure
Fuel gauge will not indicate from a certain position.
CONDUCTING THE COMBINATION METER SELF-DIAGNOSIS MODE
Perform the self-diagnosis mode of combination meter, and then check that the fuel gauge operates normally. Refer to On Board Diagnosis Function.
Is the inspection result normal?
YES>>
...
WATER PUMP : Removal & Installation
WARNING:
CAUTION:
When removing water pump assembly, be careful not to get engine coolant on drive belts.
Water pump cannot be disassembled and should be replaced as a unit.
After installing water pump, connect hose and clamp securely, then check for leakage using the radiator cap tester (commercial ...
Setting
NOTE:
Explained here is how to disassemble with engine stand supporting transmission surface. When using a different type of engine stand, note the difference in the steps, etc.
Remove the engine assembly from the vehicle. Refer to Unit Removal & Installation.
Remove the parts that may restrict ...

0.0063