
Nissan Armada 2025-2026 Service and Repair Manual: Removal & Installation
REMOVAL
Remove the map lamp assembly. Refer to Removal and Installation.
Remove the microphone harness connector  .
.
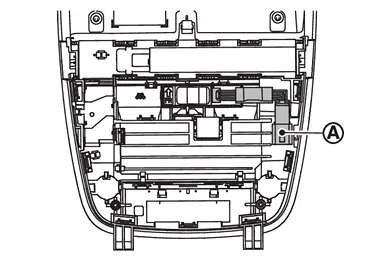
Use a suitable tool to release pawl and remove the switch finisher  .
.
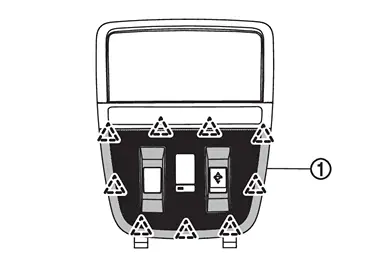
 | : Pawls |
CAUTION:
Do not damage pawl.
Use a suitable tool to release pawls and remove the moonroof switch assembly (telematics switch) .
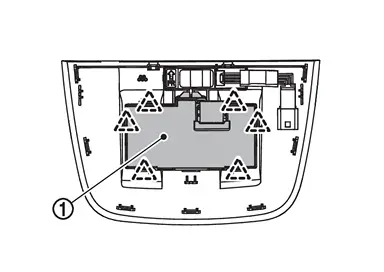
| : Pawls |
CAUTION:
Do not damage pawl.
INSTALLATION
Installation is the reverse order of removal.
 NOTE:
NOTE:
Check the telematics switch for looseness after the installation.


Other materials:
Exploded View
Rear washer nozzle Rear washer nozzle tube Connector Rear washer tube C Grommet Connector Rear washer tube B assembly*1 Rear washer tube A Tube protector Washer tank assembly Intelligent rear view mirror harness B assembly*2 : Clip : Pawl : Always replace after every disassembly.
*1: W ...
Removal and Installation
WARNING:
REMOVAL
NOTE:
CAUTION:
Perform this step when the engine is cold.
Remove front bumper. Refer to Exploded View.
Remove front under cover. Refer to Removal and Installation.
Drain A/T fluid. Refer to Draining.
Remove A/T fluid cooler hose A and B from A/T fluid cooler. Refer to Removal and In ...
ENGINE COOLANT : Flushing
WARNING:
Install reservoir tank if removed, and radiator drain plug.
CAUTION:
Be sure to clean drain plug and install with new O-ring.
Tightening torque Refer to RADIATOR : Exploded View.
If water drain plug on cylinder block is removed, close and tighten it. Refer to Setting.
Fill radiator and ...

0.0054