
Nissan Armada 2025-2026 Service and Repair Manual: Removal and Installation
CAUTION:
Never damage front door panel.
REMOVAL
CAUTION:
When removing, always use a remover tool that is made of plastic to prevent damage to the parts.
Fully open front door.
Remove pull handle cap.Apply protective tape (A) on front door finisher to protect it from damage.
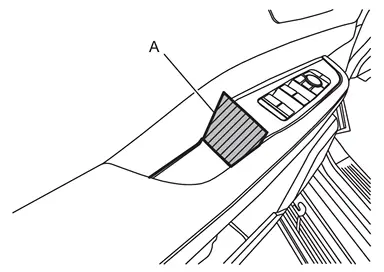
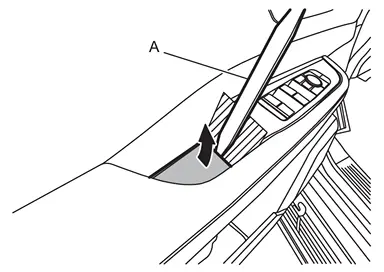
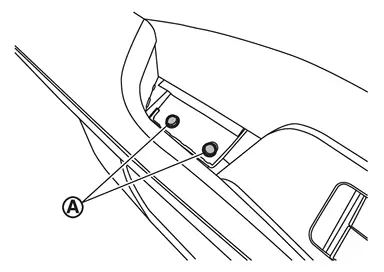
Remove front door finisher fixing screws  .
.
Remove inside handle cap.Apply protective tape (A) on inside handle to protect it from damage.
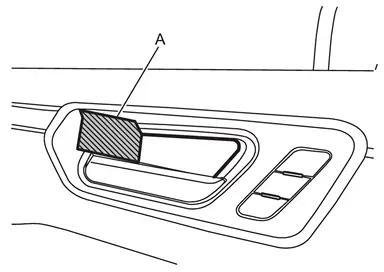
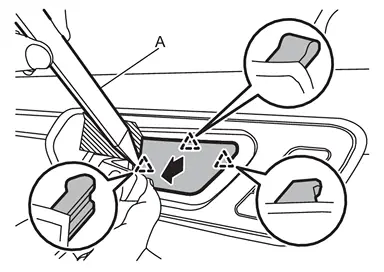
 | : Pawl |
Remove front door finisher mounting bolt .
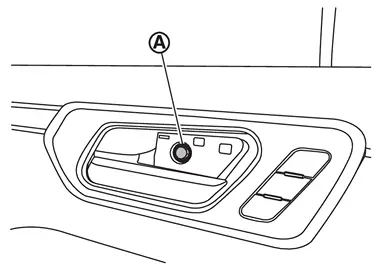
Apply protective tapes (A) on front door sash inner cover to protect it from damage.
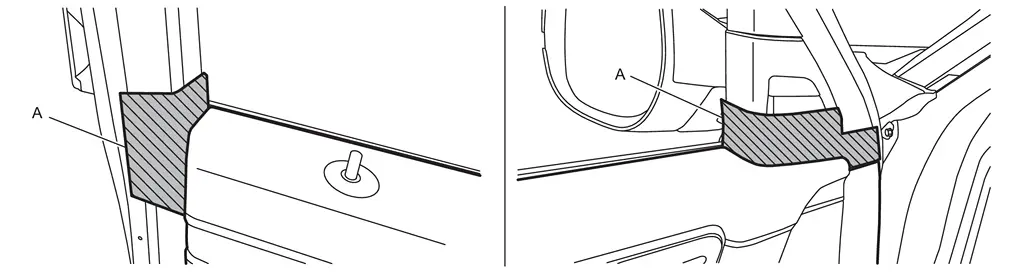
Apply protective tape (A) on front door panel to protect it from damage.
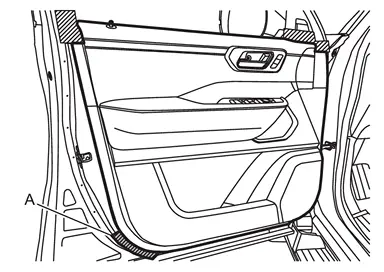
Disengage front door finisher fixing clips using a remover tool (A) according to numerical order 1→2 indicated by arrows as shown in the figure.
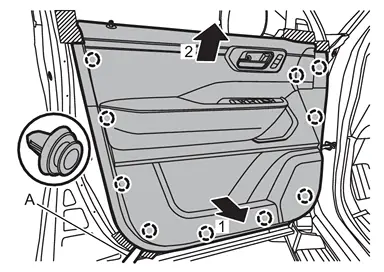
CAUTION:
Insert a remover tool between front door panel and clip to prevent damage to the parts, and then disengage clips.
 | : Clip |
Disconnect each front door harness connector, and then remove harness fixing clips from front door finisher.
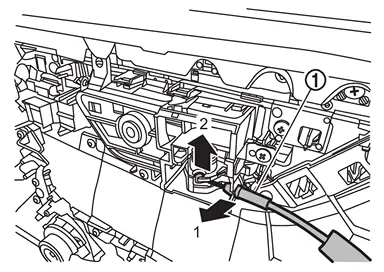
Disconnect inside handle cable  from inside handle according to numerical order 1→2 indicated by arrows as shown in the figure.
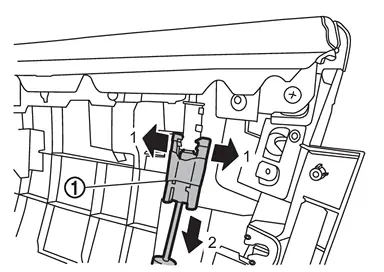
Disconnect lock knob cable from front door finisher according to numerical order 1→2 indicated by arrows as shown in the figure, and then remove front door finisher.
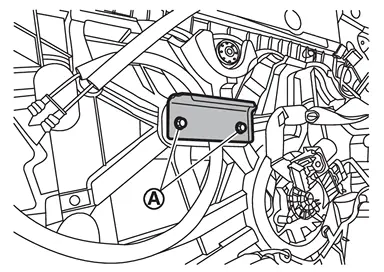
Remove pull handle bracket mounting bolts , and then remove pull handle bracket.
INSTALLATION
Note the following items, and then install in the reverse order of removal.
CAUTION:
Visually check clips for deformation and damage during installation. Replace with new ones if necessary.
Check in advance that clips are accurately aligned with the portions on front door panel, and then install by pressing in.
Tighten front door finisher mounting bolt
to the specified torque. Refer to Exploded View (front door inside handle part).


Other materials:
Work Procedure
STEP 1
Select “AUTOMATIC BACK DOOR� using CONSULT.
Select “Reset auto back door status� of “WORK SUPPORT� mode.
Touch “Initialize� to erase automatic back door position information.
>>
GO TO 2.
STEP 2
Fully close the back door manually.
>>
GO TO 3.
STEP 3
Operate bac ...
Removal and Installation
REMOVAL
Remove driver knee air bag module. Refer to Removal and Installation.
Remove BCM. Refer to Removal and Installation.
Remove fuse block (J/B).
Disconnect the stop lamp switch harness connectors.
Remove stop lamp switch , follow the procedure below.
Rotate the stop lamp switch counterclockwi ...
Speed Adjust by Route (a feature of ProPILOT Assist 1.1 and 2.1)
Speed Adjust by Route is an intelligent feature available in the Nissan Armada
as part of the advanced ProPILOT Assist 1.1 and 2.1 systems. Designed for vehicles
equipped with an integrated map locator system, this function enhances driving comfort
by automatically adapting vehicle speed to ma ...

0.0051