
Nissan Armada 2025-2026 Service and Repair Manual: Removal and Installation
CAUTION:
Never damage the body panel.
REMOVAL
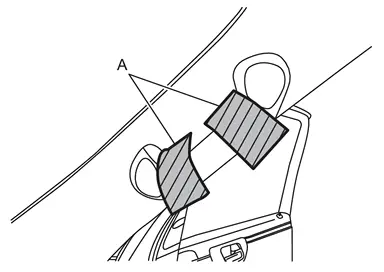
Apply protective tapes (A) on assist grip to protect it from damage.
Disengage assist grip cap fixing pawls of assist grip using a remover tool (A), and then remove assist grip cap of assist grip.
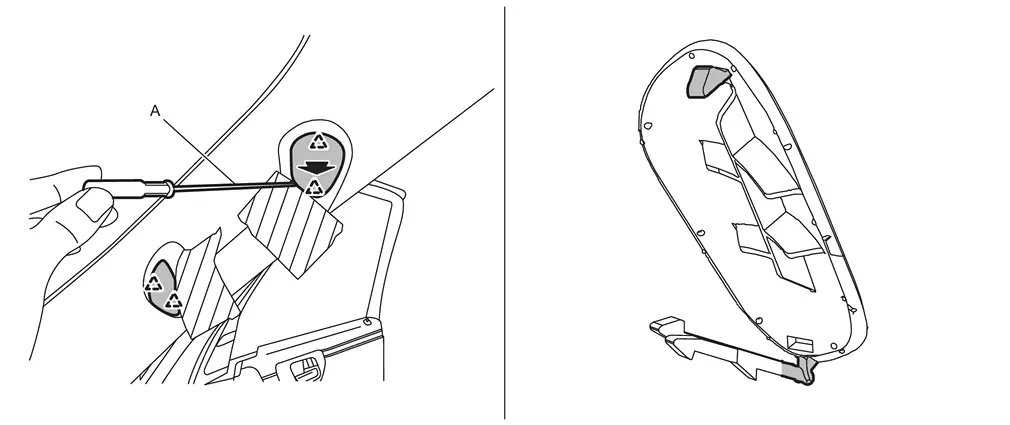
 | : Pawl |
Remove assist grip mounting bolts, and then remove assist grip.
Disengage front pillar garnish fixing clip and metal clip according to numerical order 1→2 indicated by arrows as shown in the figure.
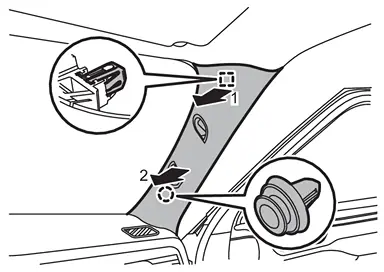
 | : Clip |
 | : Metal clip |
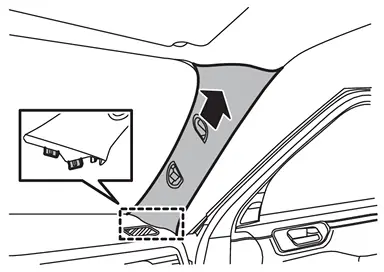
Disengage front pillar garnish fixing portions, and then remove front pillar garnish.
INSTALLATION
Note the following items, and then install in the reverse order of removal.
CAUTION:
Visually check clip and metal clip for deformation and damage during installation. Replace with new ones if necessary.
Check in advance that clip and metal clip are accurately aligned with the portions on body panel, and then install by pressing in.
After installation, check that the lip of body side welt covers. Refer to Inspection.


Other materials:
Rear End Crossmember
WARNING:
Urethane foam Unit: mm (in) : Vehicle front : Welding method, the number of welding points, and the distance in the figure apply to both sides of the vehicle. : Urethane foam portion apply to both sides of the vehicle. Replacement part • Rear end crossmember assembly • Rear cros ...
Work Flow
OVERALL SEQUENCE
DETAILED FLOW
GET INFORMATION FOR SYMPTOM
Check operation condition of the function that is malfunctioning.
>>
GO TO 2.
CHECK DTC
Check DTC.
Perform the following procedure if DTC is detected.
Record DTC and freeze frame data (Print them out using CONSULT.)
Erase DTC.
Ar ...
Disassembly and Assembly
DISASSEMBLY
CAUTION:
Disassemble and assemble steering gear assembly by fixing the mounting area with a vise using copper plates.
Loosen outer socket lock nut, and remove outer socket.
CAUTION:
To prevent damage, hold outer socket across flats using suitable tool while loosening outer socket lock ...

0.0052