
Nissan Armada 2025-2026 Service and Repair Manual: Rear End Crossmember
WARNING:
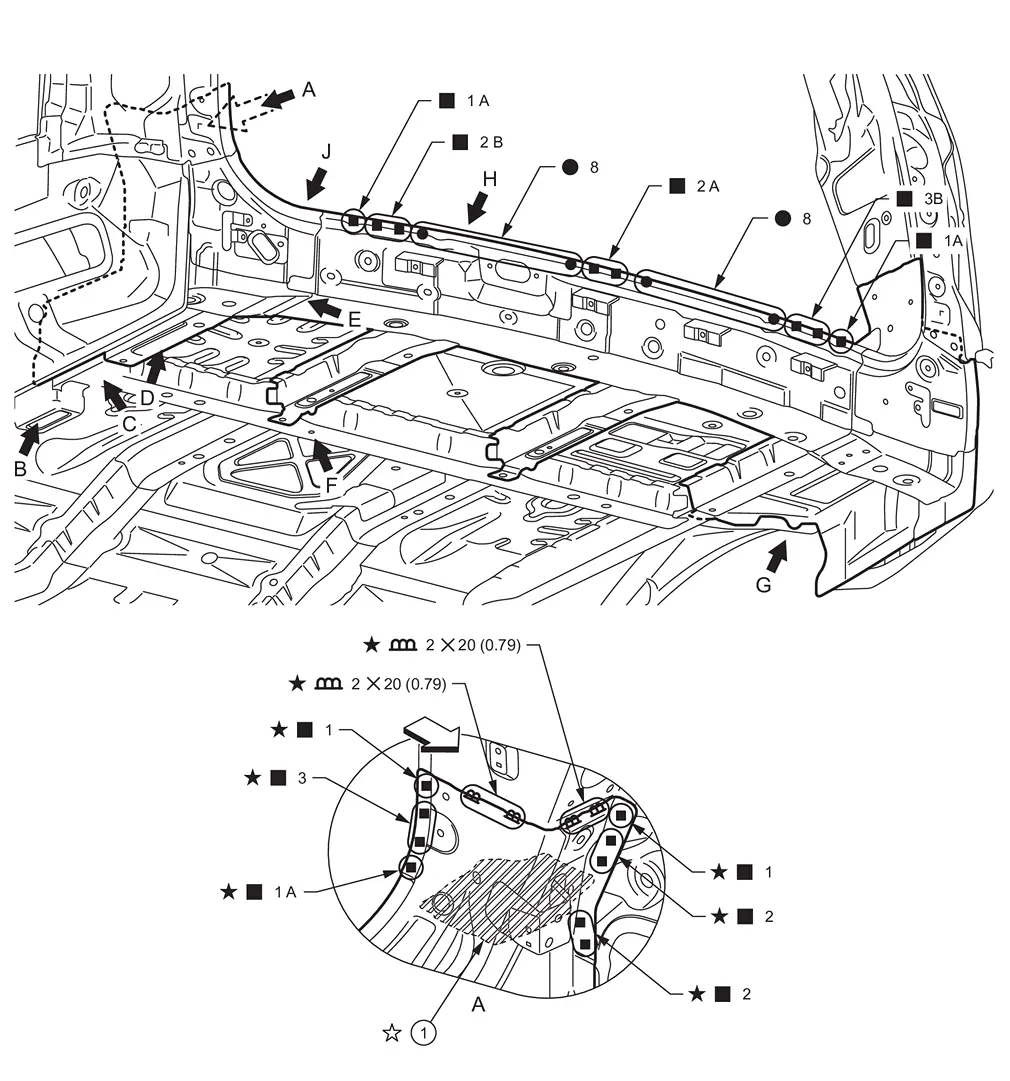
 | Urethane foam | ||||
| Unit: mm (in) | |||||
 : Vehicle front : Vehicle front | |||||
 : Welding method, the number of welding points, and the distance in the figure apply to both sides of the vehicle. : Welding method, the number of welding points, and the distance in the figure apply to both sides of the vehicle. | |||||
 : Urethane foam portion apply to both sides of the vehicle. : Urethane foam portion apply to both sides of the vehicle. | |||||
| Replacement part | |||||
| • | Rear end crossmember assembly | • | Rear crossmember assembly | ||
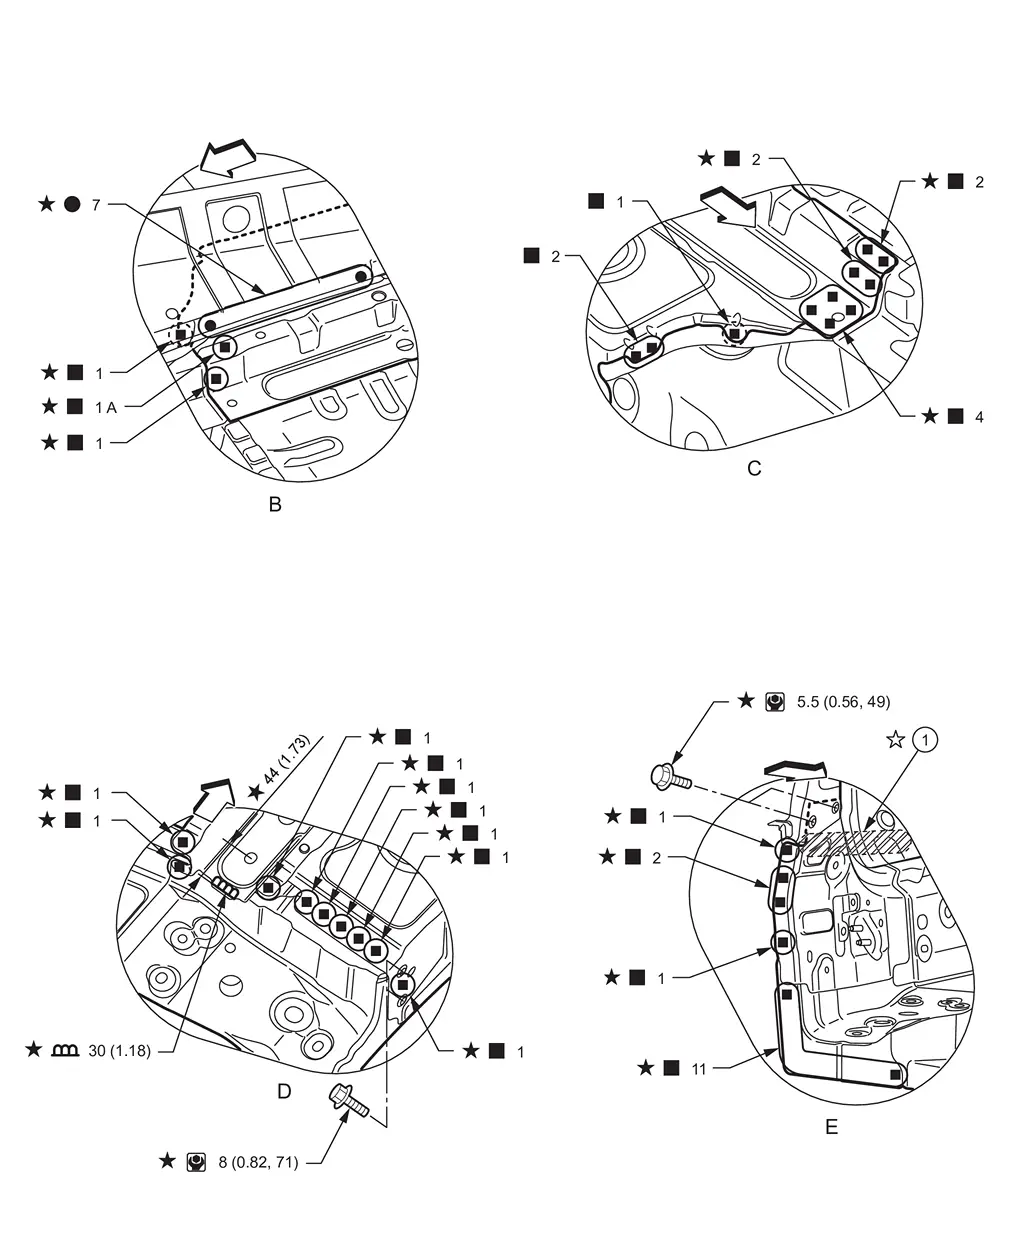
| Urethane foam | ||||
| Unit: mm (in) | |||||
| : Vehicle front | |||||
 : Weld the parts onto the back of the component part. : Weld the parts onto the back of the component part. | |||||
| : Welding method, the number of welding points, the distance in the figure, and the tightening torque apply to both sides of the vehicle. | |||||
| : Urethane foam portion apply to both sides of the vehicle. | |||||
 : N·m (kg-m, in-lb) : N·m (kg-m, in-lb) | |||||
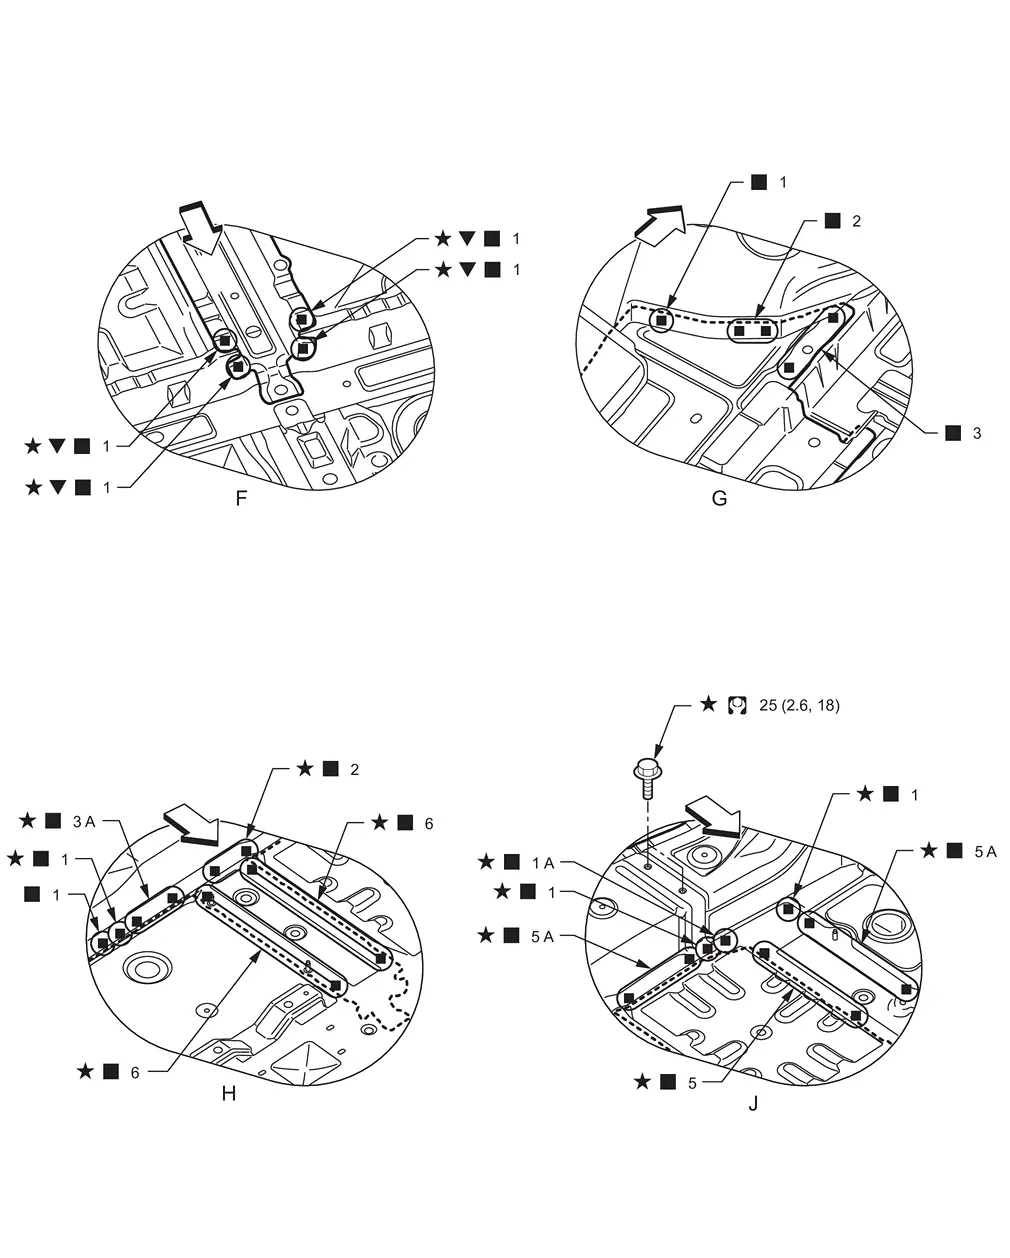
| : Vehicle front | |||||
 : Drill φ7 mm (0.28 in) hole for the plug welding hole (ultra high strength steel). : Drill φ7 mm (0.28 in) hole for the plug welding hole (ultra high strength steel). | |||||
| : Welding method, the number of welding points, and the tightening torque apply to both sides of the vehicle. | |||||
 : N•m (kg-m, ft-lb) : N•m (kg-m, ft-lb) |
 Rear Panel
WARNING:
: Vehicle front : Weld the parts onto the back of the component part. : Welding method, the number of welding points, and the tightening torque apply to both sides of the vehicle. : N•m (k ...
 Rear Floor Rear
WARNING:
WITH ProPILOT Assist 2.1 MODELS
Work after rear end crossmember is removed.
: Vehicle front : Drill φ6 mm (0.24 in) hole for the plug welding hole (ultra high strength steel). : Drill φ7 m ...
Other materials:
Removal and Installation
REMOVAL
CAUTION:
Before removing, take a short memo/photo to remember door harness and cable layout.
Remove front door glass. Refer to Removal and Installation.
Disconnect harness connectors , and then disengage harnesses fixing clips.
: Clip
Remove hole seals from front door panel, and then r ...
Removal and Installation
REMOVAL
Remove rear bumper fascia. Refer to Removal and Installation.
Disconnect automatic back door warning buzzer harness connector.
Remove automatic back door warning buzzer mounting nuts , and then remove automatic back door warning buzzer .
INSTALLATION
Install in the reverse order of removal ...
LIQUID GASKET
REMOVAL OF LIQUID GASKET SEALING
After removing mounting nuts and bolts, separate the mating surface using the seal cutter [SST: KV10111100 (NI-37228)] (A) and remove old liquid gasket sealing.
CAUTION:
Never damage the mating surfaces.
Tap the seal cutter [SST: KV10111100 (NI-37228)] to insert it ...

0.0055