
Nissan Armada 2025-2026 Service and Repair Manual: Removal and Installation
CAUTION:
Never excessively pull body side welt.
Never damage the body panel.
REMOVAL
Front Body Side Welt
Pull the mounting part inside the vehicle to the outside of the vehicle, and then remove front body side welt.
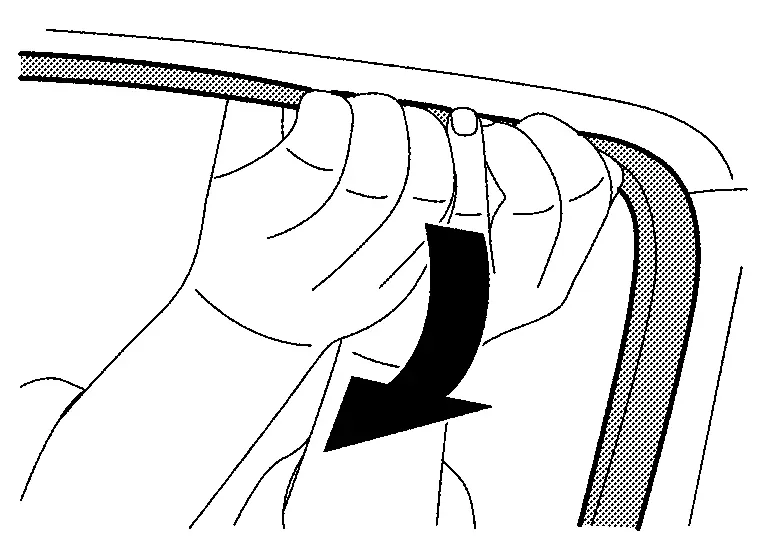
CAUTION:
Remove the headlining portion of front body side welt slowly and carefully.
Be careful to bend or damage any part of the headlining while taking out the front body side welt.
Rear Body Side Welt
Pull the mounting part inside the vehicle to the outside of the vehicle, and then remove rear body side welt.
CAUTION:
Remove the headlining portion of rear body side welt slowly and carefully.
Be careful to bend or damage any part of the headlining while taking out the rear body side welt.
INSTALLATION
 NOTE:
NOTE:
The parts (finisher, garnish, headlining, etc.) that into contact with the body side welt is describing as trim.
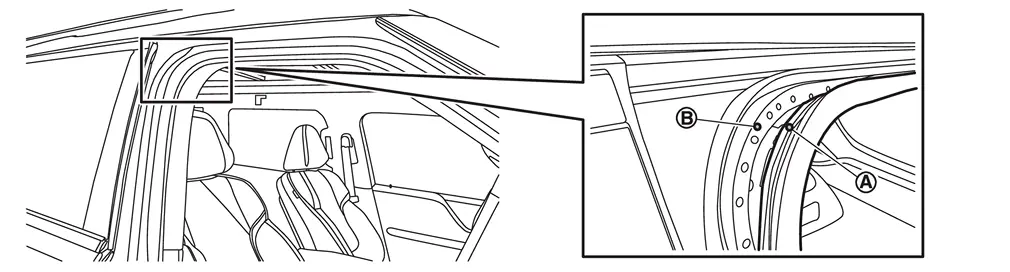
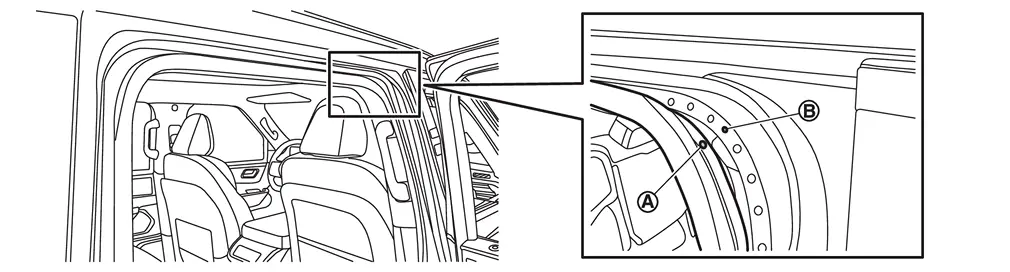
Align body side welt identification color  and vehicle position mark
  , and then install body side welt to the vehicle.
- Front body side welt
- Rear body side welt
Install body side welt.
CAUTION:
Check that body side welt fits tightly in each corner.
Pull out the lip of body side welt from each trim and cover it.
- When reusing the body side welt.
Use fingers to flip the lip of body side welt caught in the trim as shown in the figure, and then install it with body side welt to cover the trims.
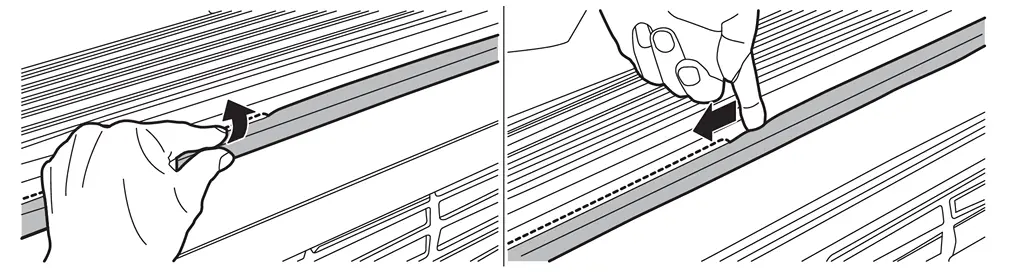
- When the body side welt is new.
- Pull the tab sheet of body side welt toward to vehicle outside as shown in the figure, and then pull the string from lip of body side welt.
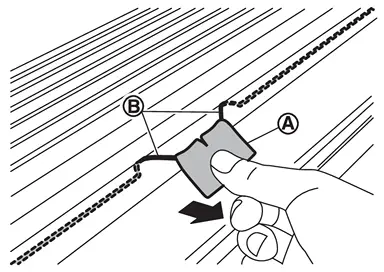 NOTE:
NOTE:By pulling the string, easily flip the lip of body side welt and cover the lip of body side welt onto the trims.
- Pull out the string from all around the body side welt.
NOTE:
The string separate from body side welt, but it is normal.
- Pull the tab sheet
After installation, check the condition of body side welt lip. Refer to Inspection.
 Body Side Welt
...
 Inspection
NOTE:
The parts (finisher, garnish, headlining, etc.) that into contact with the body side welt is describing as trim.
Check that the lip of body side welt covers onto each trim .
If the lip of bo ...
Other materials:
Removal and Installation
REMOVAL
Apply protective tape (A) on the part to protect it from damage.
Disengage fixing pawls using remover tool (A), and then remove emblem A.
: Pawl
Remove emblem bracket mounting bolt.
Apply protective tapes (A) on the part to protect it from damage.
Cut double-sided tapes using remove ...
ELECTRIC INTAKE VALVE TIMING CONTROL MODULE : Exploded View
Bracket Electric intake valve timing control module : Vehicle front : N·m (kg-m, in-lb) ...
Difference between predictive and actual distances
Basic information
The Nissan Armada RearView Monitor provides reference guidelines only. The actual
distance to objects may differ depending on terrain and object positioning.
On uneven surfaces such as slopes or when objects extend outward, the displayed
distance may not accurately reflect re ...

0.0057