
Nissan Armada 2025-2026 Service and Repair Manual: Removal and Installation
REMOVAL
Apply protective tape (A) on the part to protect it from damage.
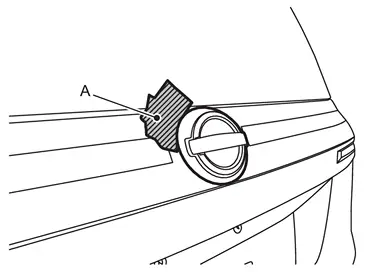
Disengage fixing pawls using remover tool (A), and then remove emblem A.
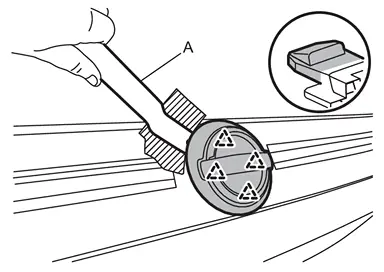
 | : Pawl |
Remove emblem bracket mounting bolt.
Apply protective tapes (A) on the part to protect it from damage.
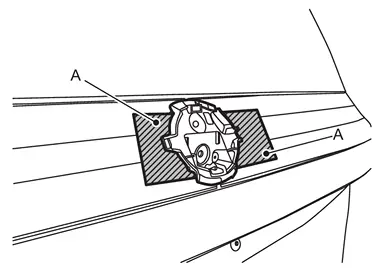
Cut double-sided tapes using remover tool (A) and cutter (B).
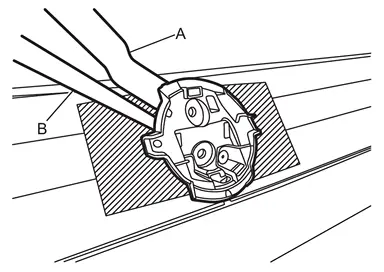
Disengage fixing pawl and clip using a remover tool (A), and then remove rear emblem bracket.
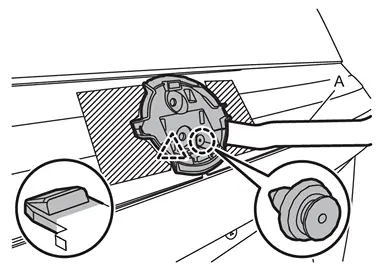
 | : Clip |
| : Pawl |
Remove emblem A from back door finisher while warming using an industrial dryer.
CAUTION:
Never damage the painted surface of the back door finisher when removing.
Remove emblem B from the panel while warming using an industrial dryer.
CAUTION:
Never damage the painted surface of the panel when removing.
INSTALLATION
Note the following items, and then install in the reverse order of removal.
CAUTION:
Always replace double-sided tape with a new one, if rear emblem bracket is reused.
Degrease rear emblem bracket mounting surface of tail lamp RH.
Never wash the vehicle within 24 hours after installing so as to keep adhesive.
If paint bumps, dust, etc., adhere to the emblem mounting surface, it may cause a defective appearance.
Never reuse the emblem A and emblem B which was peeled.
 NOTE:
NOTE:
Refer to the figure below for the emblem A and emblem B mounting position.
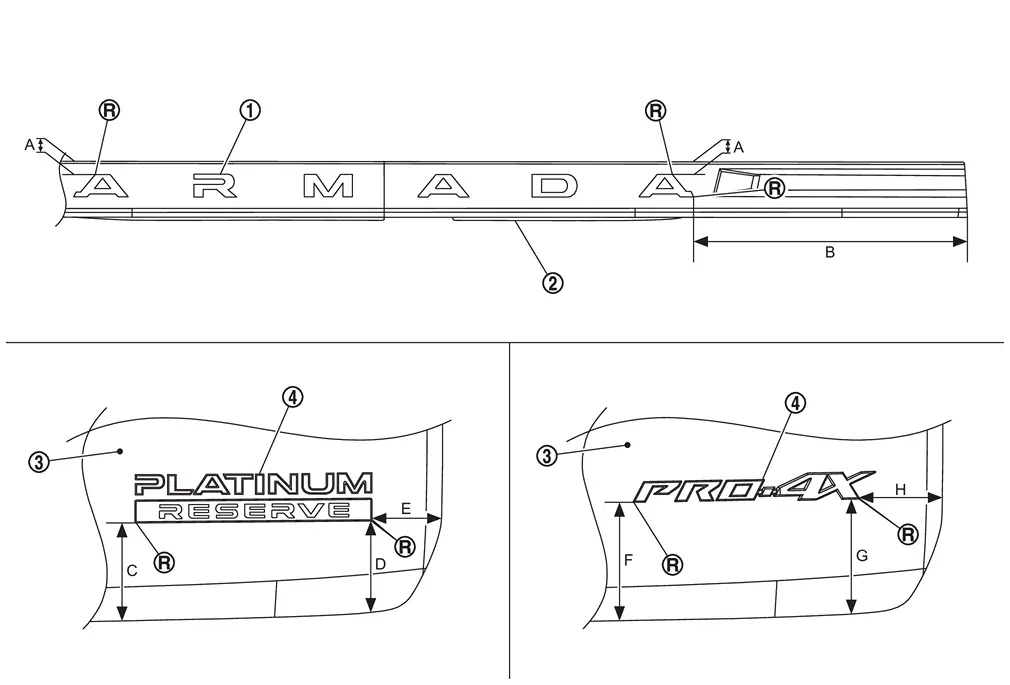
 | Emblem A |  | Back door finisher |  | Back door panel |
 | Emblem B | ||||
 | : R end | ||||
| A | : 13.0 mm (0.512 in) | B | : 365.4 mm (14.386 in) | C | : 101.5 mm (3.996 in) |
| D | : 95.8 mm (3.772 in) | E | : 78.1 mm (3.075 in) | F | : 122.8 mm (4.835 in) |
| G | : 144.9 mm (5.705 in) | H | : 77.6 mm (3.055 in) |
 Exploded View
Rear emblem Emblem A Emblem B Tail lamp RH Rear emblem bracket Double-sided tape
[t: 1.2 mm (0.047 in)] : Clip : Pawl : Always replace after every disassembly. ...

Other materials:
Exploded View
Exhaust gas/outside odor detecting sensor Active grille shutter : Clip : Pawl : Vehicle front ...
Diagnosis Procedure
CHECK POWER SOURCE AND GROUND CIRCUIT
Turn ignition switch OFF.
Remove the heated steering wheel. Refer to Removal and Installation.
Turn ignition switch ON.
CAUTION:
Never start the engine.
Turn heated steering wheel switch ON.
Check voltage between spiral cable harness connector terminals.
Spiral ...
Speed Adjust by Route (a feature of ProPILOT Assist 1.1 and 2.1)
Speed Adjust by Route is an intelligent feature available in the Nissan Armada
as part of the advanced ProPILOT Assist 1.1 and 2.1 systems. Designed for vehicles
equipped with an integrated map locator system, this function enhances driving comfort
by automatically adapting vehicle speed to ma ...

0.0054