
Nissan Armada 2025-2026 Service and Repair Manual: Removal and Installation
REMOVAL
Fully open hood assembly.
Disengage fender cover fixing pawls.
LH side
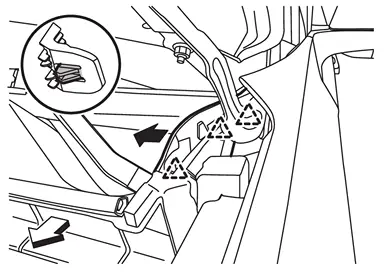

: Pawl 
: Vehicle front RH side
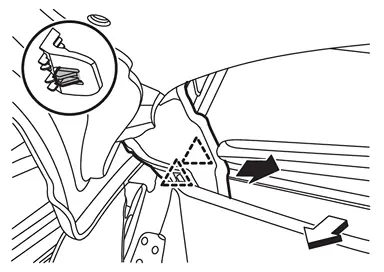
: Pawl : Vehicle front
Disengage fender cover fixing pawl, and then remove fender cover.
LH side
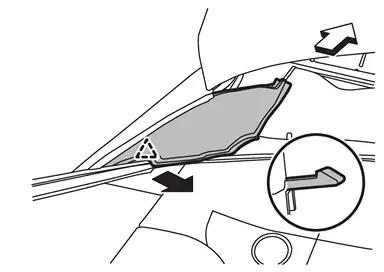
: Pawl : Vehicle front RH side
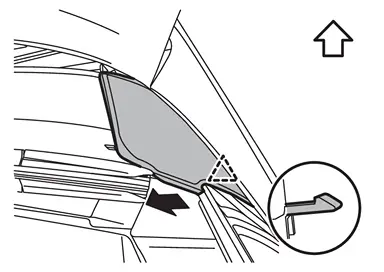
: Pawl : Vehicle front
CAUTION:
After removing fender cover, cover the end of windshield with urethane, etc. to prevent damage to windshield.
INSTALLATION
Note the following item, and then install in the reverse order of removal.
CAUTION:
Install so that there is no clearance between windshield and cowl top cover.
 Fender Cover
...

Other materials:
Work Flow (Without EXP-800 NI and GR8-1200 NI)
Before performing a alternator test, make sure that the 12V battery is fully charged. A 30-volt voltmeter and suitable test probes are necessary for the test.
Before starting, inspect the fusible link.
Use fully charged 12V battery.
OVERALL SEQUENCE
DETAILED FLOW
PRELIMINARY INSPECTION
Perform the ...
Glue System
Glue systems allow pulling when an area is not easily accessible like roof rail or beneath braces. It is also one of the easiest systems to learn. But it is mainly limited to soft dents.
A couple of things that affect the glue pulling:
Temperature
The diameter and the size of the pull knob
Applica ...
Basic information
Drive Mode Selector (example)
Vehicle information display (example)
The Nissan Armada features a versatile Drive Mode Selector system that allows
the driver to tailor vehicle performance to different driving conditions. By rotating
the selector dial to the left or right, you can quickl ...

0.0057