
Nissan Armada 2025-2026 Service and Repair Manual: Removal and Installation
CAUTION:
Never reuse fuel filler base assembly. Always replace it with a new one when it is removed.
REMOVAL
Remove fuel filler lid. Refer to Removal and Installation.
Disengage fuel filler base mask  fixing pawls using a remover tool (A) into drain hole
  , and then remove fuel filler base mask.
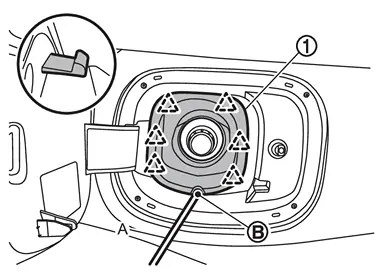
 | : Pawl |
Drill holes at recessed parts  of fuel filler base.
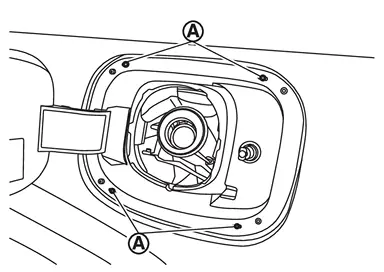
CAUTION:
Use a drill bit of Φ3.0 - 4.0 mm (Φ0.118 - 0.157 in) not to damage the vehicle body.
Never insert over 3.5 mm (0.138 in) from tip of drill bit not to break and/or damage pawl of fuel filler base assembly.
Insert a remover tool (B) into drill holes of fuel filler base assembly , and pull fuel filler base assembly to outside of vehicle while disengage fuel filler base assembly fixing pawls.
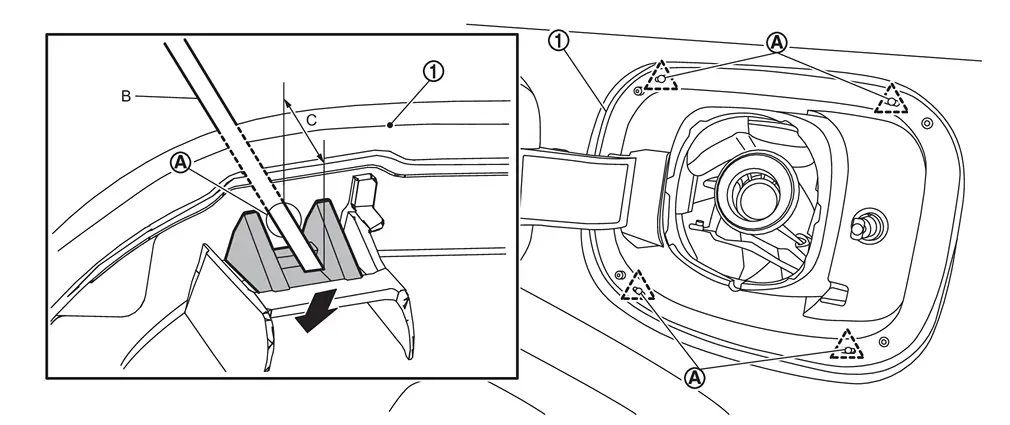
| : Pawl |
 NOTE:
NOTE:
Insert a removal tool into drill hole by approximately 12 mm (0.47 in) (C), and push down fixing pawl using principle of leverage.
It is easy to work with remover tool that has the same thickness as drill hole diameter.
Remove fuel filler base assembly from vehicle body according to the numerical order 1→2 indicated by arrows as shown in figure.
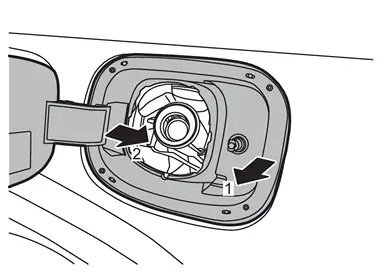
CAUTION:
Never damage vehicle body.
Remove fuel filler lid lock assembly. Refer to Removal and Installation.
INSTALLATION
Install fuel filler lid lock assembly. Refer to Removal and Installation.
Install fuel filler base assembly to vehicle body according to the numerical order 1→2 indicated by arrows as shown in figure.
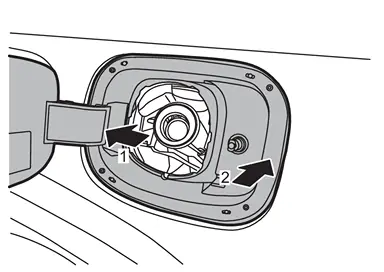
CAUTION:
Never damage vehicle body.
Install fuel filler base to rear wheel outer panel LH  and body side inner panel
  .
.
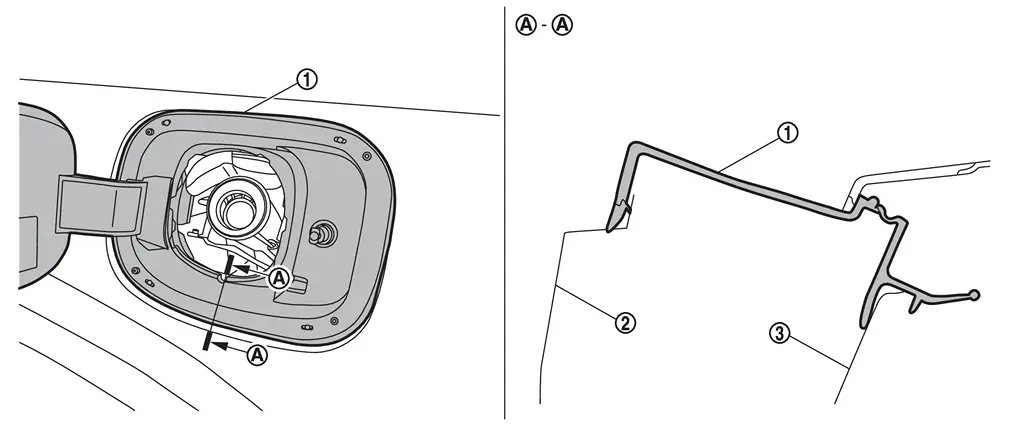
Install fuel filler base mask to fuel filler base.
Install fuel filler lid to fuel filler base assembly. Refer to Removal and Installation.
CAUTION:
After installation, check fuel filler base assembly open/close, lock/unlock operation.


Other materials:
Exploded View
Front door outside handle Escutcheon cover Escutcheon base Rear gasket Front door outside handle bracket TORX bolt Key rod
(Driver side) TORX bolt Front door lock assembly Inside handle cap Front door inside handle Hole seal TORX bolt Front gasket : Clip : Pawl : Always replace afte ...
Exploded View
Engine mounting bracket (RH) Engine mounting insulator (RH) Stopper bracket (RH) Engine mounting bracket (LH) Engine mounting insulator (LH) Stopper bracket (LH) Engine mounting insulator (rear) Comply with the assembly procedure when tightening. Refer to Unit Removal & Installation. ...
Speed Limit Assist (a feature of ProPILOT Assist 1.1 and 2.1)
Speed Limit Assist in the Nissan Armada is an advanced functionality integrated
within the ProPILOT Assist 1.1 and 2.1 systems. This feature works in conjunction
with the built-in map locator and Traffic Sign Recognition (TSR) system to help
drivers maintain compliance with posted speed limits ...

0.005