
Nissan Armada 2025-2026 Service and Repair Manual: Removal and Installation
WARNING:
REMOVAL
Disconnect 12V battery cable from negative terminal. Refer to Precautions for Removing Battery Terminal.
CAUTION:
To prevent damage to the parts, disconnect 12V battery cable from negative terminal first.
Remove 3rd seat. Refer to Removal and Installation.
Flip the rear floor carpet to secure work space.
Remove floor cover  mounting bolts
  , and then remove floor cover.
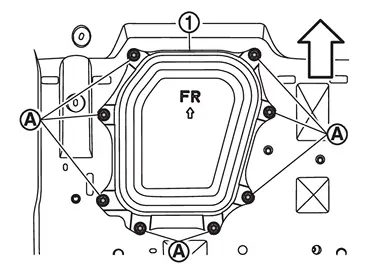
 | : Vehicle front |
Disconnect 12V sub battery (lithium ion battery) harness connector .
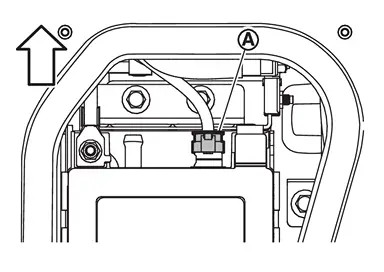
| : Vehicle front |
Remove mounting nut , and then disconnect 12V sub battery (lithium ion battery) negative cable from negative terminal.
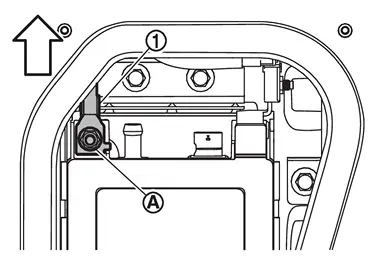
| : Vehicle front |
Disengage fixing pawl, and then remove positive terminal cover part of 12V sub battery (lithium ion battery) in the direction of the arrow ( ).
).
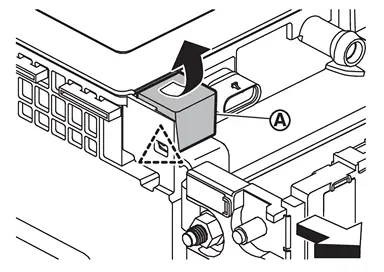
 | : Pawl |
| : Vehicle front |
Remove mounting nut , and then disconnect 12V sub battery (lithium ion battery) cable 2 from positive terminal.
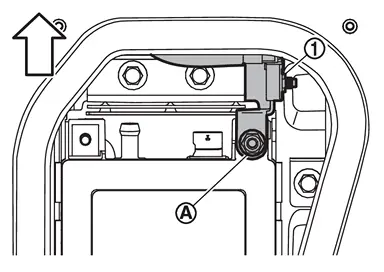
| : Vehicle front |
Remove mounting nuts , and then remove 12V sub battery (lithium ion battery) bracket.
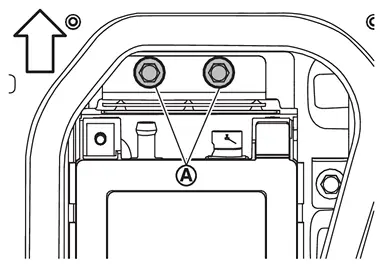
| : Vehicle front |
Remove 12V sub battery (lithium ion battery).
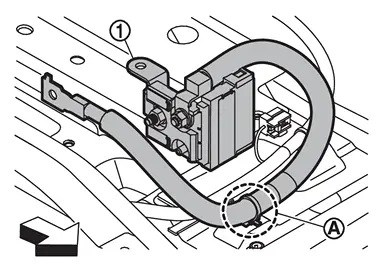
If necessary, remove the 12V sub battery (lithium ion battery) case and cover by following the steps below.Remove power network separate relay. Refer to Exploded View . Remove 12V sub battery (lithium ion battery) positive cable 1 mounting nut , harness clip  and disconnect harness connectors
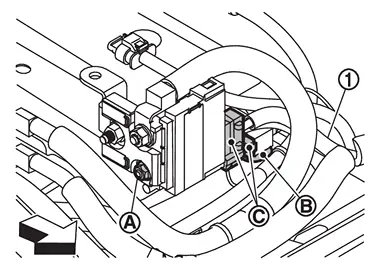
| : Vehicle front |
, and then move 12V sub battery (lithium ion battery) positive cable 1 from 12V sub battery (lithium ion battery) case  .
.
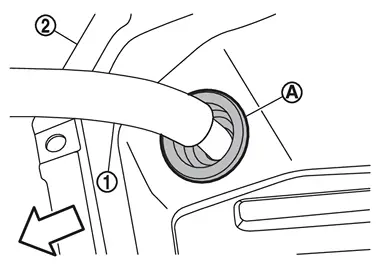
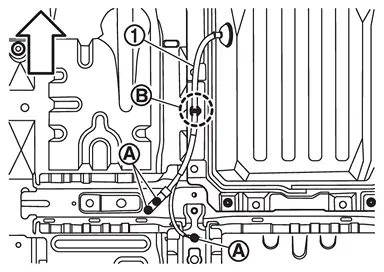
| : Vehicle front |
harness clip and then remove 12V sub battery (lithium ion battery) positive cable 2 from 12V sub battery (lithium ion battery) case.
 | : Clip |
| : Vehicle front |
mounting bolts and clip .
| : Clip |
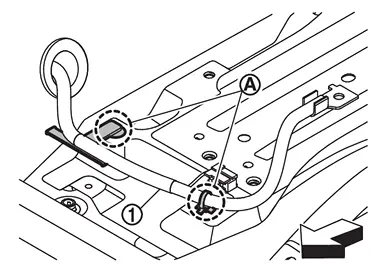
| : Vehicle front |
clips from 12V sub battery (lithium ion battery) case.
| : Clip |
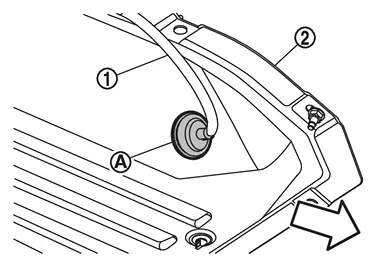
| : Vehicle front |
, and then remove 12V sub battery (lithium ion battery) negative cable from 12V sub battery (lithium ion battery) case .
| : Vehicle front |
mounting bolt to secure work space.
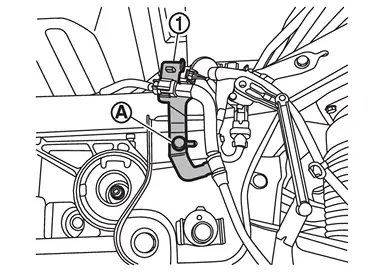
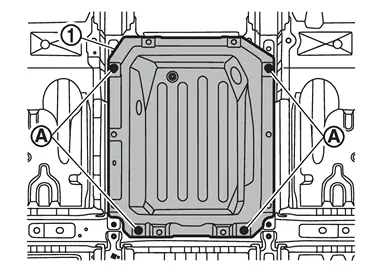
case and cover mounting nuts , and then remove 12V sub battery (lithium ion battery) case and cover from vehicle.
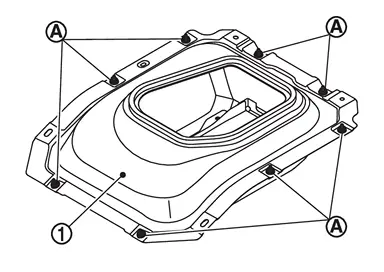
mounting nuts , and then remove 12V sub battery (lithium ion battery) cover from 12V sub battery (lithium ion battery) case.
INSTALLATION
Note the following items, and then install in the reverse order of removal.
CAUTION:
When connecting, connect battery cable to positive terminal first.
Never reuse battery cover upper seal and battery case lower seal.
When install 12V sub battery (lithium ion battery) cover seal
, make sure that the dimensions of (A) are 20 – 40 mm (0.79 – 1.57 in).: Vehicle front 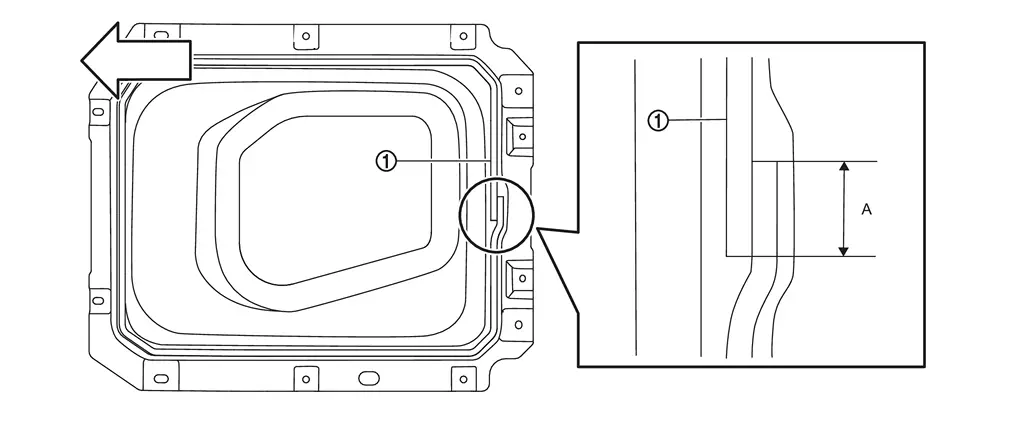
When install the 12V sub battery (lithium ion battery) cover
to the 12V sub battery (lithium ion battery) case, tighten the mounting nuts to the specified torque in the order of 1 ⇒ 2, then tighten the other mounting nuts to the specified torque.: Vehicle front 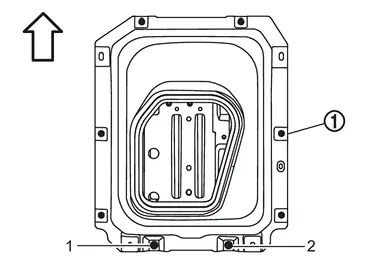
When install the 12V sub battery (lithium ion battery) cover and 12V sub battery (lithium ion battery) case
to the vehicle, tighten the mounting nuts to the specified torque in the order of 1 ⇒ 2, then tighten the other mounting nuts to the specified torque.: Vehicle front 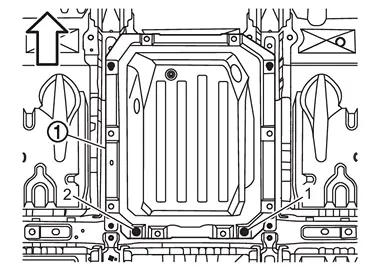
 Exploded View
12V SUB BATTERY (LITHIUM ION BATTERY) HARNESS
12V sub battery (lithium ion battery) harness 1 : To 12V sub battery (lithium ion battery) : Vehicle front : N·m (kg-m, in-lb) : N·m (kg-m, ft-lb) ...
 Battery
...
Other materials:
Work Flow (With EXP-800 NI or GR8-1200 NI)
CHARGING SYSTEM DIAGNOSIS WITH EXP-800 NI OR GR8-1200 NI
To test the charging system, use the following special service tools:
EXP-800 NI Battery and electrical diagnostic analyzer
GR8-1200 NI Multitasking battery and electrical diagnostic station
NOTE:
Refer to the applicable Instruction Manual fo ...
Removal & Installation
WARNING:
REMOVAL
CAUTION:
While electrical brake control unit is removed, hold part with hand.
Never disassemble electrical brake control unit.
Never depress brake pedal during removal and installation of brake hose because brake fluid may scatter.
Perform inspection before removal. Refer to Ins ...
Moonroof
Basic information
WARNING
In the Nissan Armada, occupants may be ejected through an open moonroof
during an accident. Always ensure that all passengers are properly secured with
seat belts and that child restraints are used where required.
Never allow anyone to stand up, lean out, or ex ...

0.0054