
Nissan Armada 2025-2026 Service and Repair Manual: Removal and Installation
REMOVAL
Disconnect the 12V battery cable from the negative terminal.
Remove 12V sub battery (lithium ion battery). Refer to Removal and Installation.
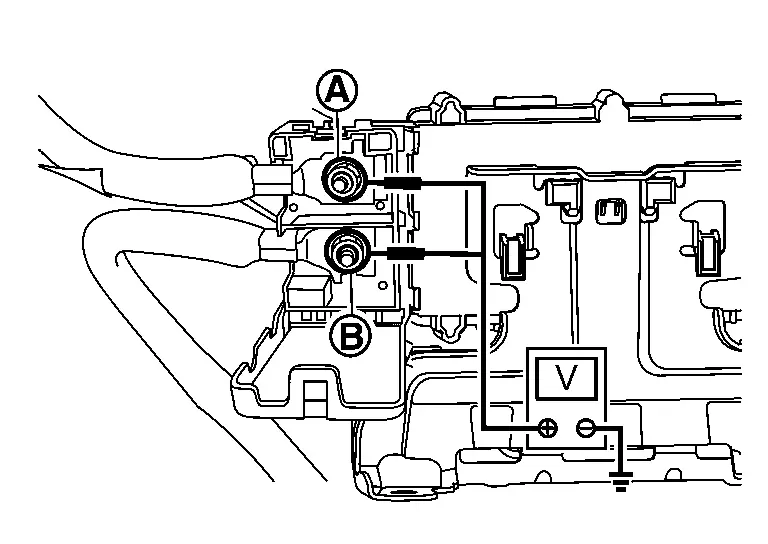
Check that there is no voltage (Approx. 0 V) between power network separate relay terminal and ground and power network separate relay terminal
 and ground.
Remove the power network separate relay terminal nuts
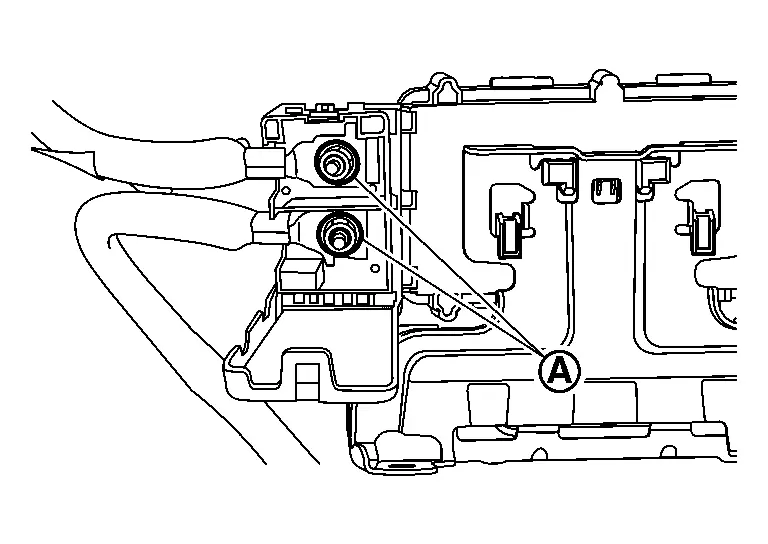
CAUTION:
Protect each terminal with insulated tape so that each terminal of the power network separate relay does not come into contact with each other.
Remove the power network separate relay bracket mounting bolts , and remove the power network separate relay bracket  and power network separate relay bracket
  .
.
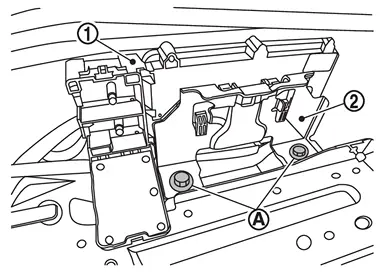
Disconnect power network separate relay connector.
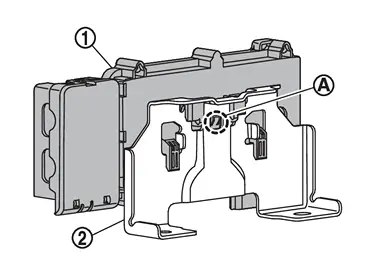
Push the lock and remove the power network separate relay from the bracket .
INSTALLATION
Installation is in the reverse order of removal.
 Exploded View
Power network separate relay Power network separate relay bracket : N·m (kg-m, ft-lb) : N·m (kg-m, in-lb) ...

Other materials:
Deformations on Panels
Elastic Deformation
If you apply light force to a panel and it deforms lightly, and once released. it returns to its original shape or form, this is called elastic deformation. If the panel gets elastically deformed. it will always return to its original shape or form. This means that stretching has ...
Diagnosis Procedure
CHECK GLASS LID
Check the following items.
Cracks, damage, or deformation of weather-strip.
Sticking of weather-strip.
Loose or missing glass lid mounting bolt.
Misalignment of glass lid. Refer to Adjustment.
Is the inspection result normal?
YES>>
GO TO 2.
NO>>
Repair or replace the m ...
Removal and Installation
REMOVAL
Remove cowl top side seal between cowl top cover and fender drip cover. Refer to Removal and Installation.
Disengage fixing clips, and then remove front fender drip cover.
: Clip
Disengage fixing clips, and then remove hood side seal.
INSTALLATION
Install in the reverse order of removal ...

0.0051