Disassembly and Assembly
CAUTION:
When disassemble, always use a remover tool that is made of plastic to prevent damage.
DISASSEMBLY
Remove inside and outside seat cushion finisher outer. Refer to Disassembly and Assembly.
Remove armrest (LH seat).Disengage fixing pawls using a remover tool (A), and then remove armrest hinge cover RH.
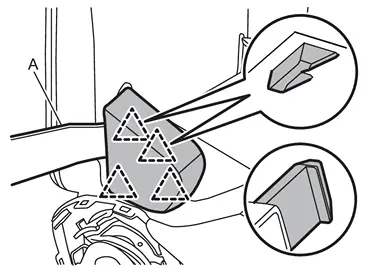
 |
: Pawl |
 and armrest hinge mounting nuts
  .
.
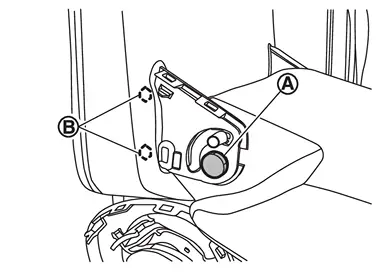
 from armrest hinge
  .
.
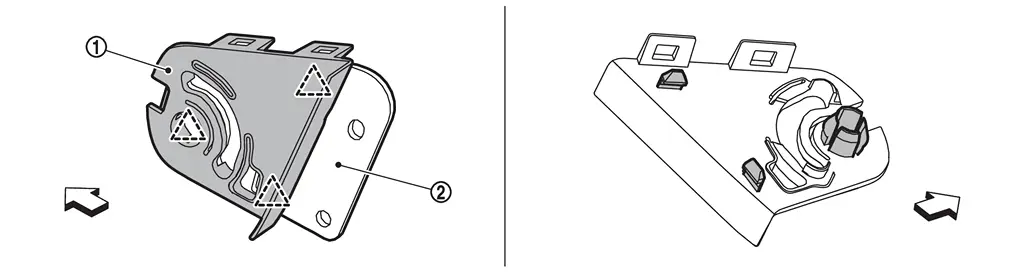
|
: Pawl |
| : vehicle front |
Disengage fixing pawls using a remover tool (A), and then remove armrest hinge cover LH (LH seat).
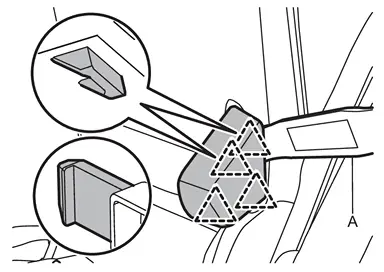
|
: Pawl |
Disengage fixing pawls, and then remove armrest hinge bracket LH (LH seat).
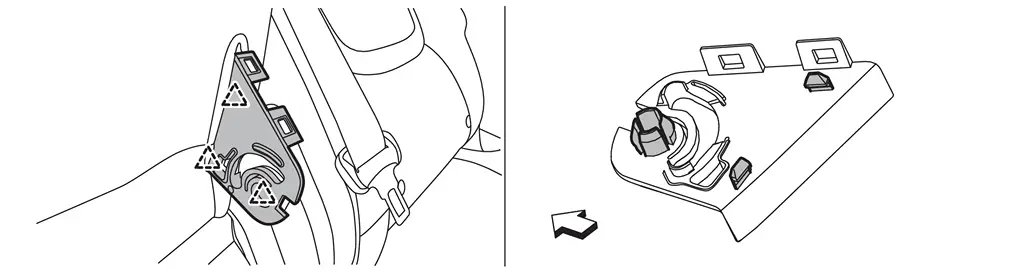
|
: Pawl |
| : vehicle front |
Disengage fixing pawls using a remover tool (A), and then remove tether anchor finisher.
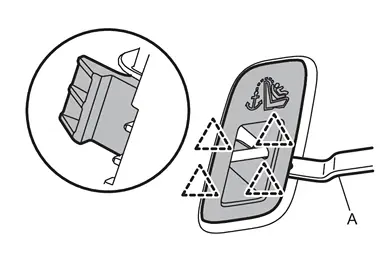
|
: Pawl |
Disengage seatback trim fixing retainer(s) .
-
LH seat
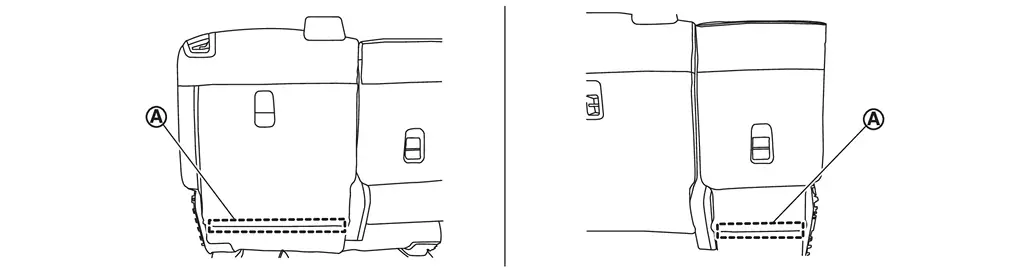
-
RH seat
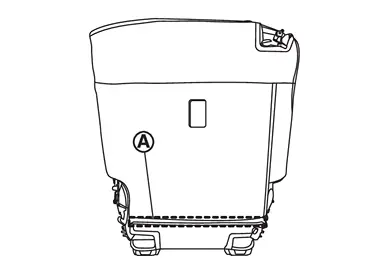
Remove seatback lever unit.Apply protective tape (A) to prevent damage.
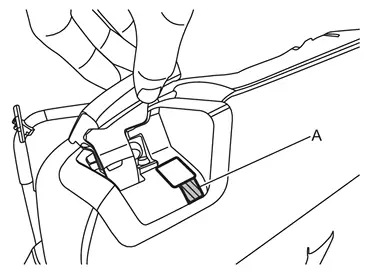
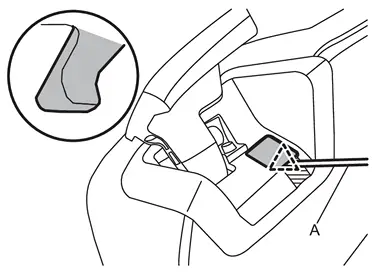
|
: Pawl |
.
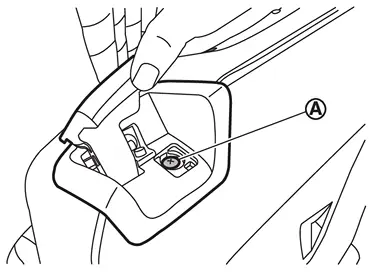
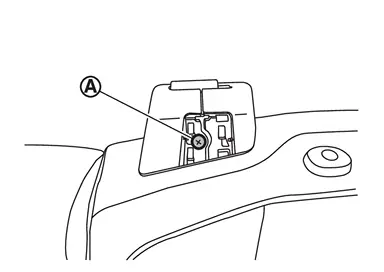
Remove seat belt retractor cover (LH seat).Disengage fixing pawls using a remover tool (A), and then remove seat belt retractor cover cap.
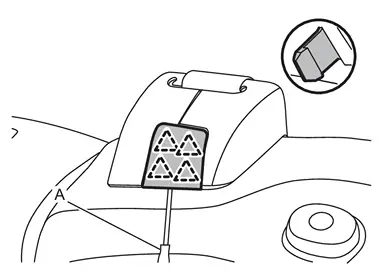
|
: Pawl |
.
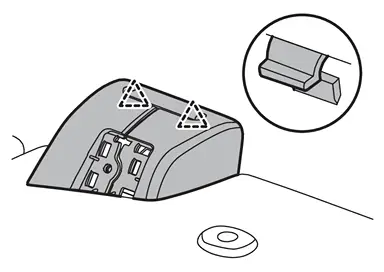
|
: Pawl |
Open seatback trim fixing fastener(s) .
-
LH seat
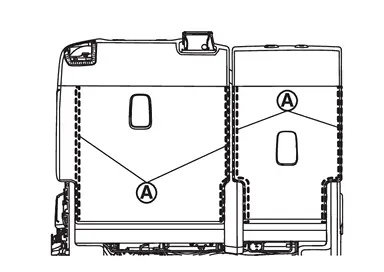
-
RH seat
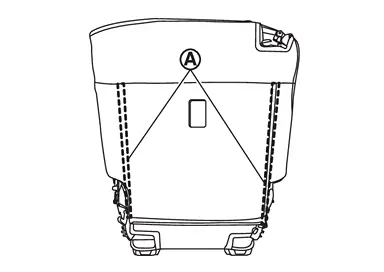
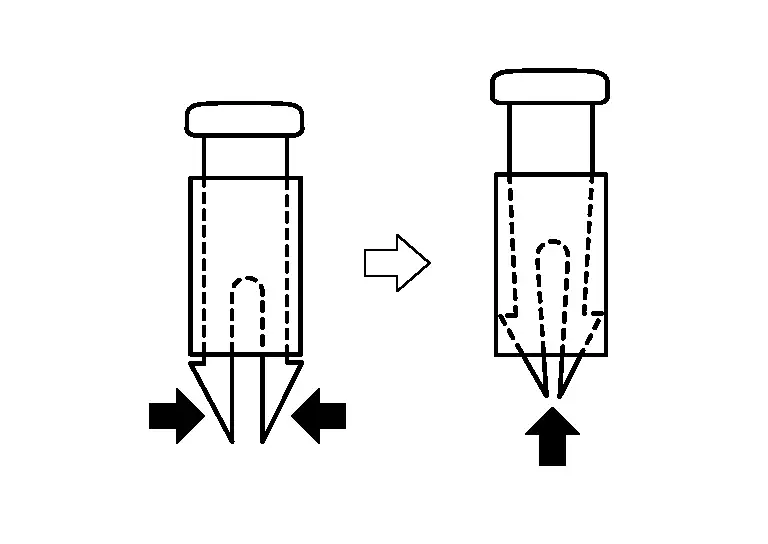
Remove headrest holders by raising it while pinching pawls from the bottom of headrest holders.
CAUTION:
Before removing headrest holders, check its orientation because it has installation direction (front/rear, left and right).
Remove center seatback trim assembly (LH seat).Disengage fixing clips and metal clip, and then remove center seatback panel.
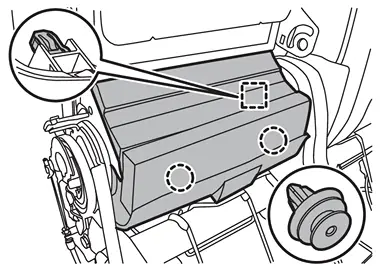
 |
: Clip |
 |
: Metal clip |
Disengage harness fixing clips of seat cushion, and then disconnect harness connectors.
CAUTION:
Before performing removal operation, check the installation position of harness connectors and harness fixing clip.
Remove seatback trim and pad as a set from seat frame assembly.
-
LH seat
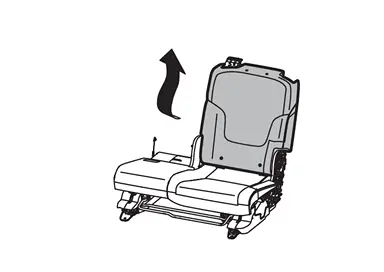
-
RH seat
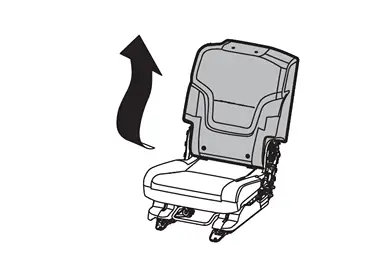
Remove hog rings, and then separate seatback trim and pad.
CAUTION:
-
Before removing hog rings, check its position because it should be installation in position.
-
Never disassemble seatback pad and seatback heater (if equipped).
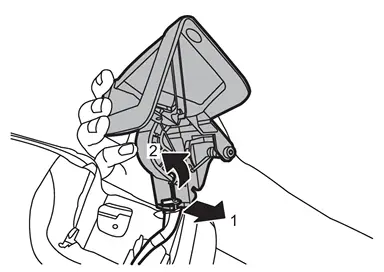
Remove center seatback frame (LH seat).Disconnect seatback lever cable fixing portions according to numerical order 1→2 indicated by arrows as shown in the figure.
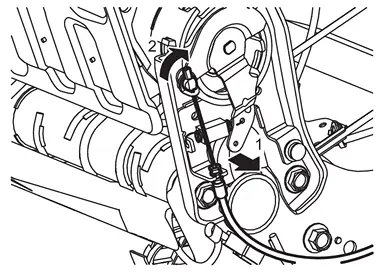
, and then remove center seatback frame.
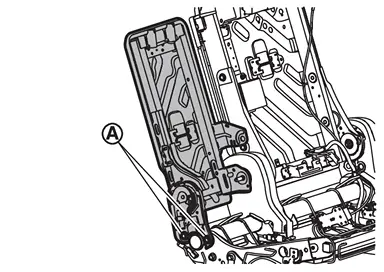
Remove center seatback hinge cover RH (LH seat).Apply protective tape (A) to prevent damage.
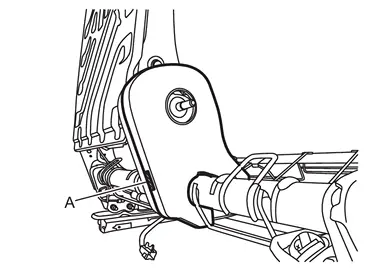
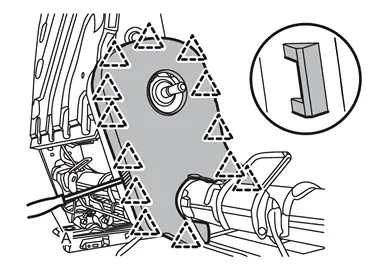
|
: Pawl |
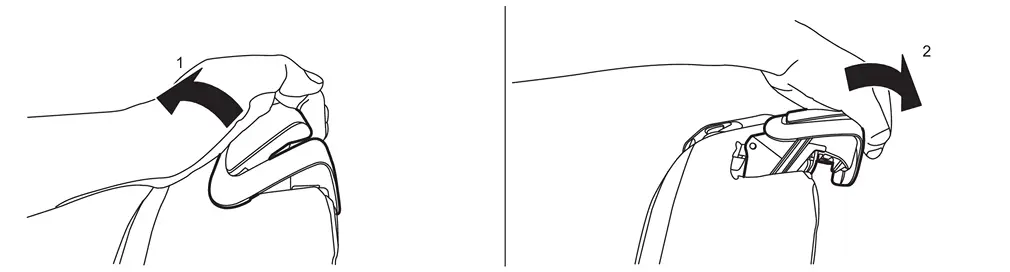
Remove center seatback hinge cover LH according to indicated by arrow as shown in the figure (LH seat).
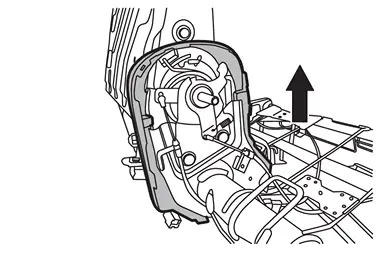
Remove the following parts after removing seatback trim and pad from seat frame assembly.
-
Center seat belt guide.
-
Seat belt guide cap.
-
Seatback lever unit escutcheon.
ASSEMBLY
Note the following items, and then assemble in the reverse order of disassembly.
CAUTION:
-
Never reuse hog ring after disassembly, using new hog ring.
-
Always install hog ring in position.
-
Use new hog ring if removed or crimped unsuccessfully.
-
Before installing headrest holders, check its orientation because it has installation direction (front/rear, left and right).
-
Be installed harnesses and harness fixing clips in position.
-
If harnesses clip be broken, replace with new clip and it install in position where marked before removing clip.
Other materials
Precautions
Precautions for removing battery terminal
When disconnecting the 12V battery terminal, turn off the ACC power before disconnecting the 12V battery terminal, observing “How to disconnect 12V battery terminal” described below.
NOTE:
Some ECUs operate for a certain fixed time even after ignit ...
Electric Power Steering Warning Lamp Does Not Turn on
Description
The power steering warning lamp does not illuminate when the ignition switch is ON (lamp check).
Diagnosis Procedure
CHECK THE POWER STEERING WARNING LAMP
Perform trouble diagnosis for the power steering warning lamp system. Refer to Component Function Check.
Is the inspection result nor ...
Folding Switch
Removal and Installation
REMOVALRemove luggage side lower finisher RH. Refer to Removal and Installation.
Disengage fixing pawls and then remove folding switch.
: Pawl
INSTALLATIONInstall in the reverse order of removal. ...