Exploded View
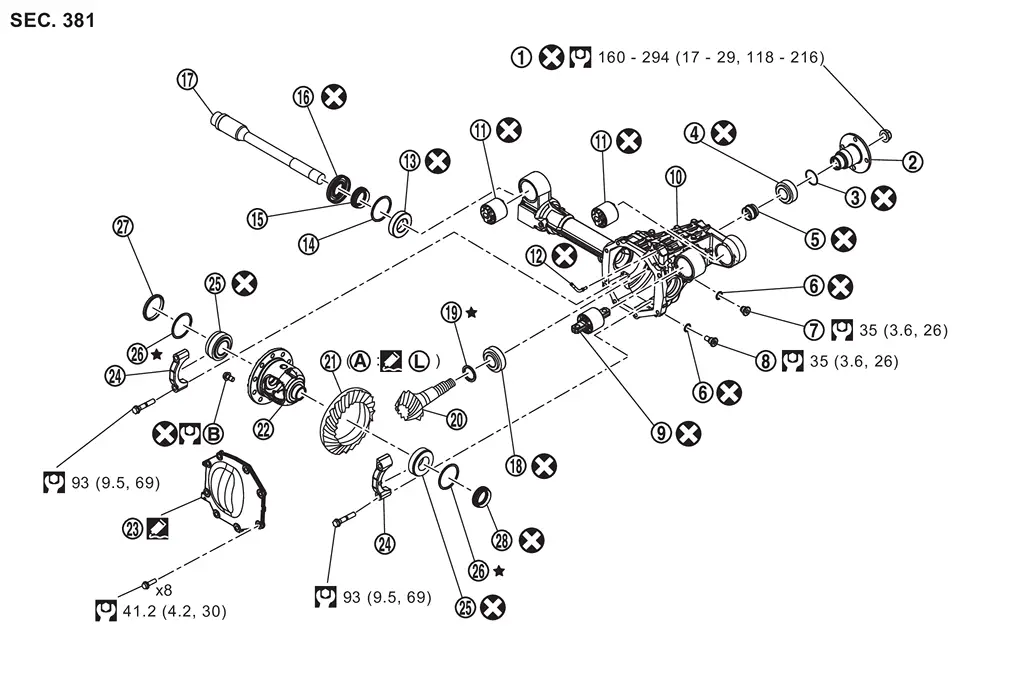
 |
Drive pinion lock nut |  |
Companion flange |  |
Front oil seal |
 |
Pinion front bearing |  |
Collapsible spacer |  |
Gasket |
 |
Filler plug |  |
Drain plug |  |
Mounting insulator |
 |
Gear carrier |  |
Mounting insulator |  |
Breather connector |
 |
Side shaft bearing |  |
Snap ring |  |
Snap ring |
 |
Side oil seal |  |
Side shaft |  |
Pinion rear bearing |
 |
Pinion height adjusting washer |  |
Drive pinion |  |
Drive gear |
 |
Differential assembly |  |
Carrier cover |  |
Bearing cap |
 |
Side bearing |  |
Side bearing adjusting washer |  |
Spacer |
 |
Side oil seal | ||||
 |
Screw hole |  |
Comply with the assembly procedure when tightening. Refer to Disassembly and Assembly. | ||
 : N·m (kg-m, ft-lb) : N·m (kg-m, ft-lb) |
|||||
 : Always replace after every disassembly. : Always replace after every disassembly. |
|||||
 : Select with proper thickness. : Select with proper thickness. |
|||||
 : Apply Genuine Liquid Gasket, Three Bond 1217 or equivalent. Refer to Recommended Chemical Products and Sealants. : Apply Genuine Liquid Gasket, Three Bond 1217 or equivalent. Refer to Recommended Chemical Products and Sealants. |
|||||
 : Apply Genuine High Strength Thread Locking Sealant, Loctite 270 or equivalent. Refer to Recommended Chemical Products and Sealants. : Apply Genuine High Strength Thread Locking Sealant, Loctite 270 or equivalent. Refer to Recommended Chemical Products and Sealants. |
|||||
Disassembly and Assembly
DISASSEMBLY
Remove the carrier cover bolts.
Remove carrier cover to insert the seal cutter (A) [SST: KV10111100 (NI-37228)] between gear carrier and carrier cover.
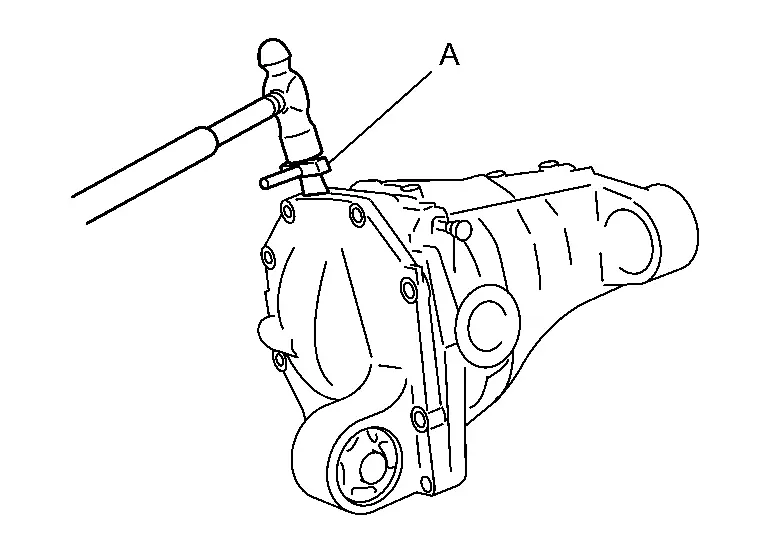
CAUTION:
-
Never damage the mating surface.
-
Never insert flat-bladed screwdriver, this will damage the mating surface.
Remove side oil seal with oil seal remover (A) (commercial service tool).
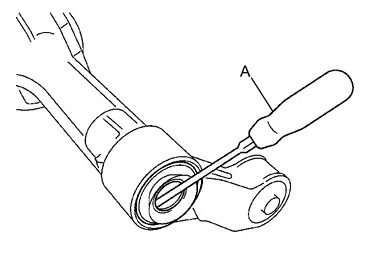
CAUTION:
Never damage gear carrier.
Remove snap ring (hole side) with a snap ring pliers (A).
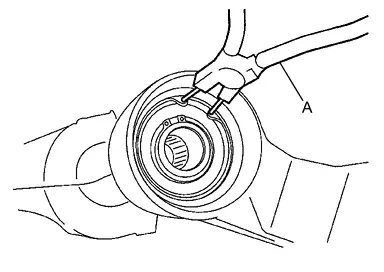
Remove differential side shaft assembly out of gear carrier with a suitable tool.
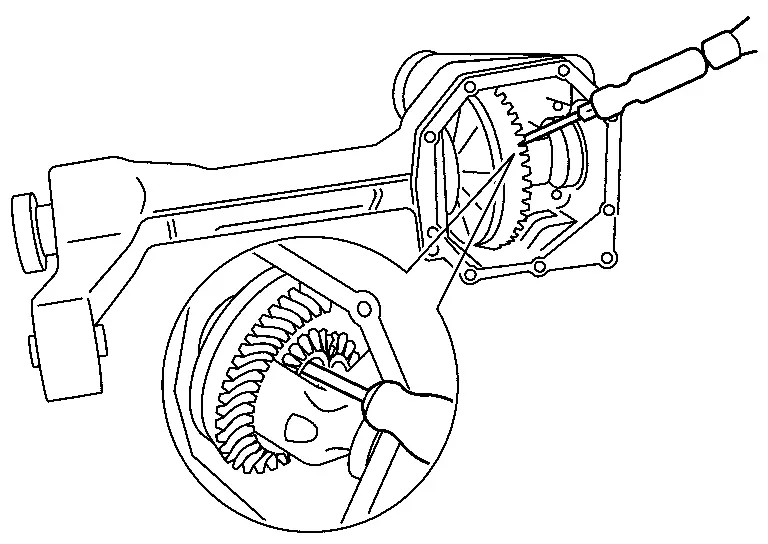
 NOTE:
NOTE:
Tap on side shaft assembly from side gear side.
Remove snap ring (side shaft side).
Press side shaft out of side shaft bearing .
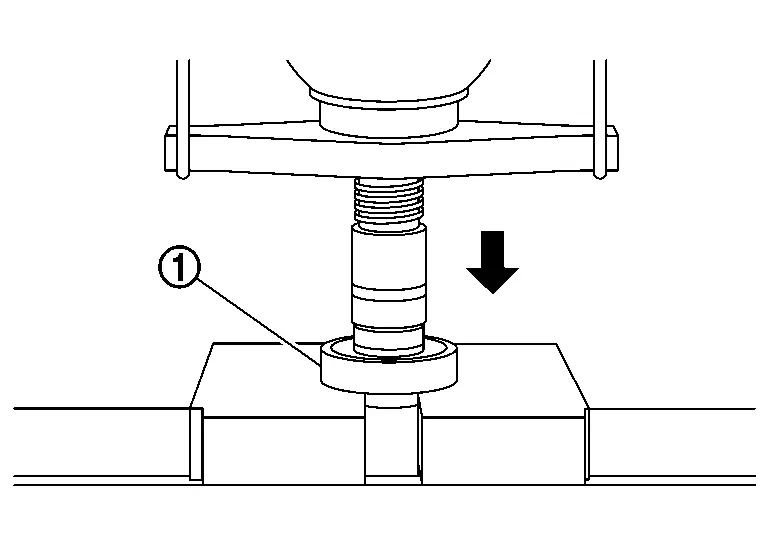
CAUTION:
Never drop side shaft.
Perform inspection after disassembly. Refer to Inspection.
ASSEMBLY
Press side shaft bearing to side shaft .
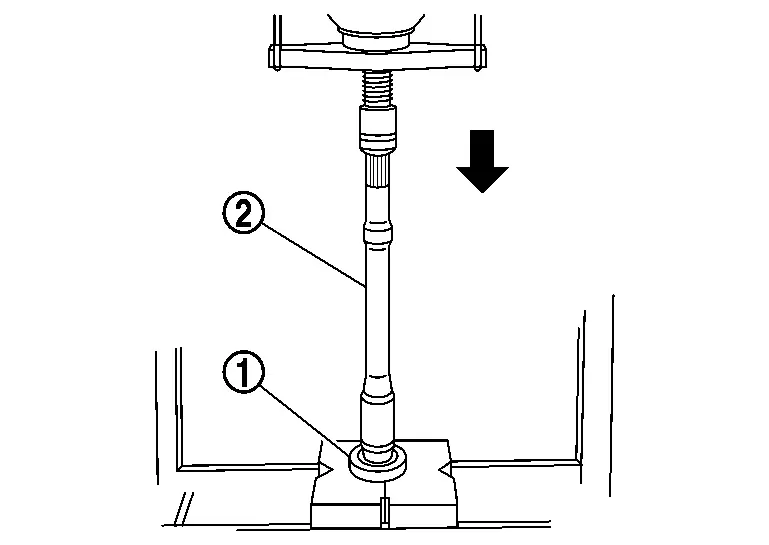
CAUTION:
Never reuse side shaft bearing.
Install snap ring (side shaft side).
Install side shaft assembly into gear carrier.
Install snap ring (hole side).
Install side oil seal until it becomes flush with the gear carrier, with the drifts (A and B).
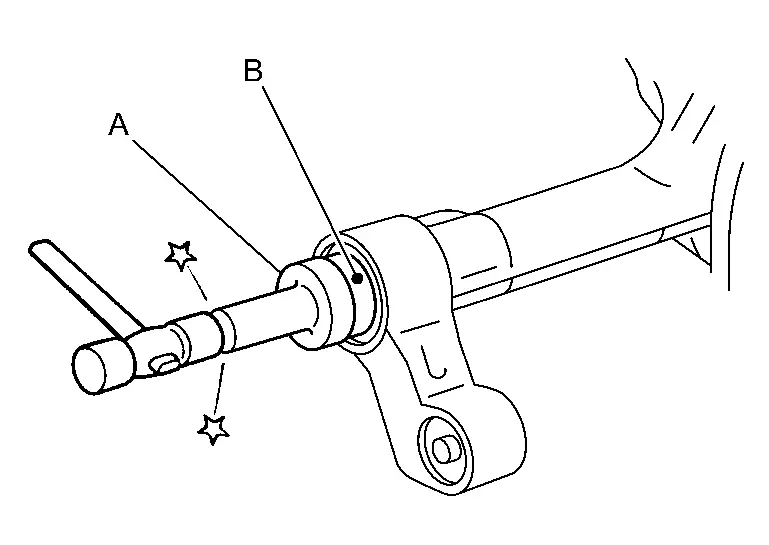
| A | : Drift [SST: ST30720000 (NI-25405)] |
| B | : Drift [SST: ST27863000 ( — )] |
NOTE:
For left side, use drift [SST: ST30720000 (NI-25405)] only.
CAUTION:
-
Never reuse oil seal.
-
When installing, never incline oil seal.
-
Check that the oil seal lip is filled up with grease.
Inspection
INSPECTION AFTER DISASSEMBLY
Side Shaft
-
If it is chipped (by friction), cracked, damaged, or unusually worn, replace.
Oil Seal
-
Whenever disassembled, replace.
-
If wear, deterioration of adherence (sealing force lips), or damage is detected on the lips, replace.
Other materials
High-Pressure Pipe
Removal and Installation
WARNING:
Jacking up or lifting up the vehicle may the vehicle height to go down which cause a personal injury and/or damage to the air suspension component parts. Refer to Precaution for when Jacking and Lifting Up the vehicle with Electronic Air Suspension System (With ele ...
Ir Sensor
Exploded View
IR sensor assembly
Headlining assembly
IR sensor finisher
: Pawl
: vehicle front
Removal and Installation
REMOVALRemove headlining assembly. Refer to Removal and Installation.
Disconnect IR sensor harness connector .
Remove room lamp harness from IR sensor assembly.
...
The Steering Switches Are Inoperative
Diagnosis Procedure
If any of the following malfunctions is found for the steering switch operation.
All switches are inoperative
The specified switch cannot be operated
CHECK STEERING SWITCH SIGNAL CIRCUIT
Check the steering switch signal circuit. Refer to Component Function Check.
Is the inspe ...