Removal and Installation
WARNING:
- Jacking up or lifting up the vehicle may the vehicle height to go down which cause a personal injury and/or damage to the air suspension component parts. Refer to Precaution for when Jacking and Lifting Up the vehicle with Electronic Air Suspension System (With electronic air suspension).
- When checking under the vehicle or inside wheel house, always turn OFF the electronic air suspension function with the vehicle unladen and normal height, since the suspension may accidentally move and it can lead to personal injury. Refer to Precaution for Electronic Air Suspension System (With electronic air suspension).
REMOVAL
CAUTION:
-
Perform lubricant return operation before each refrigeration system disassembly. However, if a large amount of refrigerant or lubricant leak is detected, never perform lubricant return operation. Refer to Perform Lubricant Return Operation.
-
When disconnect the A/C piping related parts, cap or wrap the joint of those parts with suitable material such as vinyl tape to avoid the entry of air.
Use a refrigerant collecting equipment (for HFO-1234yf) to discharge the refrigerant. Refer to Recycle Refrigerant.
Remove front heater outlet pipe assembly. Refer to Removal and Installation.
Remove front heater pipe assembly. Refer to Removal and Installation.
Remove low-pressure pipe. Refer to Removal and Installation.
Remove reservoir tank and reservoir tank bracket. Refer to RADIATOR : Exploded View.
Remove 12V battery and battery tray. Refer to Removal and Installation.
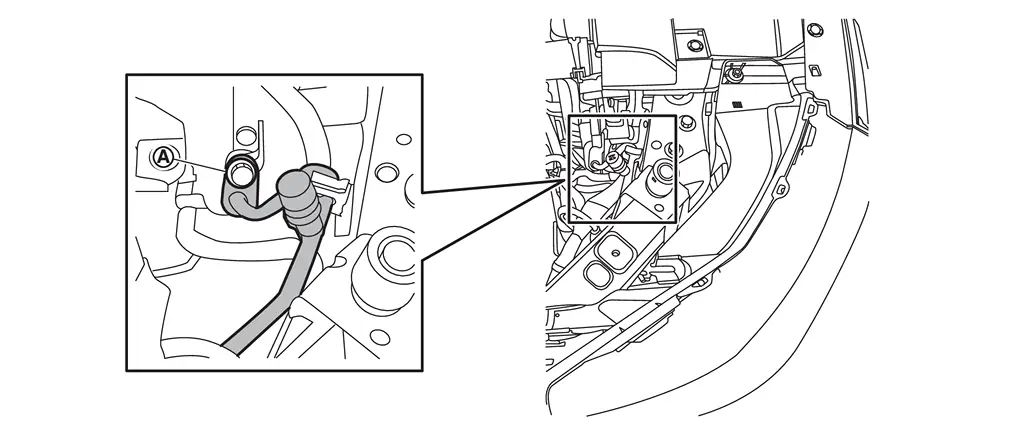
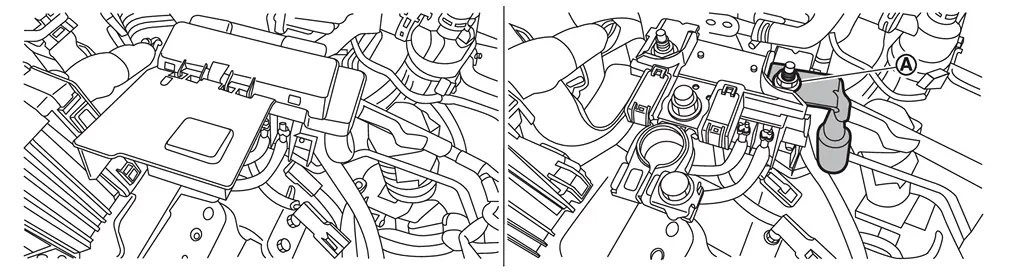
Remove mounting bolt  , and then disconnect high-pressure pipe from condenser outlet pipe.
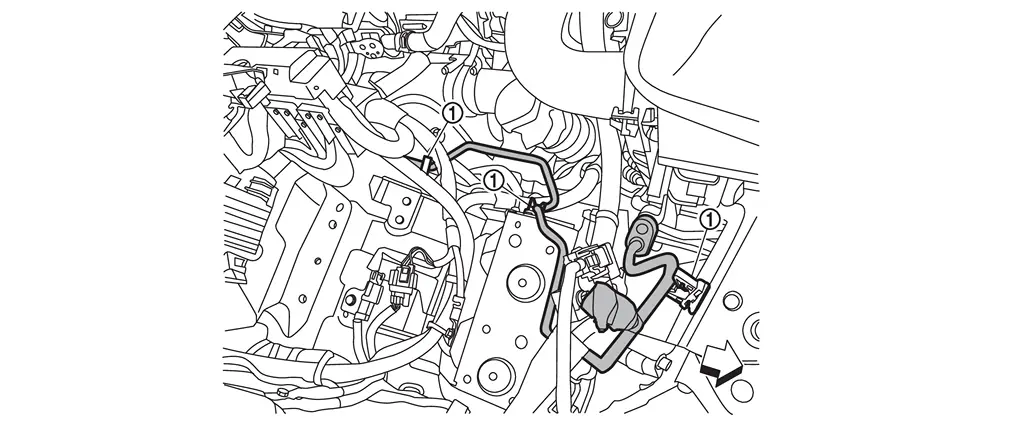
Remove high-pressure pipe from tube clips 1  .
.
| : vehicle front |
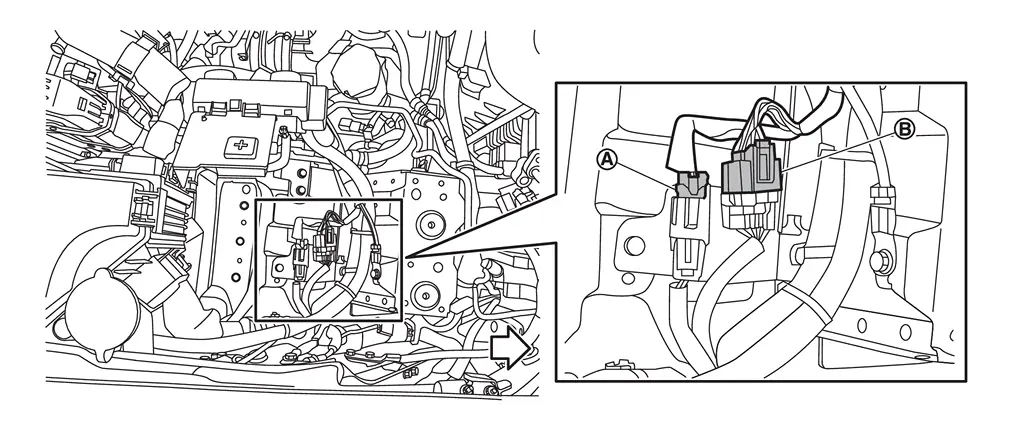
Disconnect engine No.2 harness connectors and  .
.
| : vehicle front |
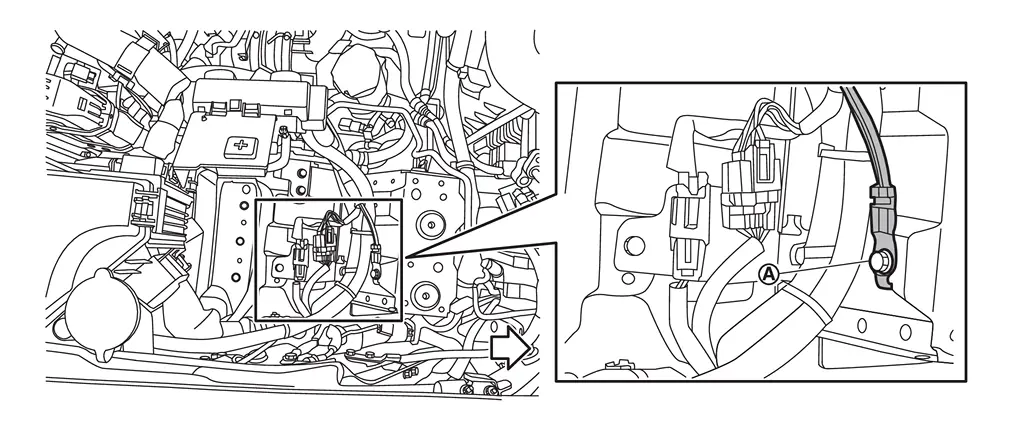
Remove mounting bolt , and then remove ground wire.
| : vehicle front |
Remove mounting nut , and then disconnect engine No.2 harness from engine room harness.
Disengage fixing pawl, and then move engine No.2 harness to secure work space.
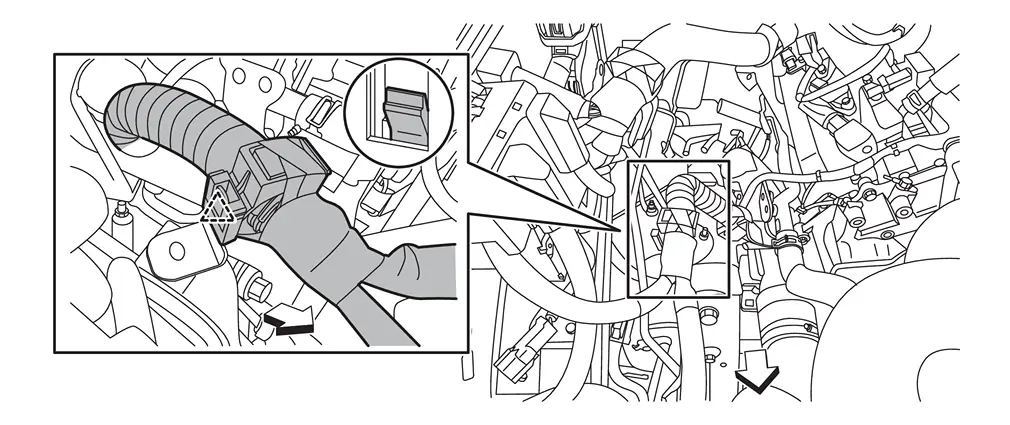
 |
: Pawl |
| : vehicle front |
Disconnect high-pressure pipe from rear cooler pipe assembly.
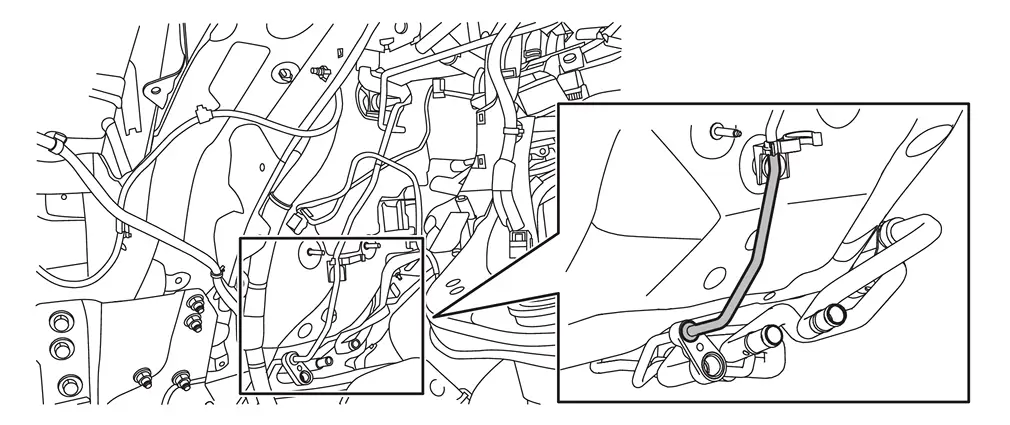
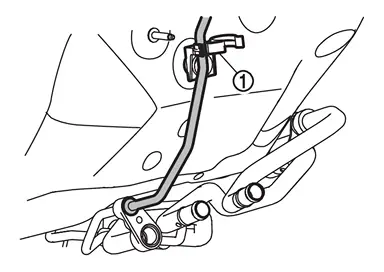
Remove high-pressure pipe from tube clip 2 .
Disconnect high-pressure pipe from front expansion valve.
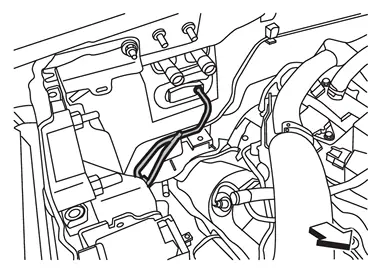
| : vehicle front |
Remove high-pressure pipe from vehicle.
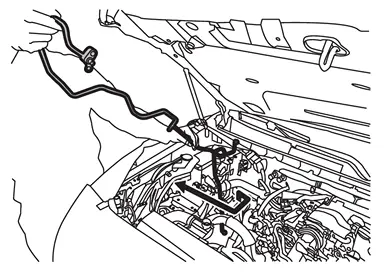
INSTALLATION
Note the following items, and then install in the reverse order of removal.
CAUTION:
-
To prevent leakage of refrigerant, replace the O-ring and washer seal with a new one. Apply a coat of compressor oil to the O-ring prior to installation.
-
Use a refrigerant collecting equipment (for HFO-1234yf) to charge the refrigerant. Refer to Charge Refrigerant.
-
Perform a check for refrigerant leakage when charging with refrigerant. Refer to Leak Test.
Other materials
Warning/indicator lights (other)
Automatic brake hold indicator light (white)
In the Nissan Armada, the white automatic brake hold indicator light confirms
that the system is activated and currently in standby mode, ready to assist the
driver when needed. This feature enhances comfort during stop-and-go driving by
mainta ...
Suspension Arm
Exploded View
Frame
Stopper rubber
Suspension arm
Axle housing
: Always replace after every disassembly.
: N·m (kg-m, ft-lb)
Removal and Installation
REMOVALWithout Dynamic Digital Suspension and Electronic Air SuspensionRemove tires. Refer to ROAD WHEEL TIRE : Removal &a ...
Luggage Room Lamp
Exploded View
Roof rear garnish
Luggage room lamp
: Pawl
: vehicle front
Removal and Installation
CAUTION:
Disconnect the battery negative terminal or remove power circuit fuse when performing the operation for preventing electric leakage. Refer to Precautions for Remov ...