Exploded View
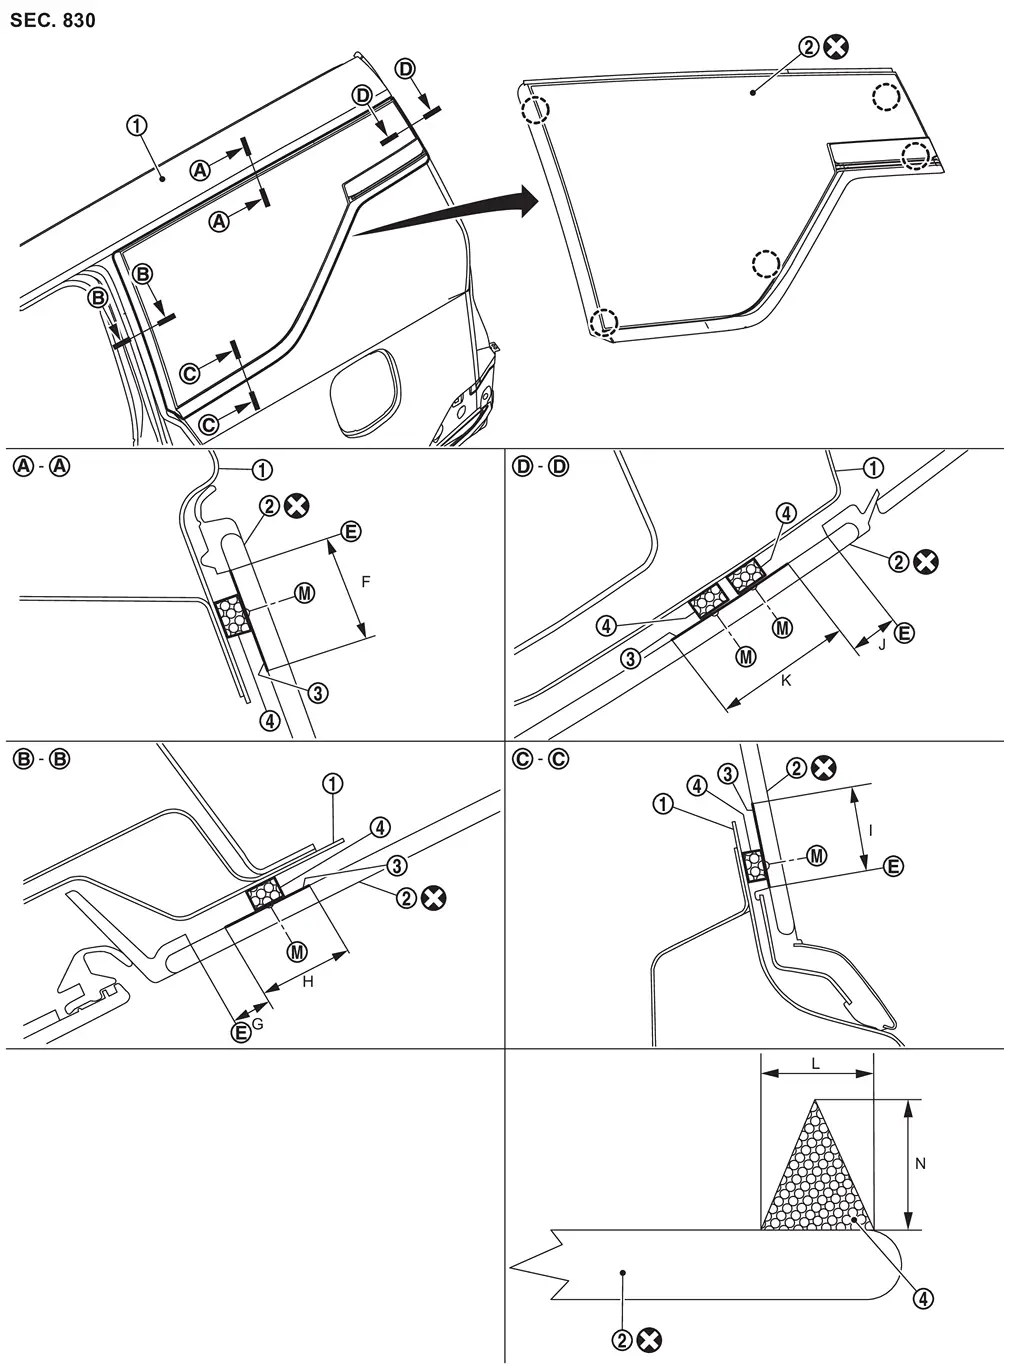
 |
Body side outer panel |  |
Side window glass |  |
Glass primer |
 |
Adhesive | ||||
 |
Edge |  |
Adhesive mark | ||
 |
: Clip | ||||
 |
: Always replace after every disassembly. | ||||
Unit: mm (in)
| Portion | Primer range | Adhesive range | ||||
|---|---|---|---|---|---|---|
| L | N | |||||
| Side window glass - Body side outer panel |  - - |
F |
From edge, more than 20.0 (0.79) |
7.0 + 2.0, - 0.0 (0.28 + 0.08. - 0.0) |
12.0 + 2.0, - 0.0 (0.47 + 0.08, - 0.0) |
|
 - - |
G |
From edge, 8.0 (0.32) |
||||
| H |
More than 20.0 (0.79) |
|||||
 - - |
I |
From edge, more than 20.0 (0.79) |
||||
 - - |
J |
From edge, 11.5 (0.45) |
||||
| K |
More than 30.0 (1.18) |
|||||
Removal and Installation
REMOVAL
CAUTION:
Never damage body side outer panel.
Remove rear side spoiler. Refer to Removal and Installation.
Remove luggage side upper finisher. Refer toRemoval and Installation .
Disconnect window antenna connectors .
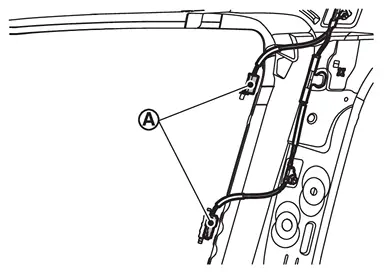
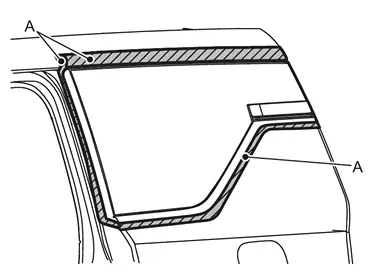
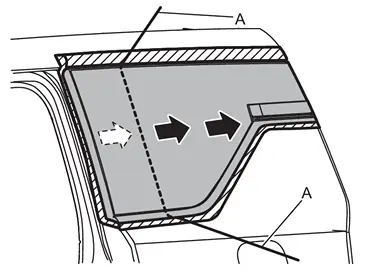
Cut the adhesive using a piano wire.Apply protective tapes (A) on body side outer panel around side window glass to protect painted surface from damage.
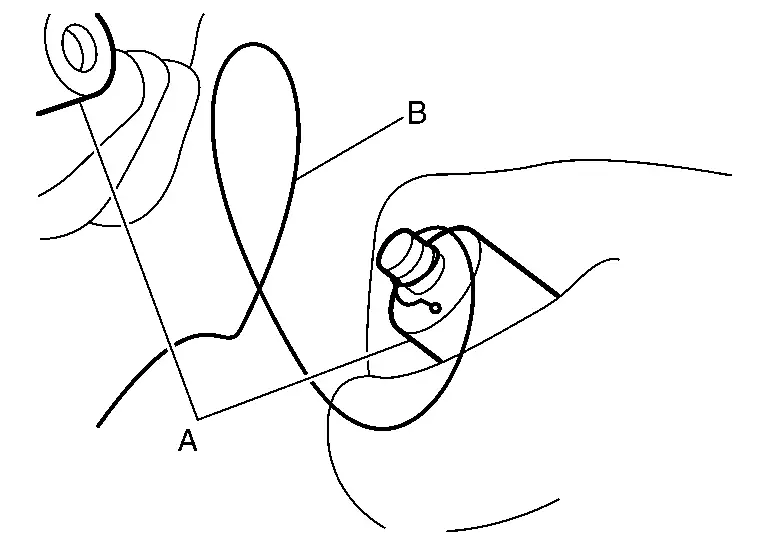
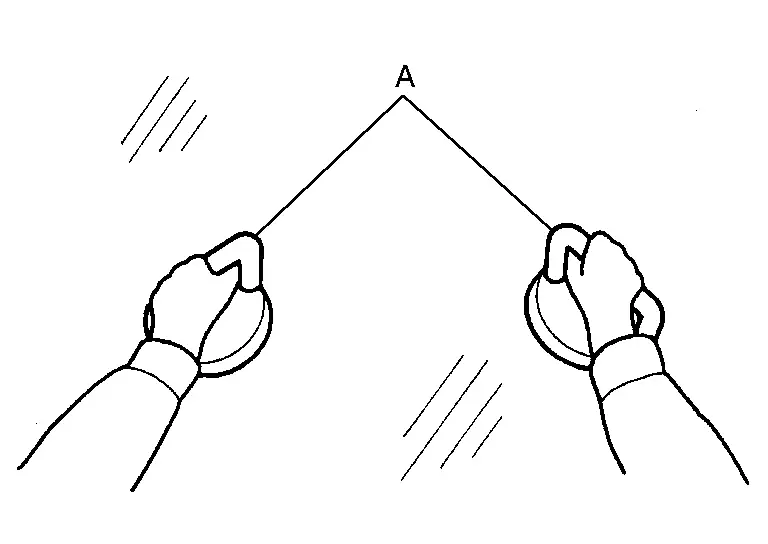
Use suction lifter (A) to remove side window glass from the vehicle.
INSTALLATION
CAUTION:
-
Replace side window glass with a new part after removal. Never reuse side window glass.
-
Never damage body side outer panel.
-
Apply touch-up paint that same as body-color if the painted surface be damaged.
-
No need to applying painted surface primer onto painted surface.
-
Wipe the primer using degreasing agent etc., if you apply it onto not-adhesive part by mistake.
-
Follow the instruction sheet of primer/adhesive when it is drying.
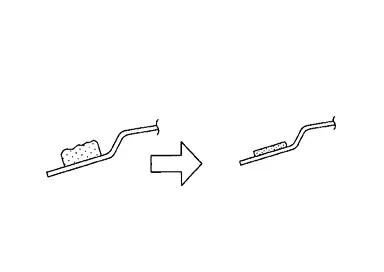
Use a cutter knife or scraper, and leave the adhesive on the body side thin and smooth as shown in the figure.
Clean the bonded area on side window glass and body side outer panel using a white gasoline or degreasing agent.
Apply glass primer along the entire circumference of side window glass. For the range of glass primer, refer to Exploded View.
Apply adhesive to side window glass by using an adhesive gun. For the volume of adhesive, refer to Exploded View.
CAUTION:
The start/stop positions of adhesive are along with adhesive marks as shown in the figure.
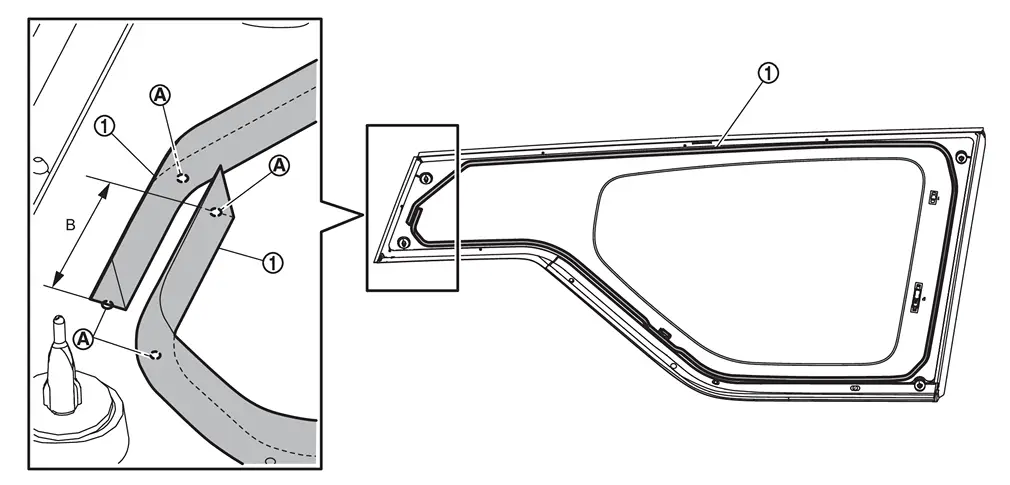
| B | : More than 30 mm (1.18 in) |
Install side window glass to body side outer panel.
Correct any adhesive overflow or shortage using a spatula to make the surface smooth.
CAUTION:
-
After installing side window glass, keep the all door glasses open until the adhesive is completely cured.
-
Never drive the vehicle before the adhesive is completely cured.
Remove protective tapes.
Install removed parts.
CAUTION:
-
Check the mating area with surrounding parts. Adjust if necessary.
-
After installing, perform the inspection. Refer to Inspection.
Inspection
WATER LEAKAGE INSPECTION
CAUTION:
-
Dry adhesive according to the specification of adhesive kit, do the leaking check when adhesive is stiffen.
-
If leakage was found, start over from the beginning as side window glass removal, install and leaking check.
Other materials
Oil Pan (upper)
Exploded View
Oil pan (upper)
O-ring 1
Engine oil pressure control solenoid valve
O-ring 2
Engine oil level sensor
O-ring 3
Oil level gauge guide
O-ring 4
Oil level gauge
Comply with the installation procedure when tightening. Refer to Disassembly and Assembly.
: ...
Noise, Vibration and Harshness (nvh) Troubleshooting
NVH Troubleshooting Chart
Use the chart below to find the cause of the symptom. The numbers indicate the order of the inspection. If necessary, repair or replace these parts.
SUSPECTED PARTS
(Possible cause) Symptom Reference
Transfer fluid leakage Noise
TRANSFER FLUID (Level low)
1 ...
Differential Assembly
Exploded View
Side oil seal
Rear final drive assembly
Rear cover
Gasket
Drain plug
Stud bolt
Filler plug
: N·m (kg-m, ft-lb)
: Always replace after every disassembly.
: Apply Genuine Liquid Gasket, Three Bond 1217 or equivalent. Refer to Recom ...