Removal and Installation
CAUTION:
-
Perform work with 2 workers, because it is heavy weight.
-
Support back door with a proper material and use protective tape or shop cloth to protect back door and body from falling and damage when removing and installing spindle unit.
REMOVAL
Disconnect battery cable from 12V battery negative terminal. Refer to Removal and Installation.
Remove luggage side upper finisher LH. Refer to Removal and Installation.
Disconnect spindle unit harness connector  .
.
-
LH side
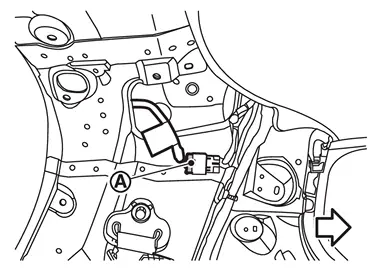
: vehicle front
-
RH side
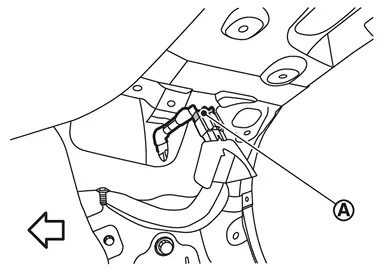
: vehicle front
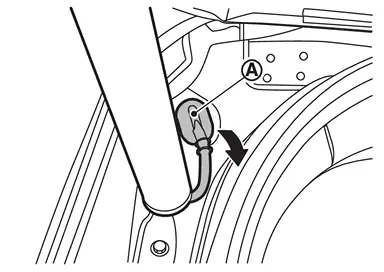
Remove harness grommet from back main center pillar, and then pull out spindle unit harness from vehicle body.
Support back door panel with a proper material to prevent it from falling.
WARNING:
Injury may occur if back door panel is not supported with appropriate material when removing back door assembly.
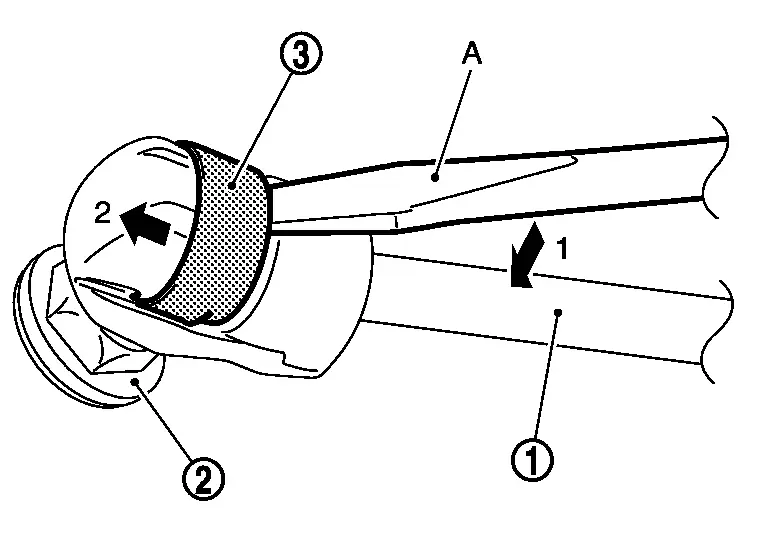
Remove metal clip  located on connection between spindle unit
  and stud ball part
  of spindle unit bracket upper to using a remover tool (A) according to the numerical order 1→2 indicated by arrows as shown in figure.
Disengage spindle unit from stud ball part of spindle unit bracket upper.
Repeat the same operation to disengage spindle unit from stud ball part of spindle unit bracket lower, and then remove spindle unit.
Remove spindle unit bracket upper mounting bolts, and then remove spindle unit bracket upper.
Remove back door touch sensor. Refer to Removal and Installation.
Remove spindle unit bracket lower mounting bolts, and then remove spindle unit bracket lower.
INSTALLATION
Note the following items, and then install in the reverse order of removal.
CAUTION:
-
When installation, check spindle unit harness connector
 is inside the vehicle body pocket (RH side).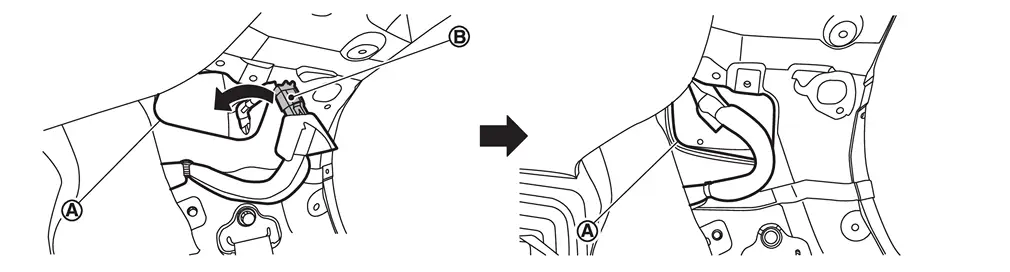
-
After installation, check back door lock. Refer to Inspection.
-
After installation, perform calibration of automatic back door position information. Refer to Work Procedure.
Other materials
Remote engine start
Basic information
Example
The Nissan Armada remote engine start feature is activated using the dedicated
button on the Intelligent Key (if equipped), allowing the engine to be started conveniently
from outside the vehicle.
This advanced Nissan Armada functionality enhances comfort by en ...
Diagnosis and Repair Work Flow
Work Flow
OVERALL SEQUENCEDETAILED FLOWINTERVIEW FOR MALFUNCTION
It is also important to clarify the customer concerns before starting the inspection. Interview the customer about the concerns carefully and understand the symptoms fully.
NOTE:
The customers are not professionals. Never assume that ...
Preset Switch
Exploded View
Front center console switch finisher assembly
Preset switch
: N·m (kg-m, in-lb)
Removal & Installation
REMOVALRemove the front center console switch finisher assembly. Refer to Removal and Installation.
Remove the preset switch mounting screw , and remove ...