Exploded View
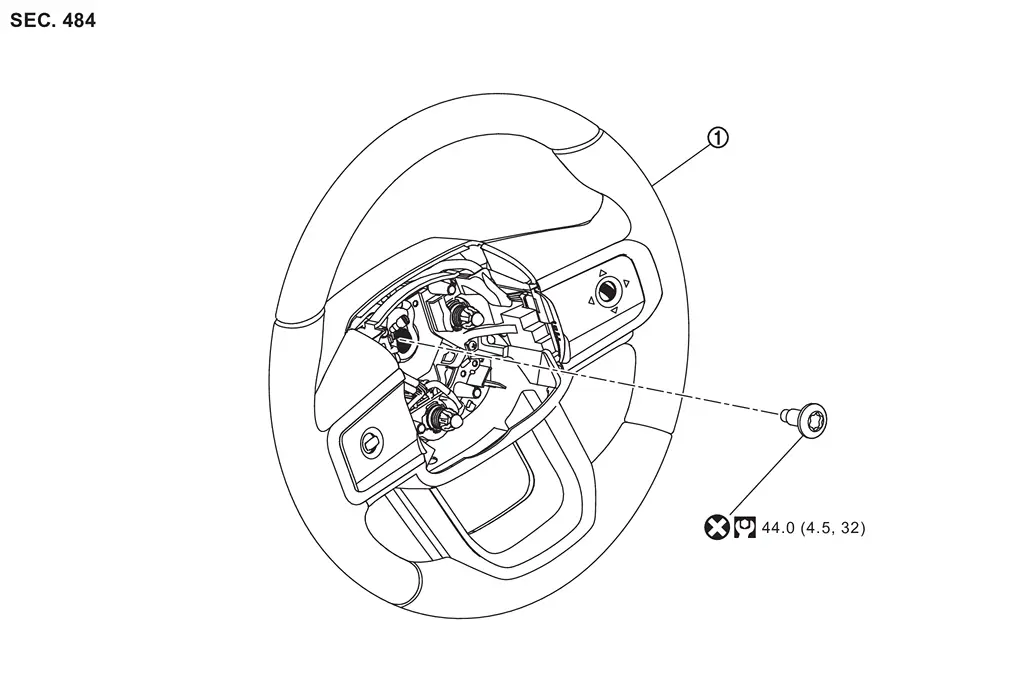
 |
Steering wheel | ||||
 |
: N·m (kg-m, ft-lb) | ||||
 |
: Always replace after every disassembly. | ||||
Removal and Installation
REMOVAL
 NOTE:
NOTE:
When reconnecting spiral cable, fix cable with a tape so that fixing case and rotating part keep aligned. This will omit neutral position alignment procedure during spiral cable installation.
Set vehicle to the straight-ahead position.
Remove driver air bag module. Refer to Removal and Installation.
Lock the steering wheel and remove the steering wheel mounting bolt.
CAUTION:
Leave 2 - 3 thread of mounting bolt, do not completely remove.
Pull the steering wheel to release the spline.
NOTE:
To align the position when installing, apply the matching mark to steering wheel and column shaft head with paint.
Remove the mounting bolt and remove the steering wheel from the steering column.
INSTALLATION
Note the following, and install in the reverse order of removal.
-
Adjust neutral position of steering angle sensor. Refer to Work Procedure.
-
If equipped with ProPILOT Assist, perform steering torque calibration after replacing or removal and installation the steering wheel. Refer to Work Procedure.
-
Check the spiral cable neutral position after replacing or rotating spiral cable. Refer to Removal and Installation.
CAUTION:
Never twist spiral cable excessively after it becomes tight. (Twisting may cause the cable to be torn off.)
-
Never reuse steering wheel mounting bolt.
Other materials
Parking Brake Switch
Removal and Installation
REMOVALRemove the instrument lower panel LH. Refer to Removal and Installation.
Remove parking brake switch mounting screws , and then remove parking brake switch .
: Instrument lower panel LH
INSTALLATIONInstall in the reverse order of removal. ...
Radiator Core Seal
Removal and Installation
REMOVALApply protective tape (A) on the part to protect it from damage.
Disengage radiator core seal fixing clips using a remover tool (A), and then remove radiator core seal .
: Clip
INSTALLATIONInstall in the reverse order of removal. ...
Rear Propeller Shaft: 2f C-C
Inspection
WARNING:
Jacking up or lift up the vehicle may the vehicle height to go down which cause a personal injury and/or damage to the air suspension component parts. Refer to Precaution for when Jacking and Lifting Up the vehicle with Electronic Air Suspension System.
LOOSENESS OF CONNECT ...