
Nissan Armada 2025-2026 Service and Repair Manual: Tools for Pulling
If it is impossible to gain access to the damaged area, dents can be pulled out and repaired.
METHODS
There are many techniques to repairing a dent, but there are basically two methods. Both methods can be used depending on the type of damage. Each method has its own advantages and disadvantages.
| Outside in | Inside out |
|
|
| The traditional method is from the outside to the inside in a spiral from. This method has the advantage that the single spots will harden and stabilize the area as you are working into the center. The disadvantage is that the center will be stiffened up and will not be easy to bring out. | The inside out method is to start in the middle and as it comes out the surrounding area can be worked. Also the hammer can be used at the same time to stress relieve the metal around it. |
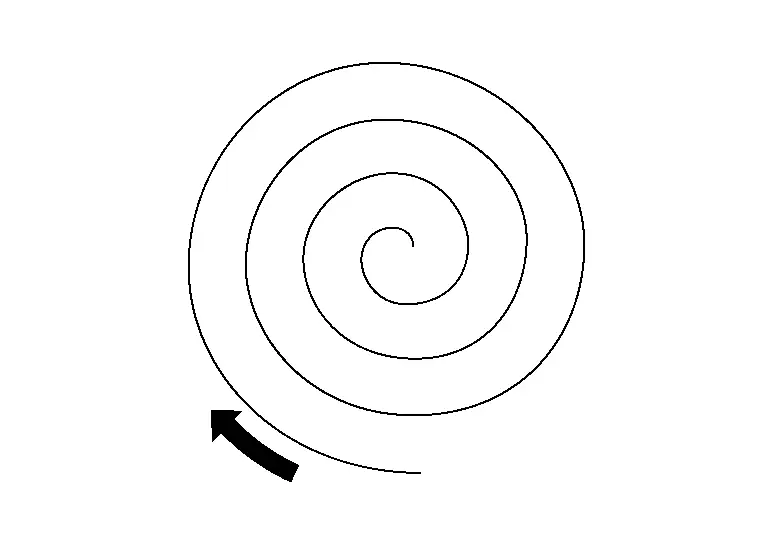
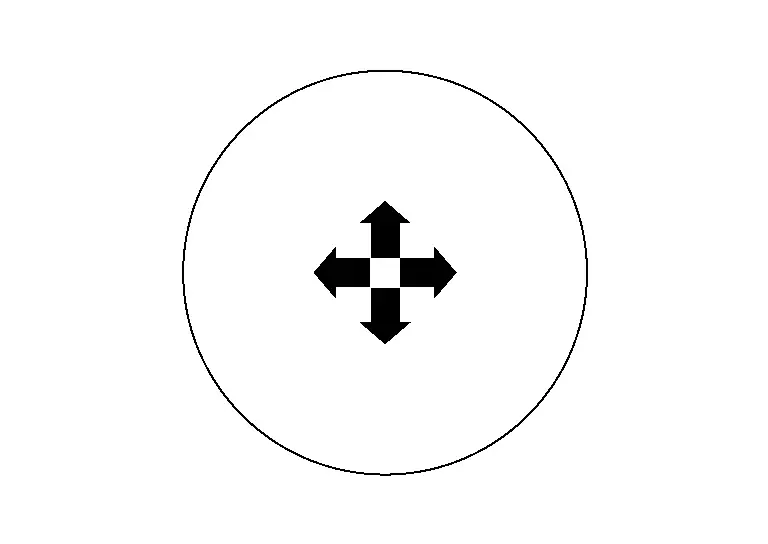
If the damage is influenced or affected by an edge or bodyline, you have to go away from the edge - feathering away from the edge with small single pulls.
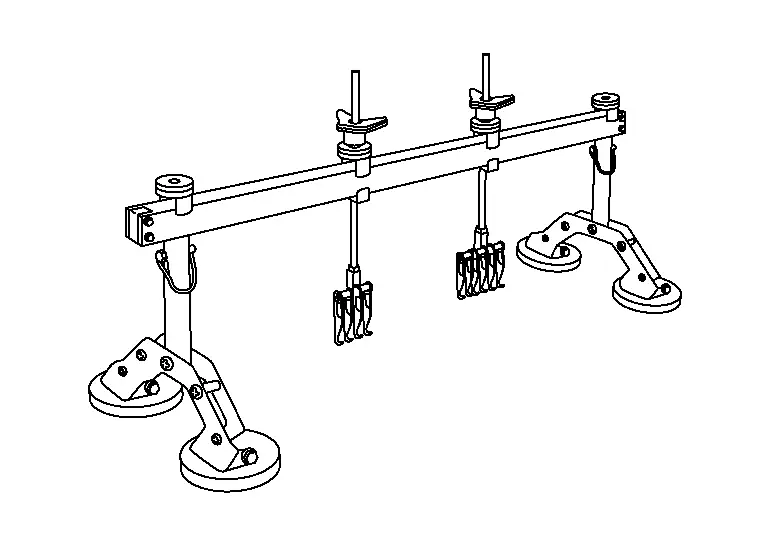
DENT PULLING TOOLS
| Damage Level | Recommended Tool | |
|---|---|---|
| Heavy |
| Dent pull bar |
| Dent pull bar Long bridge | |
| Moderate |
| Dent pull bar Short bridge |
| Slide hammer | |
| Light |
| Dent Pulling Rod and Hammer |
| Dent pulling rod | |
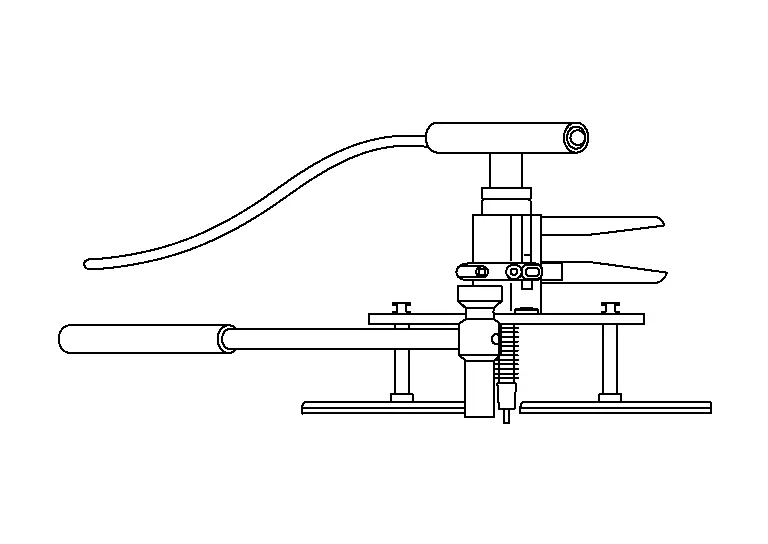
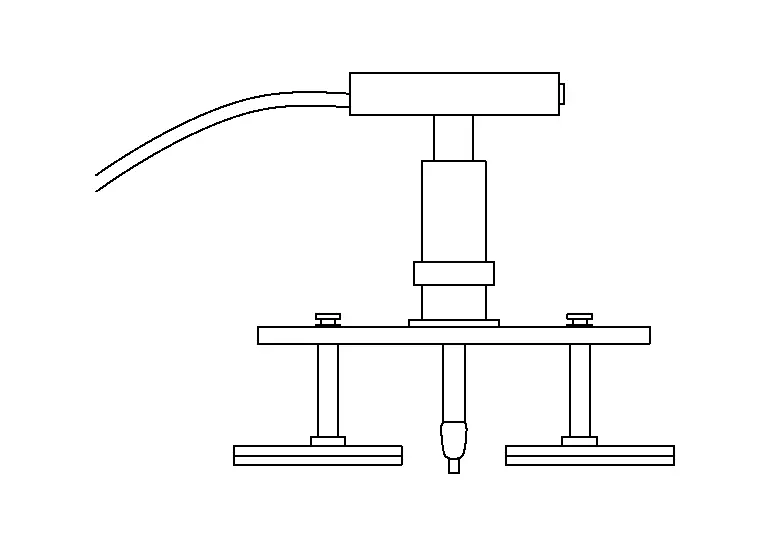
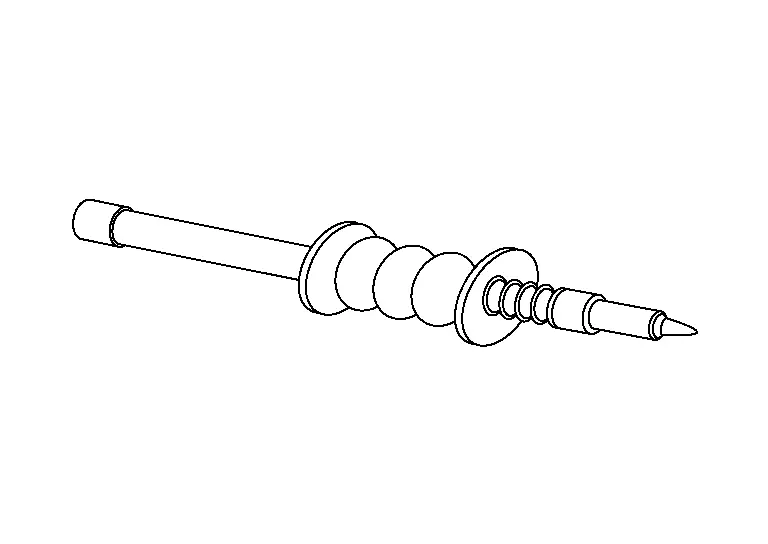
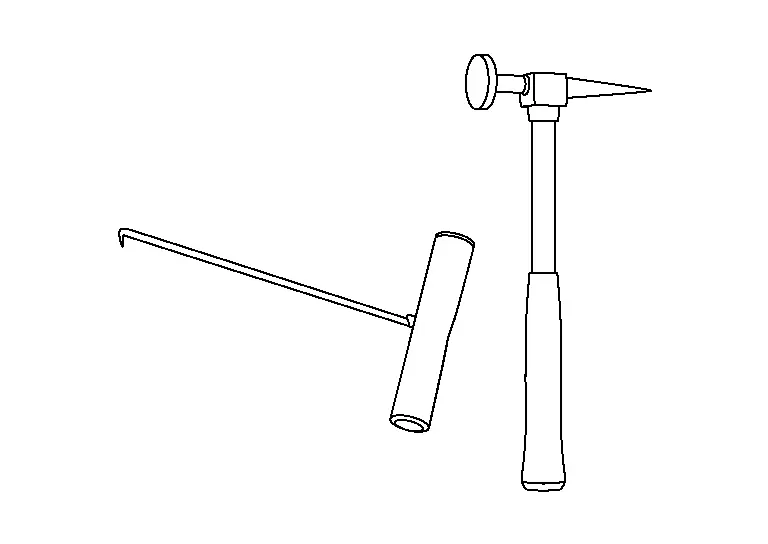
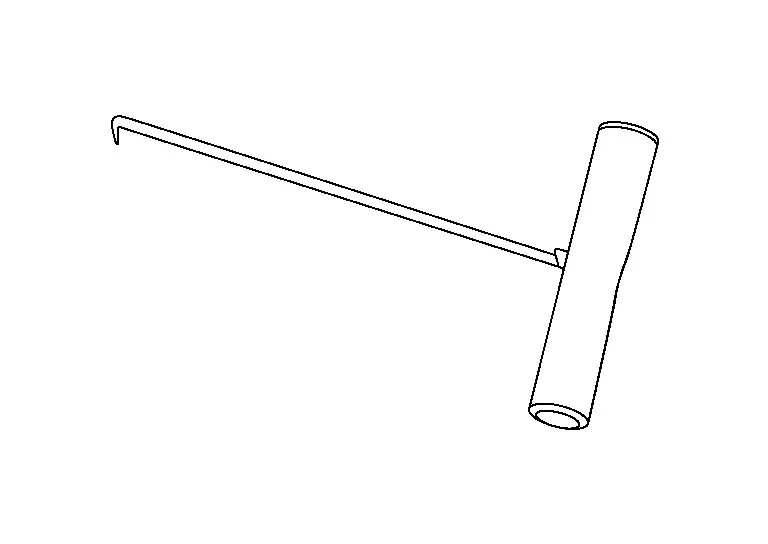
(1) SLIDING HAMMER
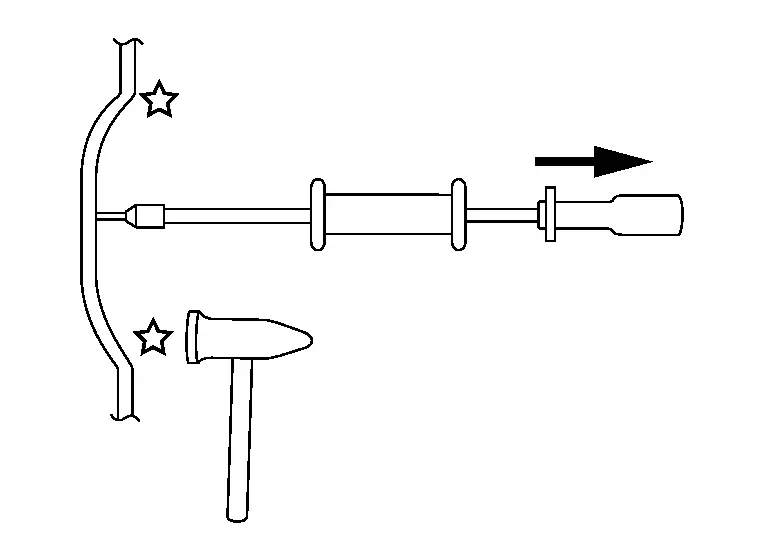
The sliding hammer is used for repairing large, deep dents. Since it provides greater force than an ordinary hammer, it is used to repair dents in thick panels.
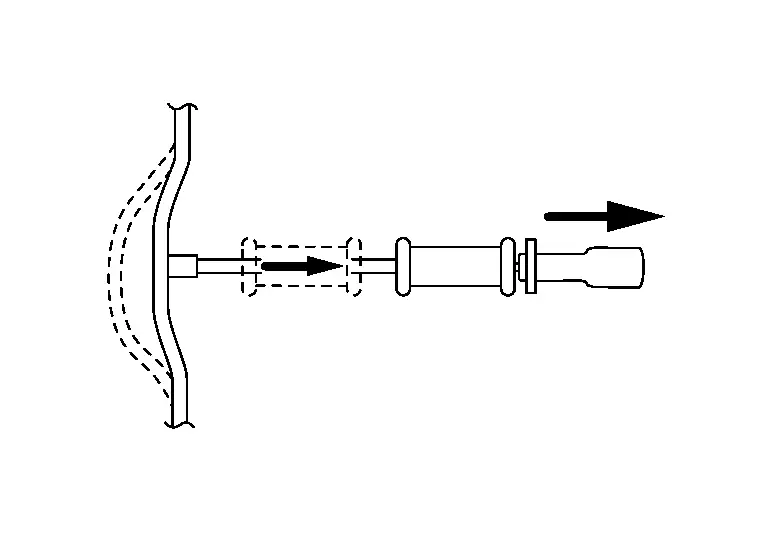
(a) When the panel is thin. Instead of a hole, a metal pin or washer is welded to the panel. Great force can be used for pulling.
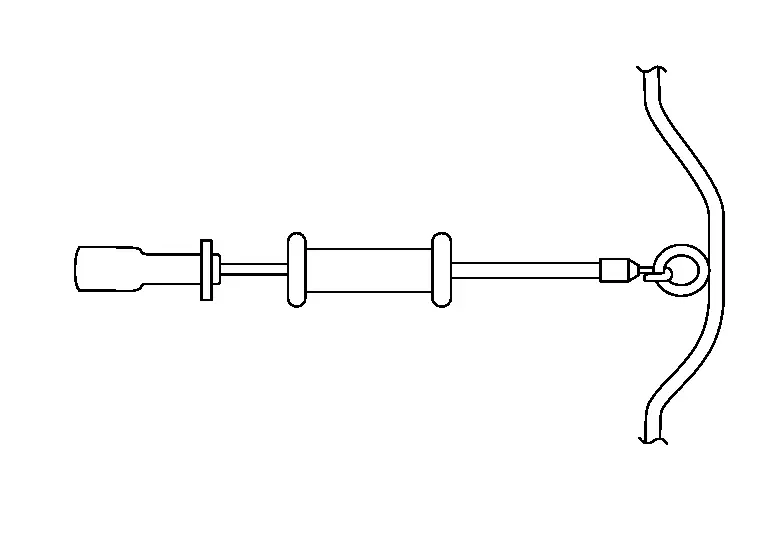
(b) When the dent is deep and narrow, pull it with a single blow.
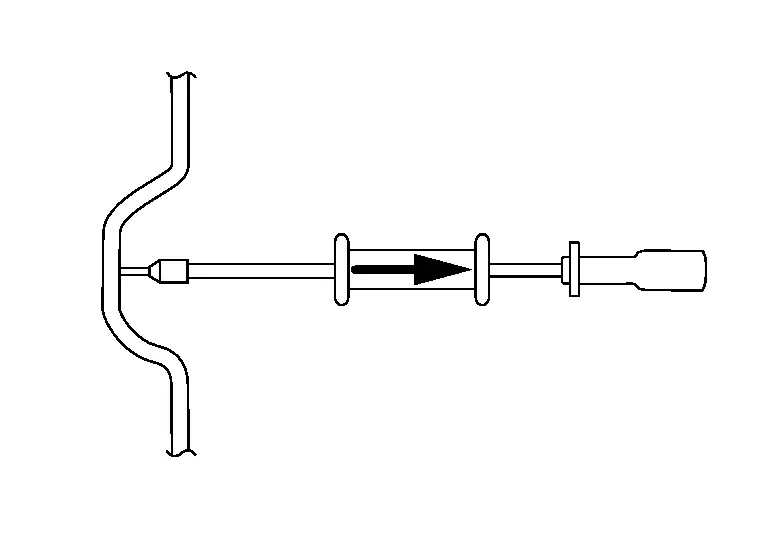
(c) When the panel dent is shallow and wide, hold the end of the sliding handle. Repair the dent by gradually tapping the edge of the dent.
(d) Deeper Damages are pulled out with a hand puller. It allows more of a control and it allows pressure to be applied and at the same time the pressure can be applied with the hammer.
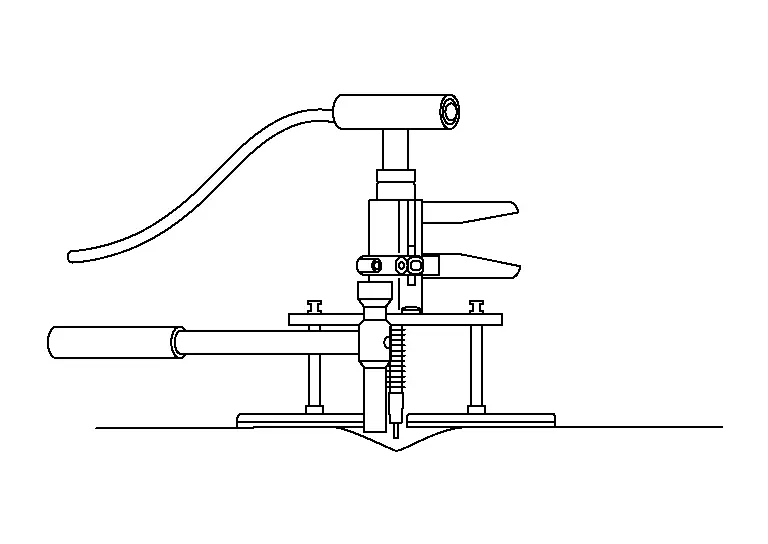
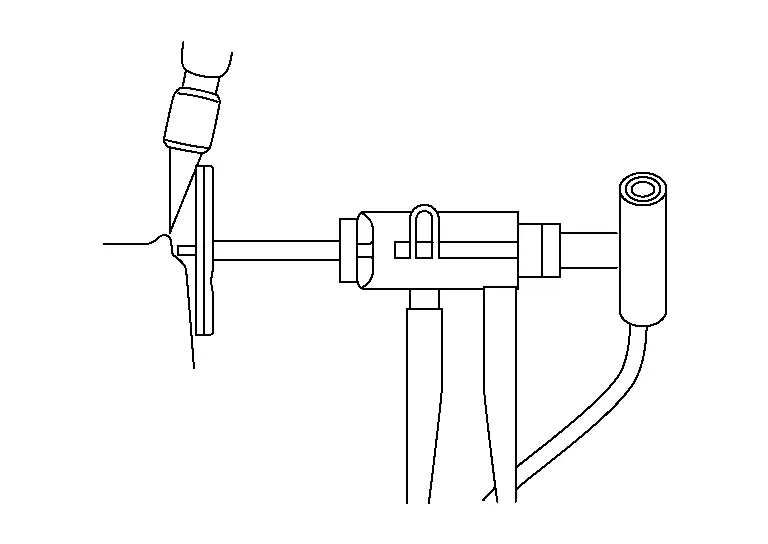
A hand puller has the advantage with a line damage. The damage can be pulled up with more control and will reduce the repair area.
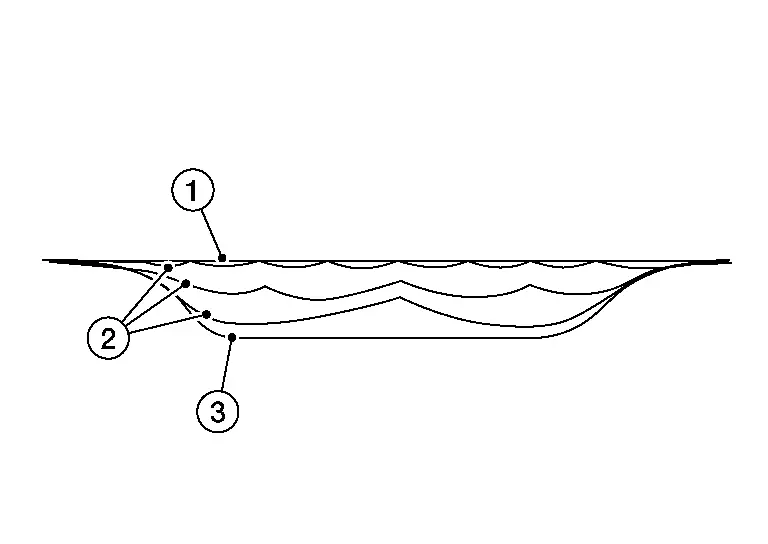
Repairing long dents or deep dents
If the damage is deep don't try to pull up the damage completely. Do it in increments until the desired level is achieved .
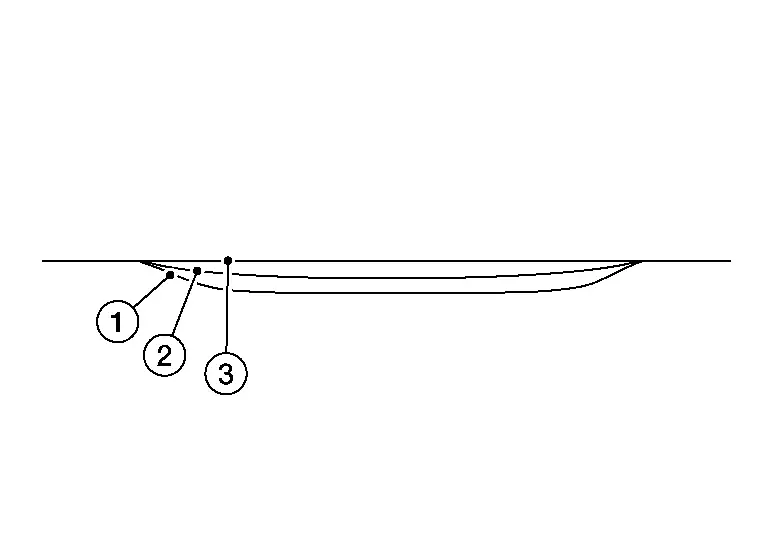
| 1 | :Panel surface |
| 2 | :First pulling distance |
| 3 | :Finishing pulling distance |
Pull first in the middle with a light pull. Then continue by halving the distance between the pulls always pulling a little every time. Don’t try to pull it all at once, because the metal will be too high at the end.
| 1 | :Finishing pulling distance |
| 2 | :Pulling distance by halving |
| 3 | :Panel surface |
When using the hand puller, place the feet cross to the bodyline.
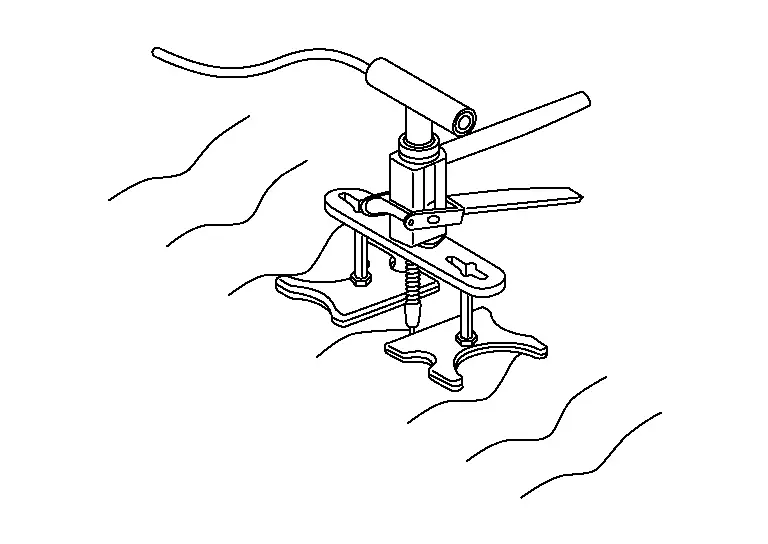
(2) STUD WELDER (BODY REPAIR STATION)
A pin or washer is welded directly to the body panel dent without drilling. The panel dent area is then pulled outward with the sliding hammer. Because no drilling is required, panel strength is unaffected. Corrosion problems are also reduced.
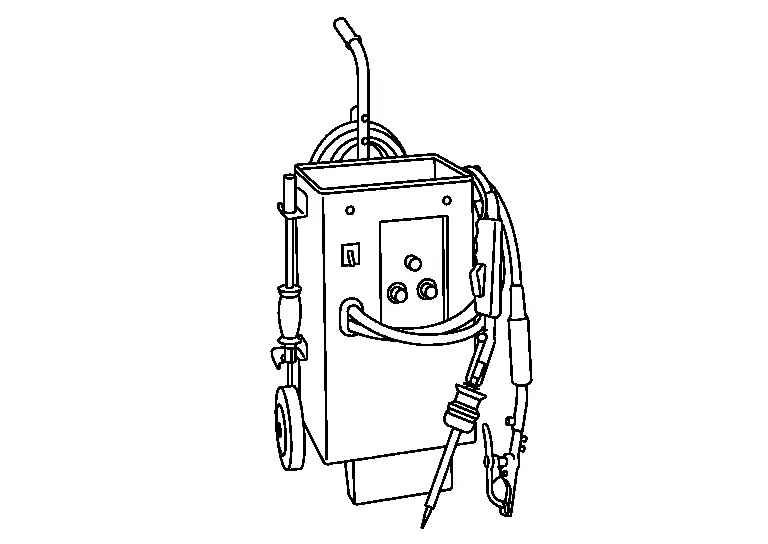
Application of the clamp for ground will increase the painting area in the repair process. A different ground could be used which can be applied next to the damage and will reduce the repair area.
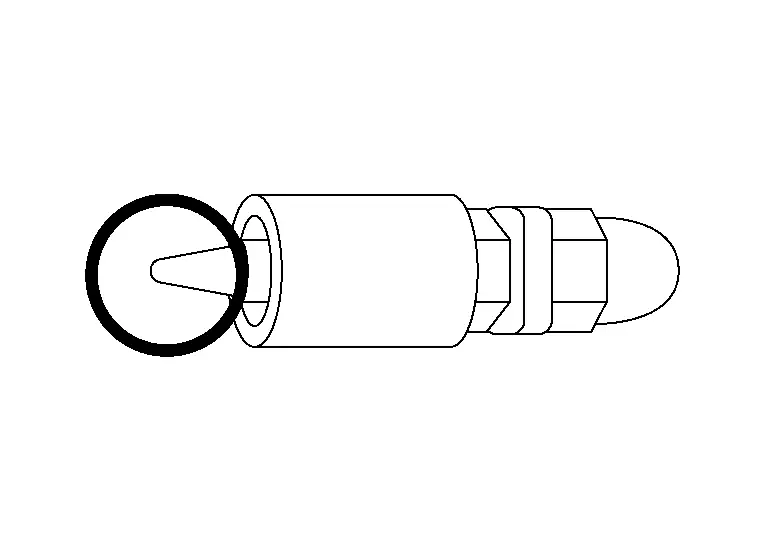
Because the stud welder welds pins directly, the paint must be removed from the dent surrounding area and the area where body ground is established.
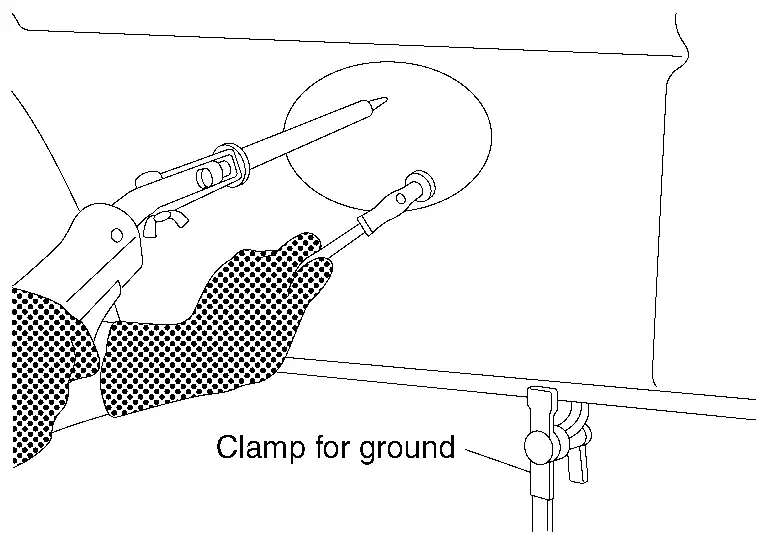
As shown in the figure, the ground can be established at the flange area or in the dent surrounding area using a magnet.
(3) WELDED PIN OR WASHER
A pin or washer is welded to the dent without drilling. It is then pulled to repair the dent.
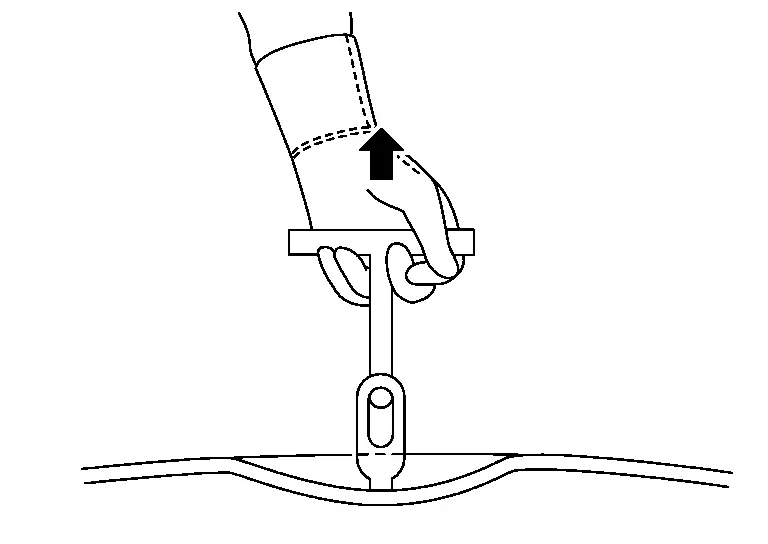
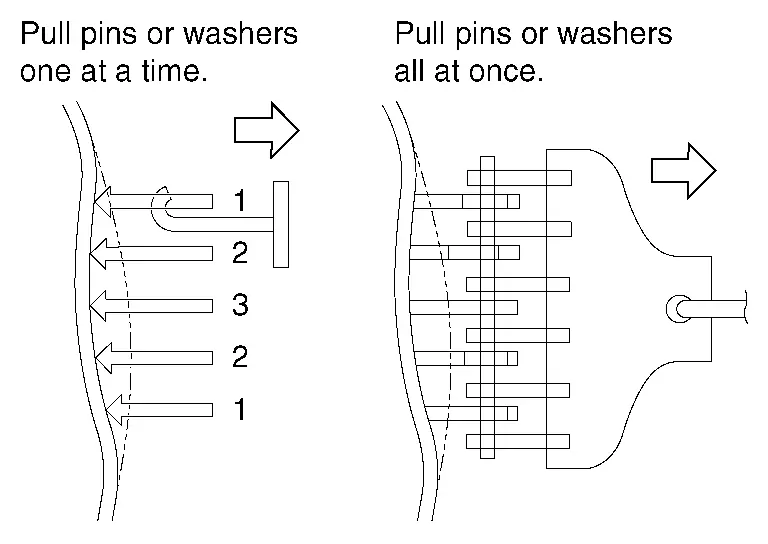
Several pins or washers are welded to the dent. They are then pulled together or separately to repair the dent.
Analyze
Look at the damage. See from which direction the hit came from and the extent of the damage. Also look for the different zones.
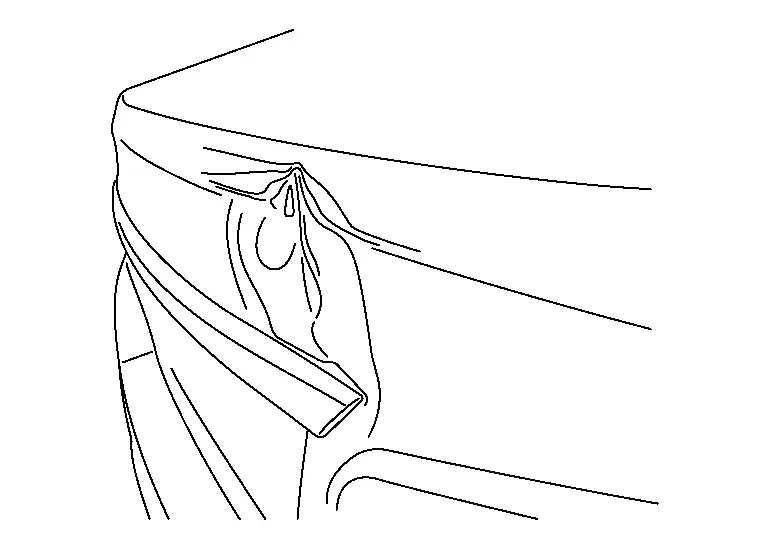
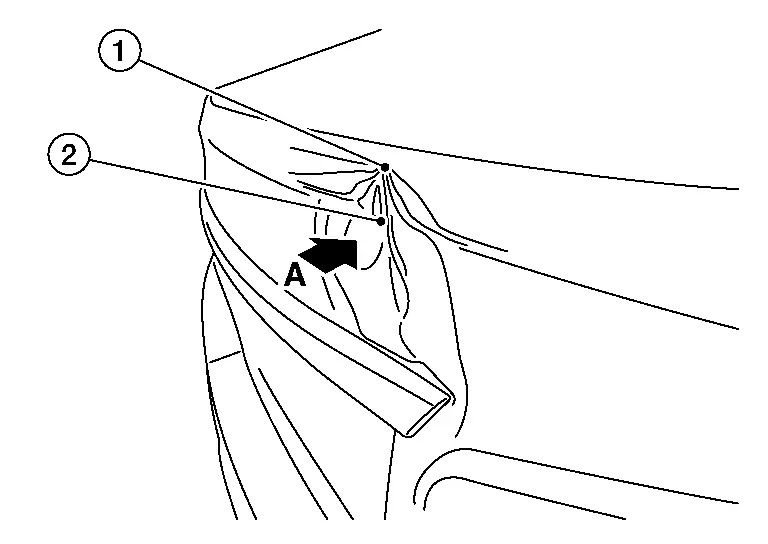
| 1 | :Crown (metal pushed up) |
| 2 | :Damage |
| A | :Direction of impact |
If there is an edge or bodyline within the damage area, it is important to focus on straightening it first as shown.
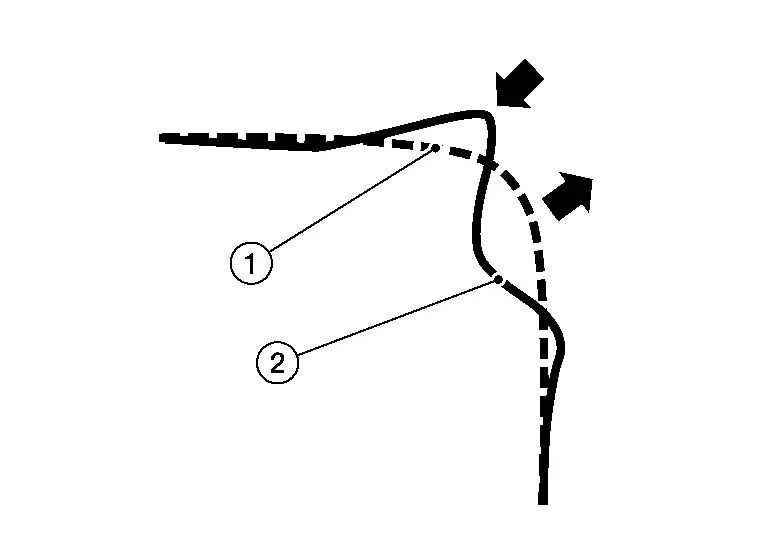
| 1 | :Finishing pulling distance |
| 2 | :Panel surface |
In most cases, there is also a crown (1) in the damage. The crown is the area where the metal has been pushed out. Depending on the shape of the metal and the direction of the hit the crowns are in different areas.
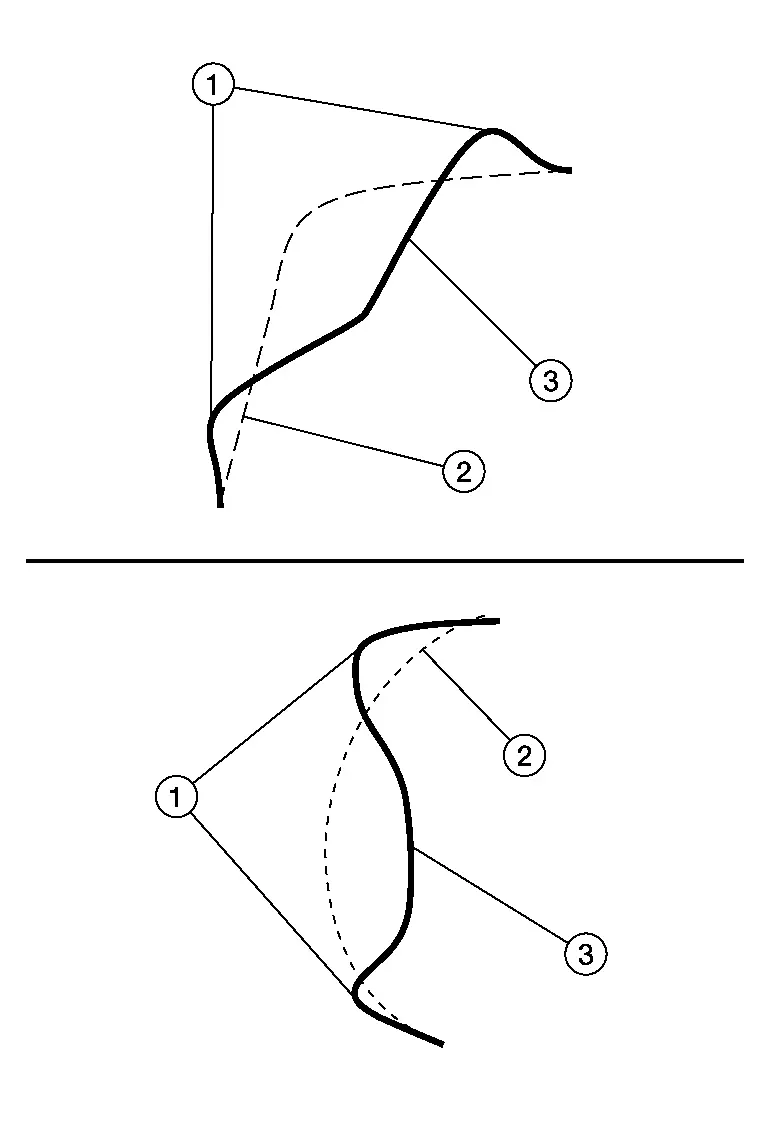
| 2 | :Finishing pulling distance |
| 3 | :Panel surface |
To bring out the edge or the bodyline a bridge system is ideal. The advantage of a bridge system is that you can bring out the edge first and relieve pressure on the crown.
Welding on the Bits
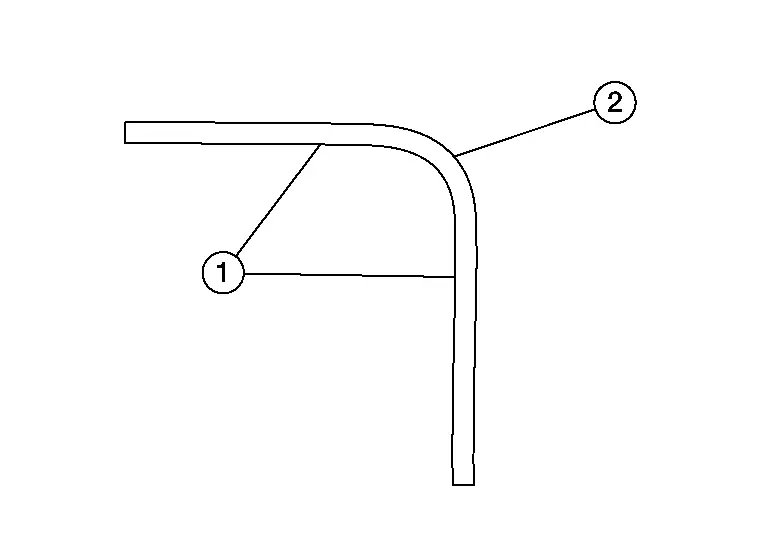
It is important to weld on the line. Therefore, first mark the line by using the pulling bar and making a scratch on the bare metal. You can also use the Flatliner Laser to make the line. Welding of the bits is done most of the time on the tangent point (2) of the line. This depends on the direction of the hit. Try not to weld on the radius area (1) or round area of the bodyline. This will increase the risk of making a hole in the panel.
Welding on the bits is easiest done with the Bit Gun. You can also single weld this. On the Digispot, change to manual welding mode, this way you can first place the bit and then weld. In the area where you don’t need a lot of pulling force you can place the bits further apart. In the center where more pulling force is needed try to weld the bits as closely together as possible. The more bits you weld on and the closer they are, the fewer waves you get in the repair.
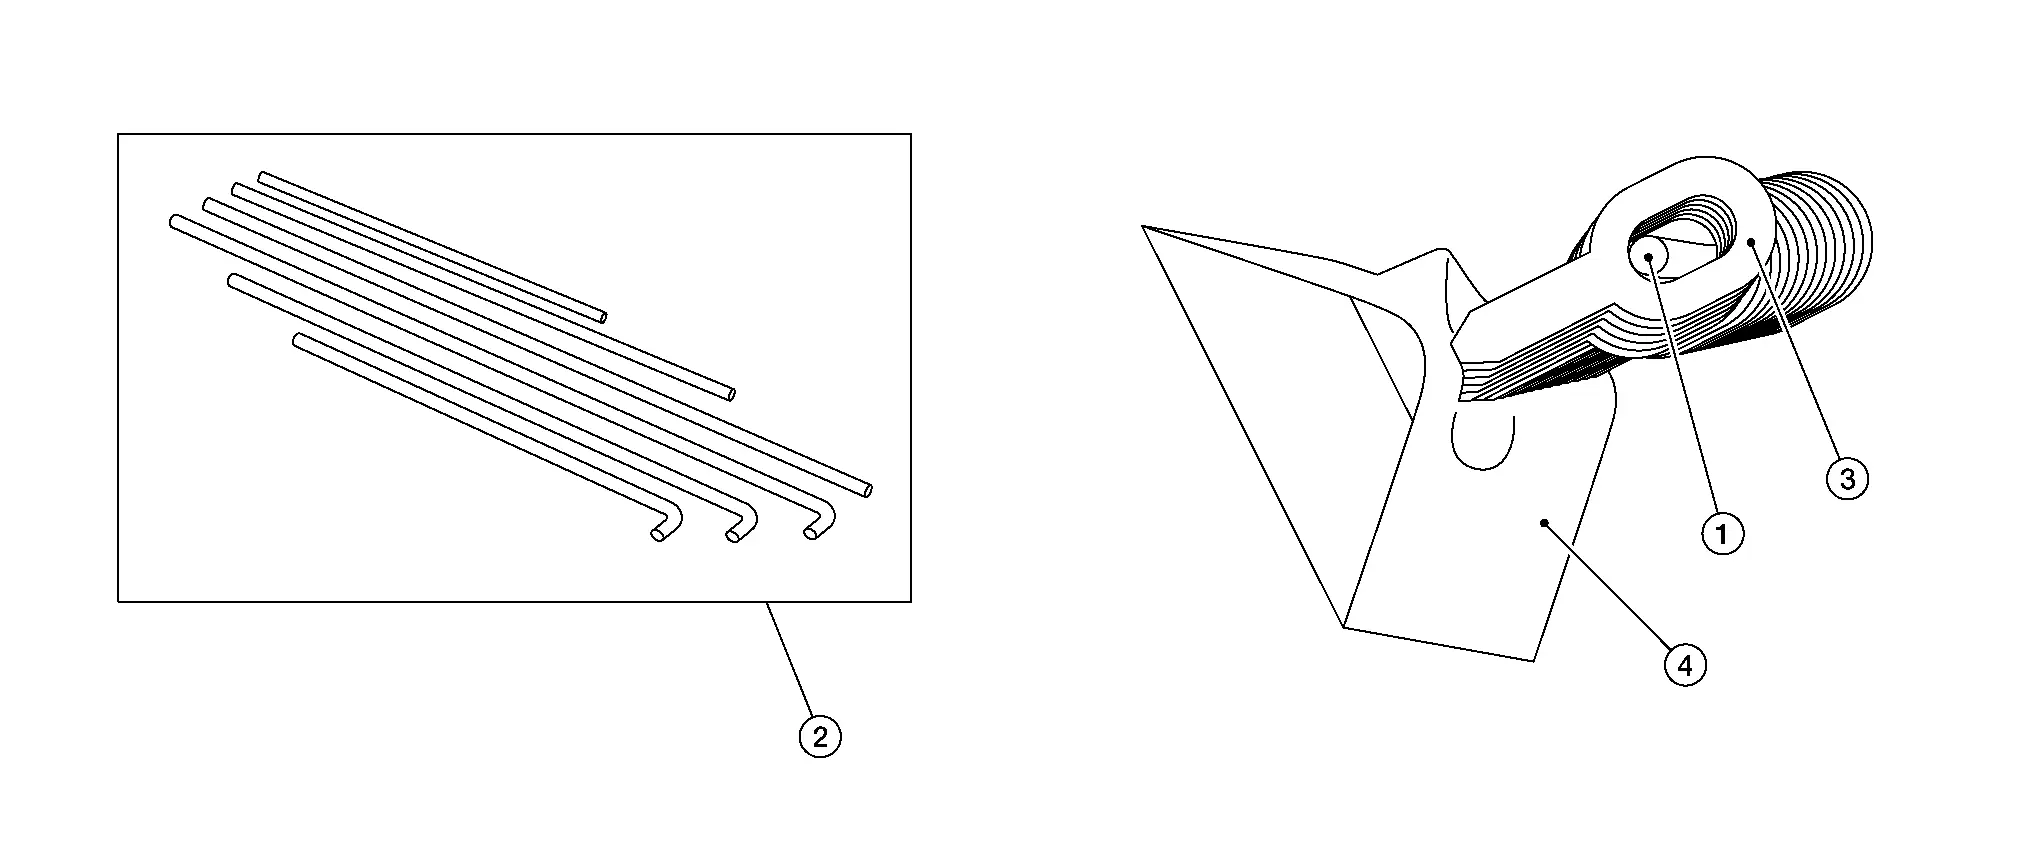
Insert the pulling bar (1). There are 6 different types of pulling bars (2): three different lengths and also either straight or bent at the end. The bent pulling bars are for vertical applications.
 NOTE:
NOTE:
For a low pulling force, individual weld on tabs (3) can be pulled. For a high pulling force, multiple weld on tabs can be pulled.
| 4 | :Panel surface |
Applying the Bridge
For small areas, it is best to use the FL80-bridge. Also use the 2 angle directional feet (1). This way the bridge will not tilt down during the pull.
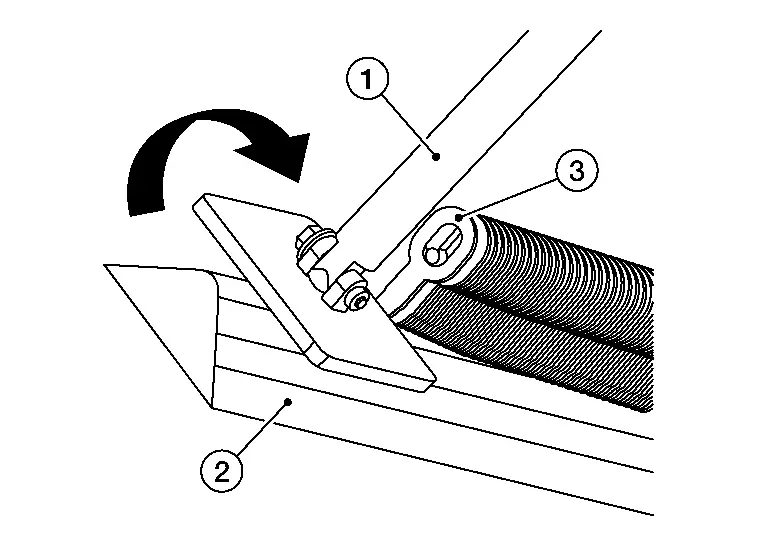
| 2 | : Panel surface |
| 3 | :Weld on tabs |
Open up a space for the pulling bar (1) in the middle of the panel surface (2).
Place the feet on the outside of the damaged area and apply a little pressure by rotating on the pulling mechanism.
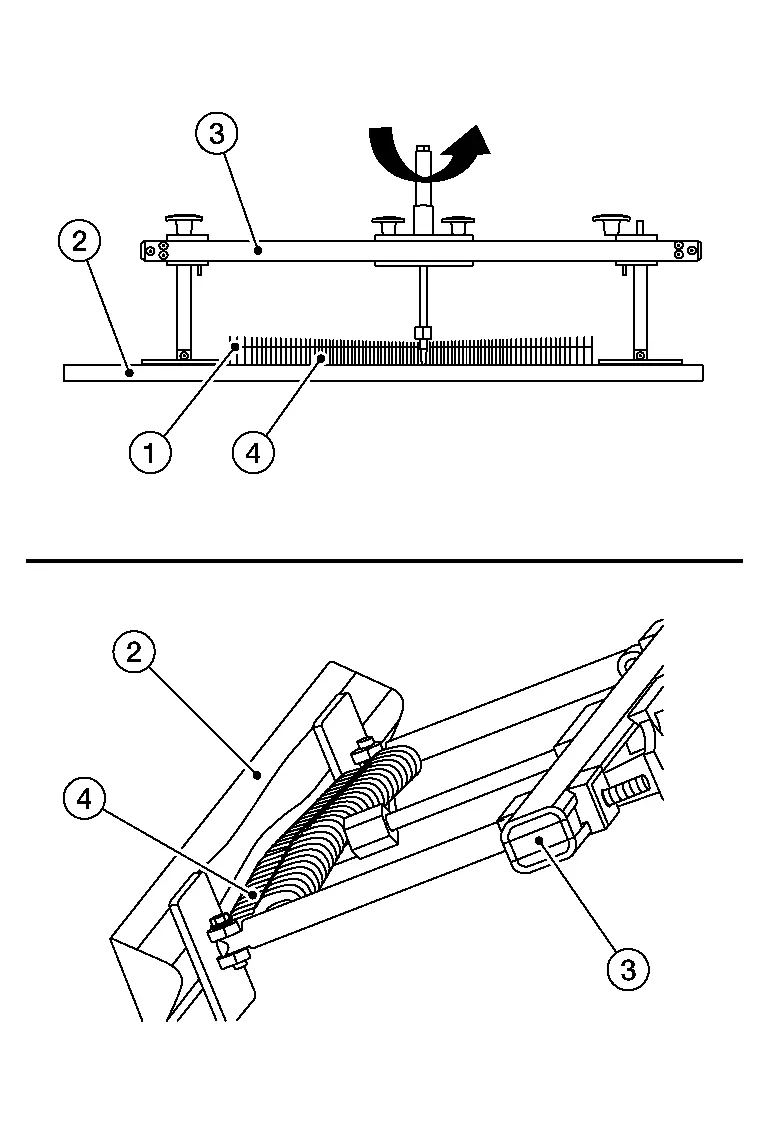
| 3 | : Bridge |
| 4 | : Weld on tabs |
When you pull up the damage, don't pull it out completely. Once you get a little tension on the pulling mechanism it is important to start to relieve the tension on the crown. This means that you are pulling a little and knocking down on the crown in direction shown.
| 1 | :Panel surface |
| 2 | :Finishing pulling distance |
It is easiest to use two hammers (1) at the same time. One is for placing and the other for hitting. If you use the vertical fin of the hammer and place it on the crown (2) you can see the crown much better from the side, even if it is a small crown. The other advantage of using two hammers is that it will reduce the vibration, which can loosen the bits.
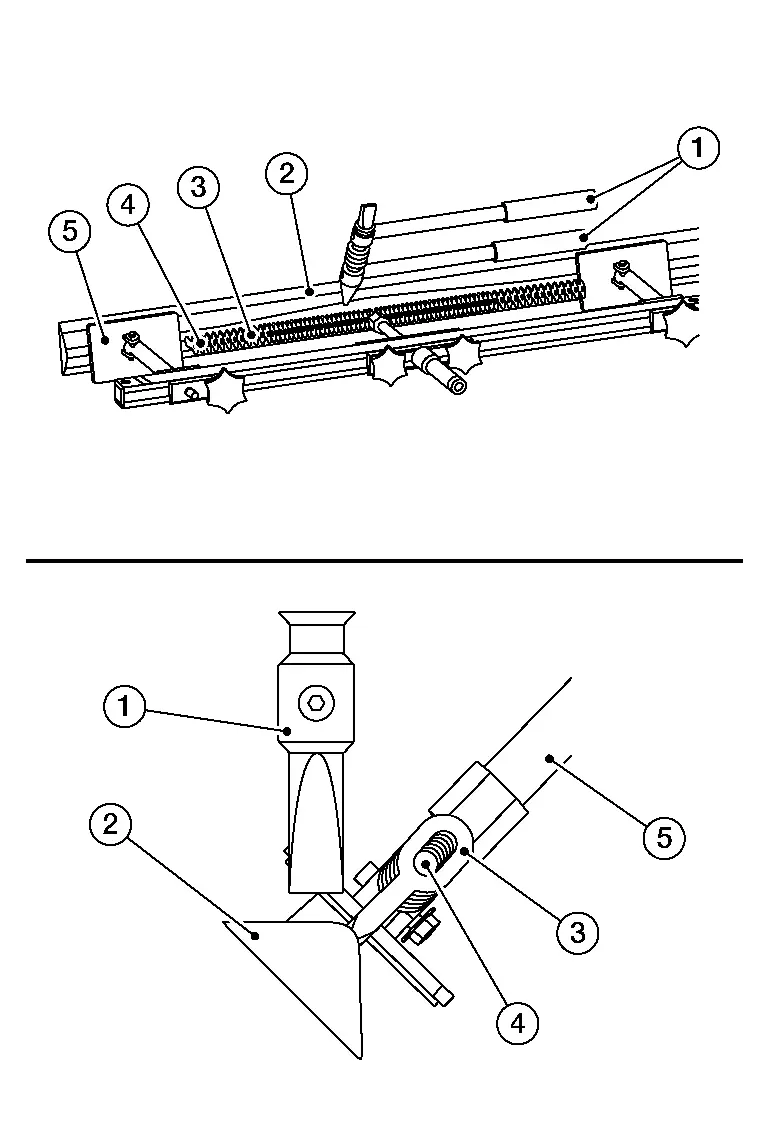
| 3 | : Weld on tabs |
| 4 | : Pulling bar |
| 5 | : Bridge foot |
Try to pull out the damage a little and knock down the crown again. You will feel the pressure on the pulling mechanism releasing once you take away the tension from the crown.
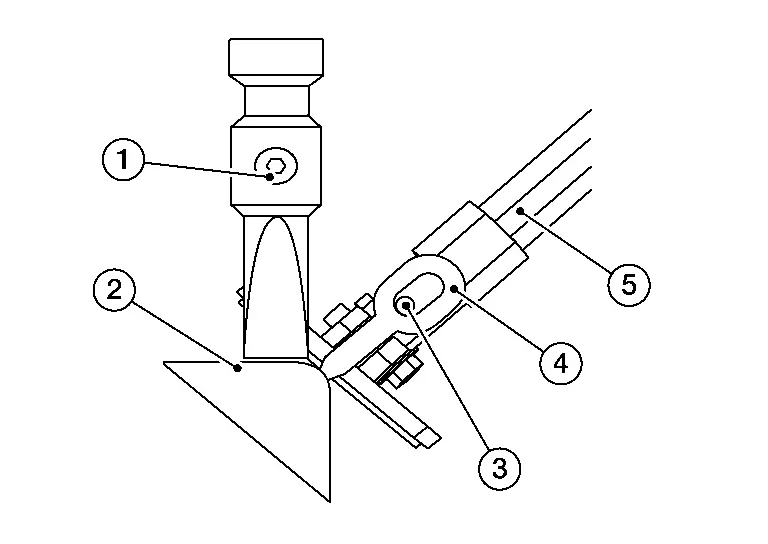
| 1 | : Hammer |
| 2 | : Panel surface |
| 3 | : Pulling bar |
| 4 | : Weld on tabs |
| 5 | : Bridge foot |
Once most the damage is pulled up and the crown is knocked down, check if the line is straight. You can do this with a pulling bar or with the laser.
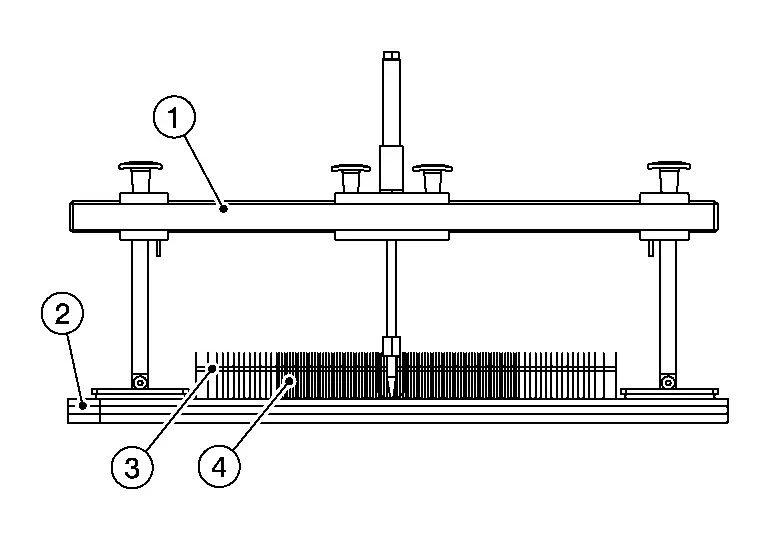
| 1 | : Bridge |
| 2 | : Panel surface |
| 3 | : Pulling bar |
| 4 | : Weld on tabs |
The next step is to bring out the remaining area and to stabilize the edge. This is normally done on both sides of the damage. This is done while the bridge is still in place. It will hold the line and facilitate the repair process of the area.
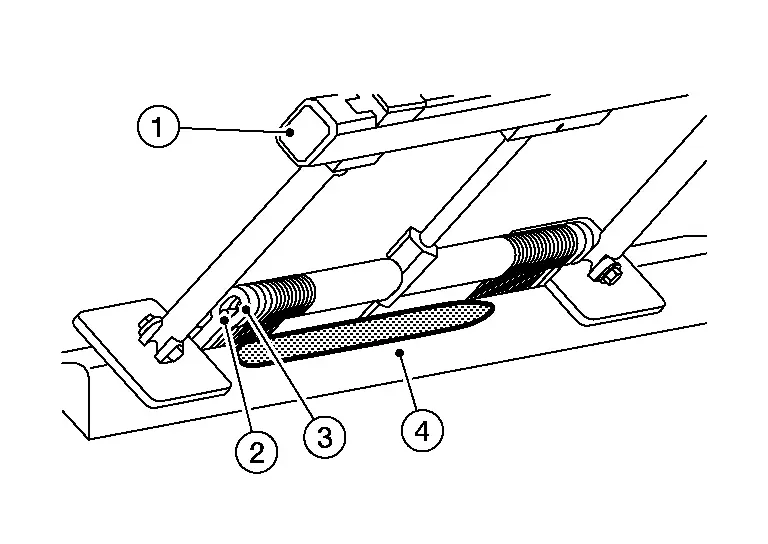
| 1 | : Bridge |
| 2 | : Pulling bar |
| 3 | : Weld on tabs |
| 4 | : Panel surface |
Depending on the depth and strength of the remaining damaged area (1) different tools maybe be used. It is best to use the T-Handle (2) or if needed the small sliding hammer of the Innopuller. Normally not much force is required.
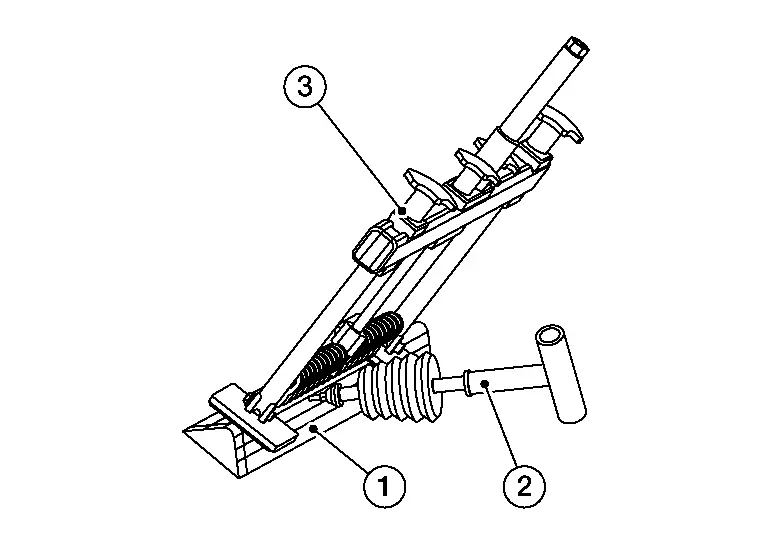
| 3 | : Bridge |
The rest of the finish can be done with the Innopuller or the hand puller (1). Another option, if the damage (2) is still deep, is to use the Innopuller with the hammer (3).
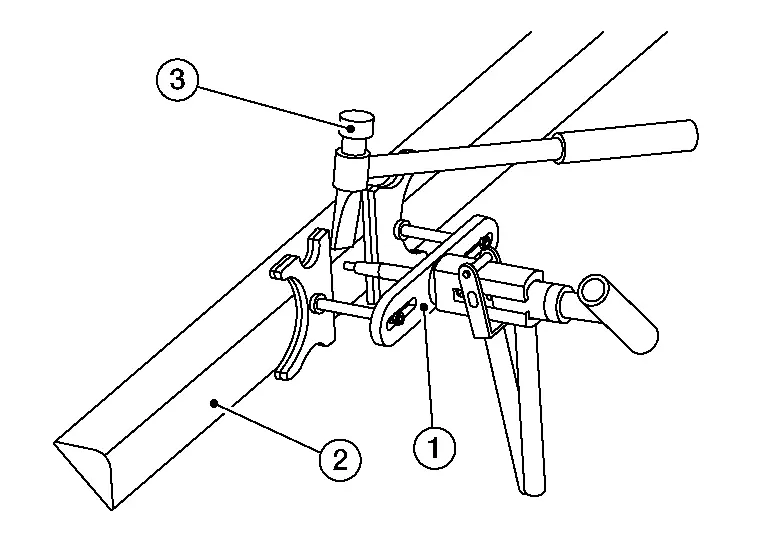
Bridge Application Short
On rocker panels and edges or in small places most of the time the FL80-bridge is being used.
Bridge Application Long
On larger areas or where the damage is in the middle of the panel the FL120-bridge is being used.
(4) SPOT HAMMER WELDING
The sliding hammer tips are welded to the dent.
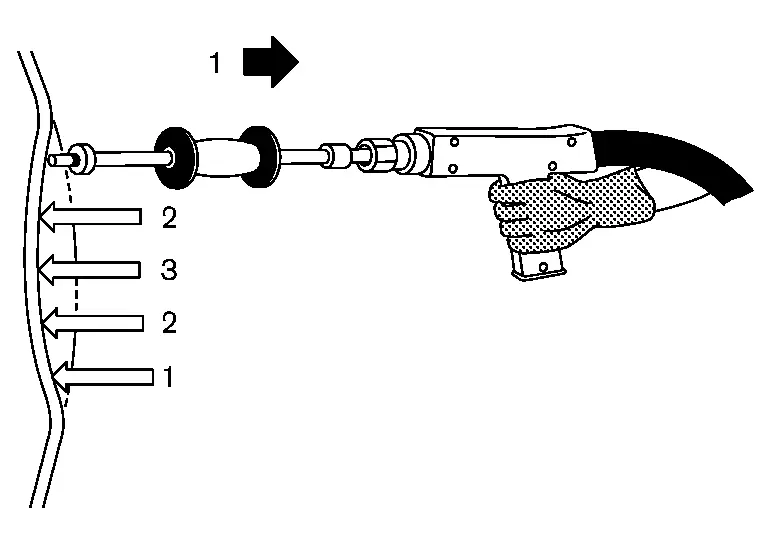
They are then pulled separately to repair the dent.
After the tips are pulled, they are twisted to separate them from the panel.
(5) HAND PULLER
The hand puller (1) can also be used together with the hammer (2). By applying a little pressure on the handle and with little hits from the hammer the stress can be relieved. This can also help with frogs/oil canning in the metal.
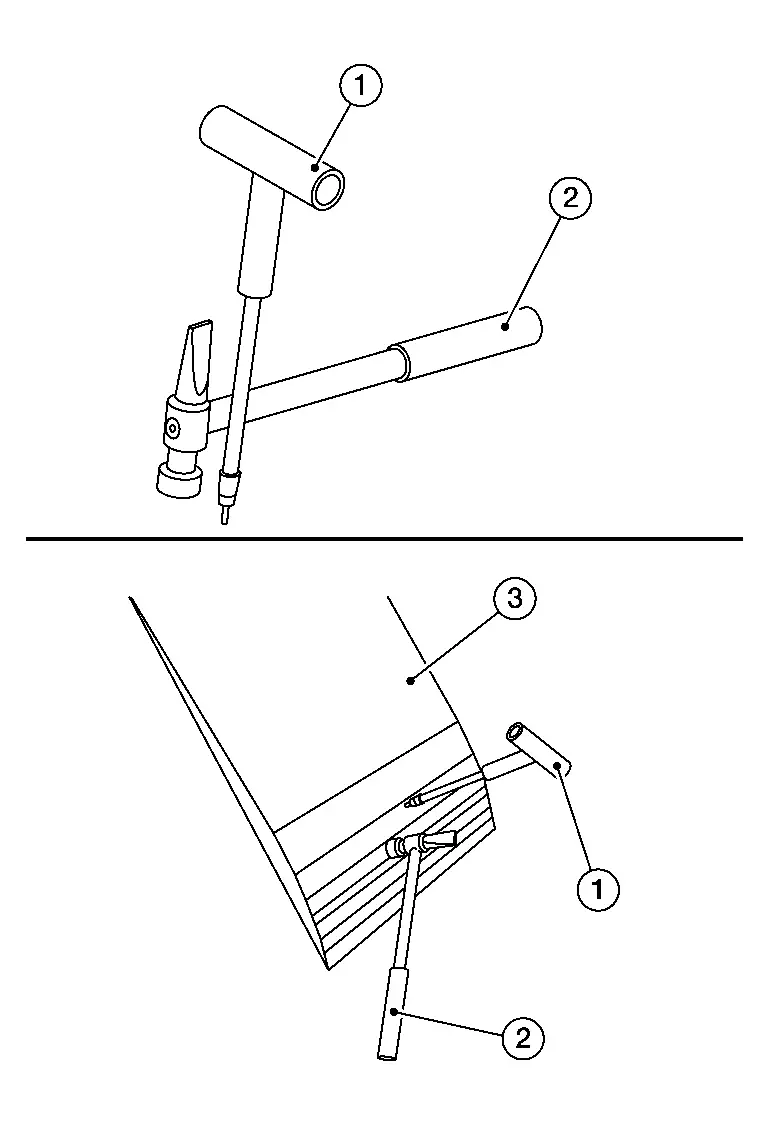
| 3 | :Panel surface |
The finish is best done with the hand puller/T-bar and the hammer. Start from somewhere on the outside and work your way in. It is also helpfull to place the Flatliner Laser further away and to run the light over the surface.
Hotbox dent removal
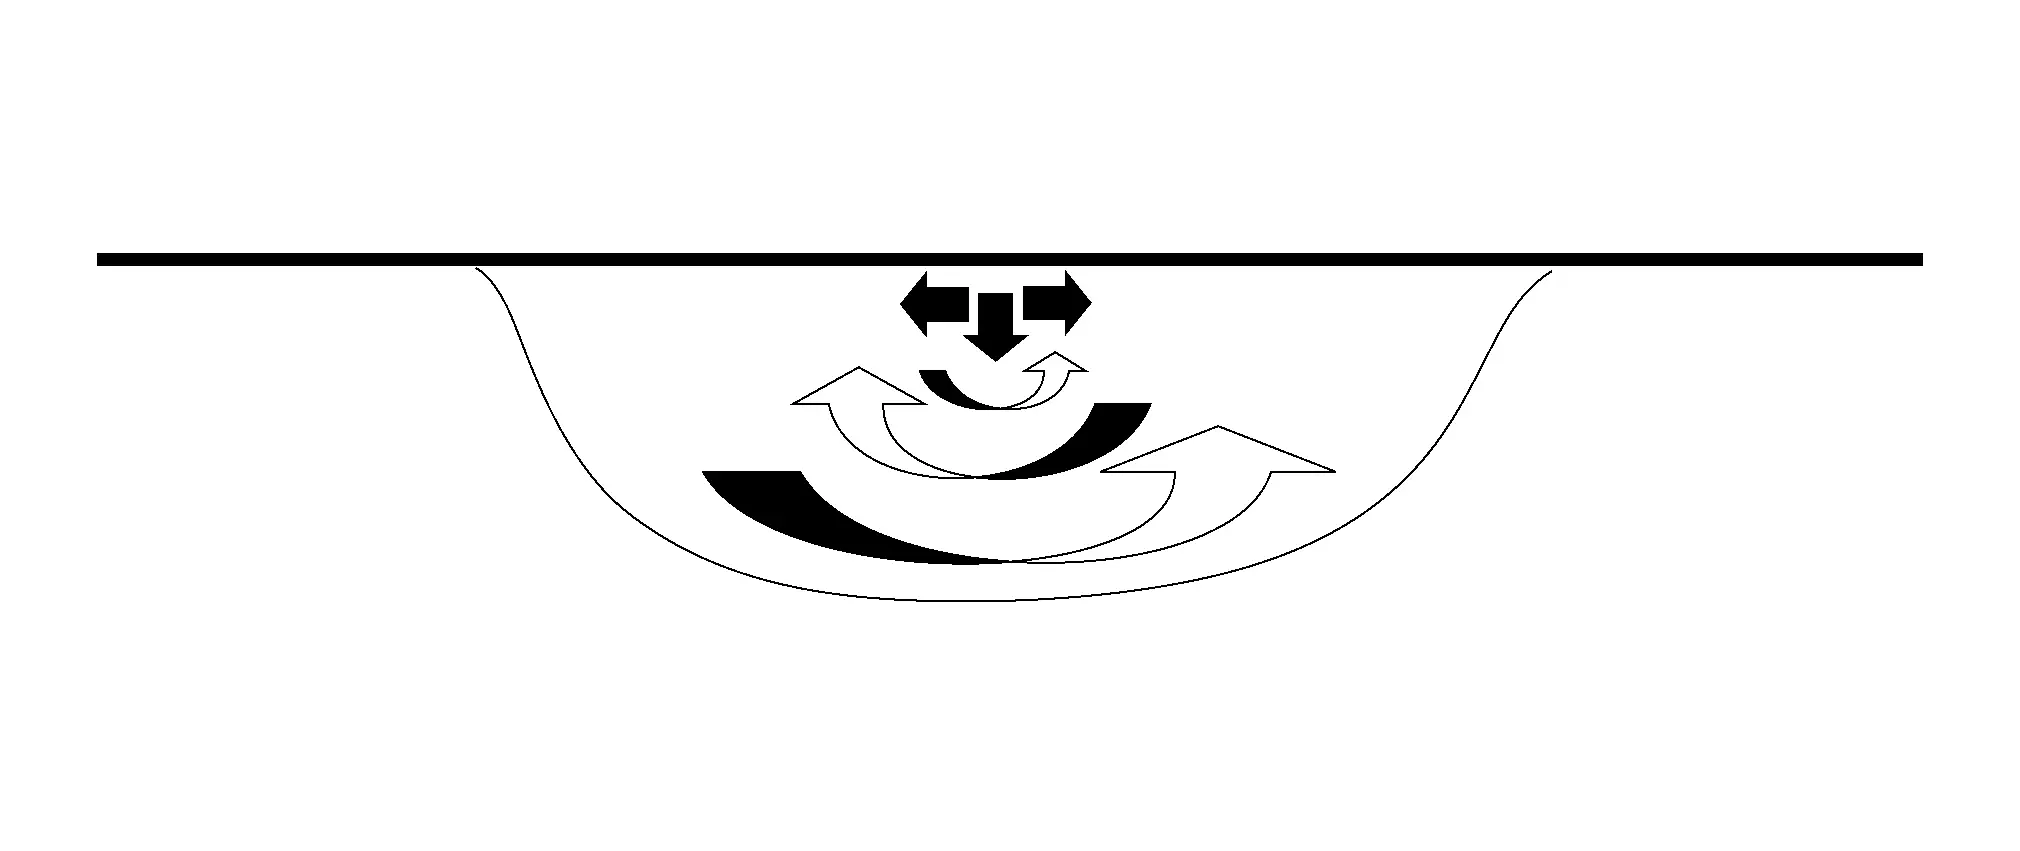
The dent removal with induction heating works on the basis of surface heating of the sheet metal (1). By using a certain frequency the surface (2) of the sheet metal gets activated so that the top surface of the sheet metal is heated and thus expands. The other key working function is the vibrating impulse in the tool which helps the process.
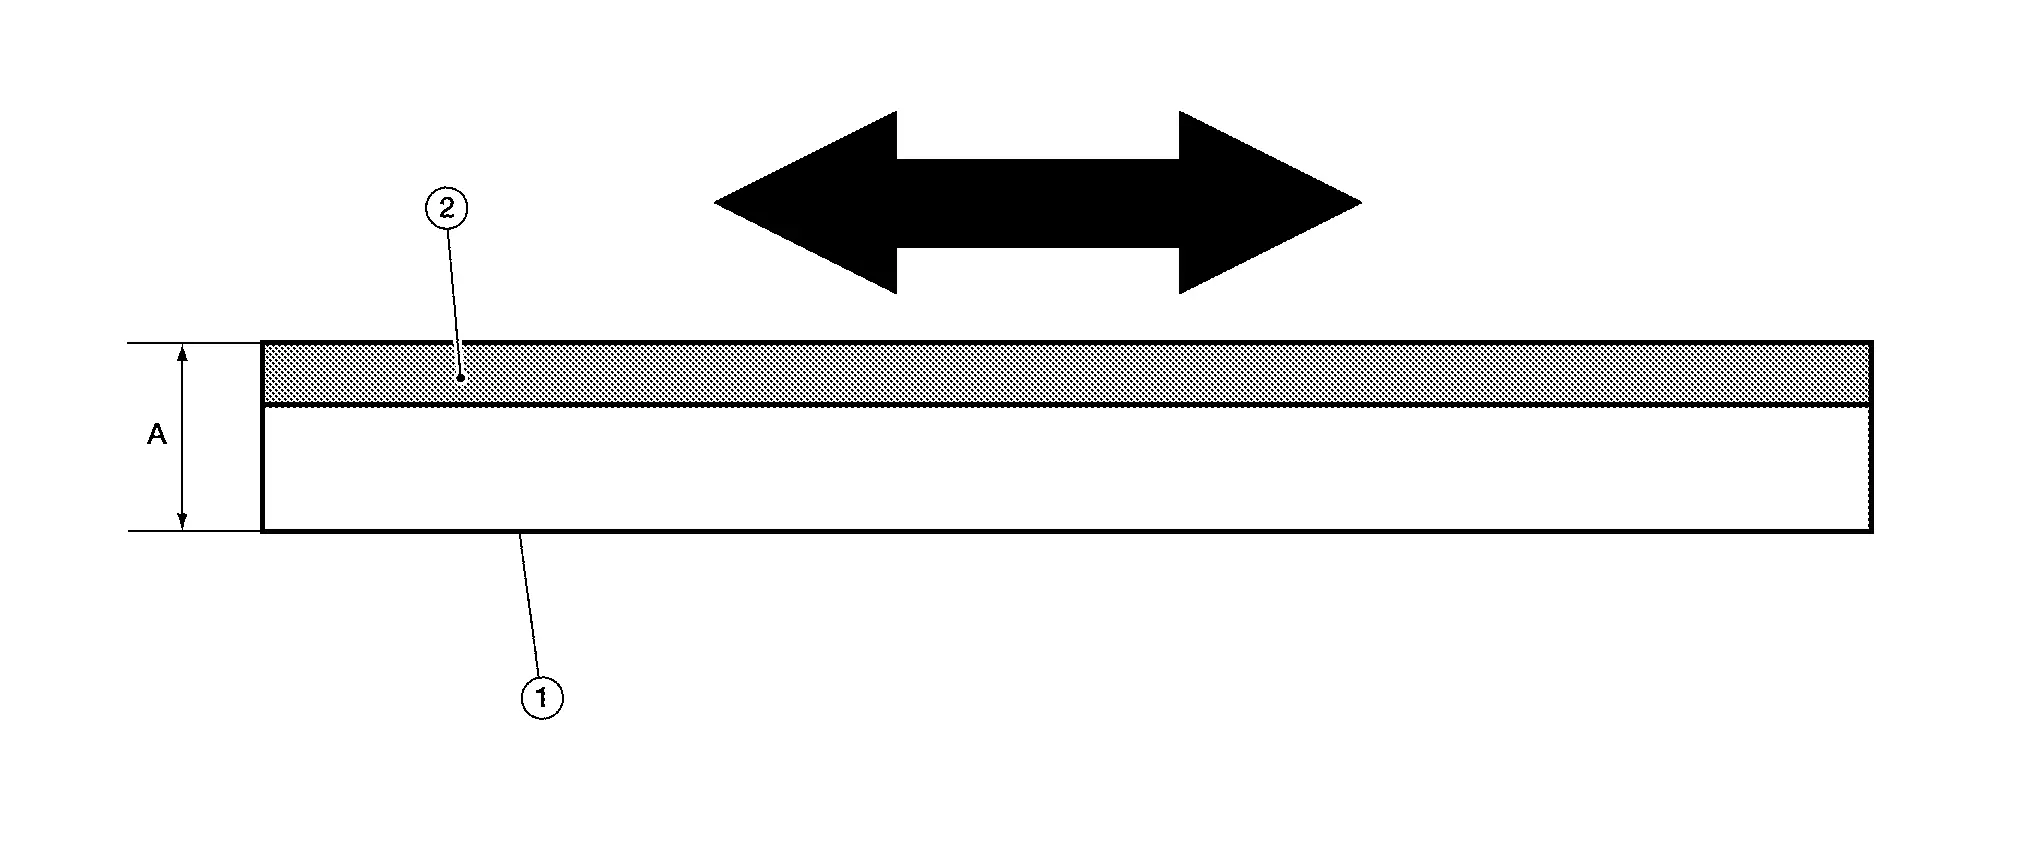
| A | 0.7mm (0.028 in) |
This effect makes it ideal for the rising of soft damages.
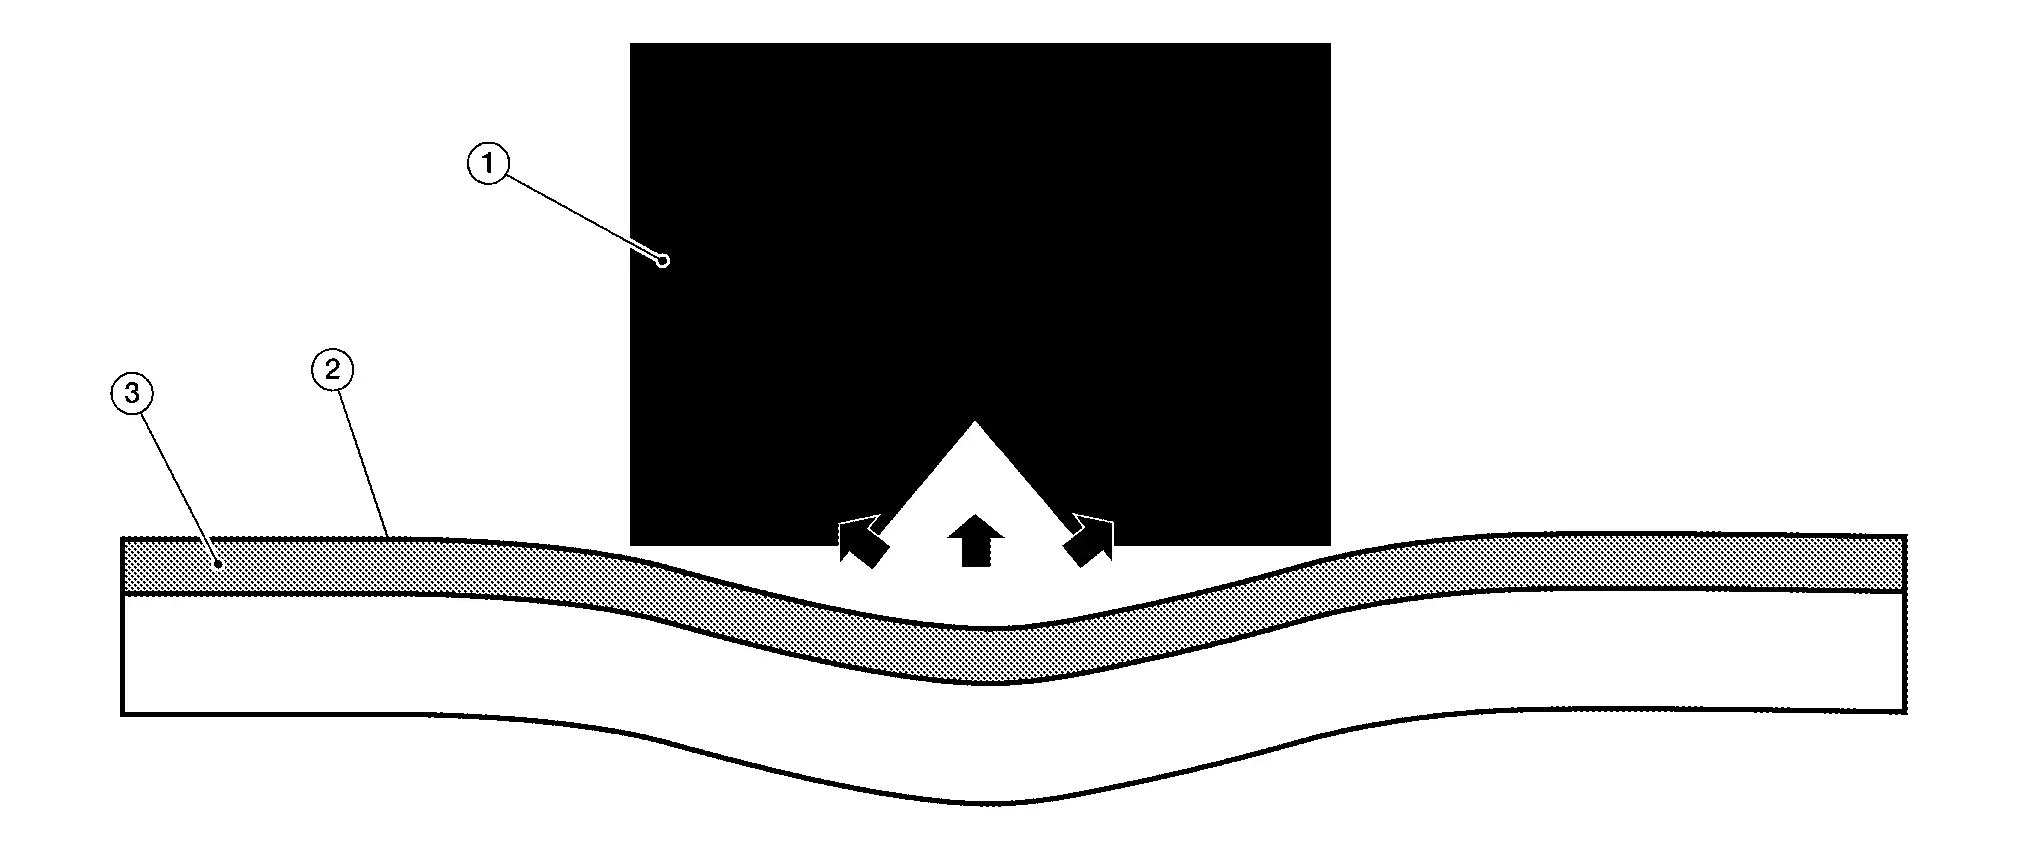
| 1 | :Hotbox |
| 2 | :Sheet metal |
| 3 | :Surface |
There are four applications
- Soft dents
- Dent reduction of larger or sharper dents
- Area work or cleaning up an area that has been repaired by the dent removal tools or glue system.
- Shrinking or stiffening of metal
The use of each applications
Soft dents or elastic dents can be repaired as long as the metal is not stretched and or that the main stress on the metal is not larger than the pulling force of the Hotbox effect.
With dents which have a plastic deformation or dents which are larger or where the center is stretched, the energy part (plastic deformation) of the dent cant be removed, as long as the main stress on the metal is not larger than the pulling force of the Hotbox.
After a dent has been repaired by the dent tools or the glue system, it often happens that the general area is still low and might have some waves in it. Then this area can be easily brought up by the Hotbox.
If by large dents the damage was that large that the mechanical strength of the material has been weakened, then the Hotbox can be used to shrink this area, best done by applying the tool to the center and then heating it to the maximum and then to cool off with cold air or water. This is best done more than 3 times to get the stiffness into the metal.
The setting of the unit as far as the power is concerned is always 100% with the Hotbox. With the T-Hotbox the power setting is always 100% if the time functions is being used.
The Applications
Application (Small soft dents)
Don’t press the heat pen (1) on the metal (2). Just hold it on top and as the metal comes up pull up the tool head.
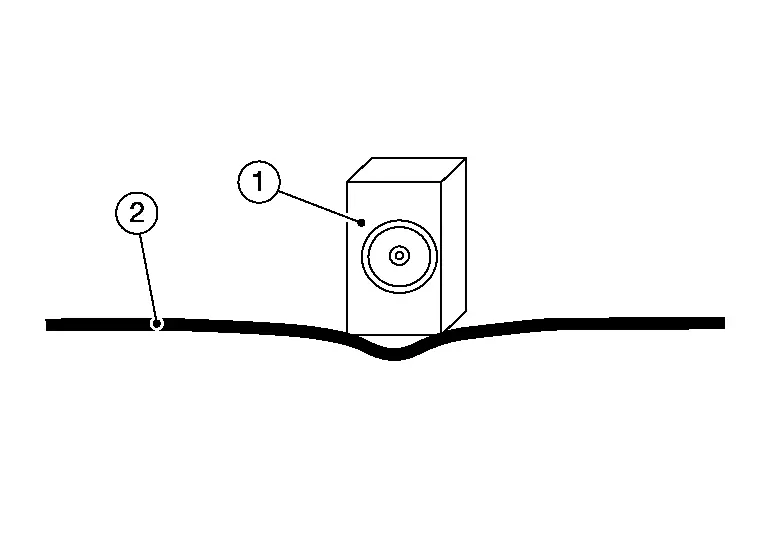
Application (Large soft dents)
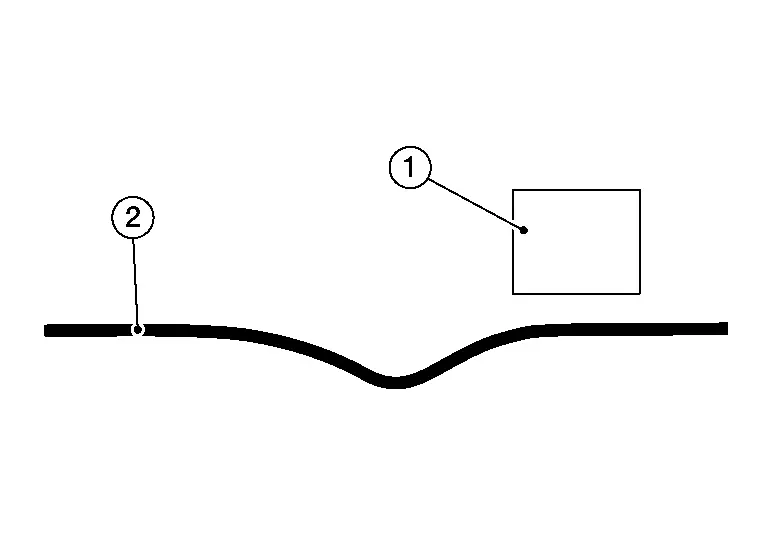
1 :Hotbox 2 :Sheet metal Start on the side with a short impulse. Depending on the size of the damage it might be necessary to start far away from the center of the dent as shown. The impulse should sound like a beebeep (2 Beeps). This is about .1 sec pressing the red button on the hotbox (1). Always use the light and look on the surface to see what the metal (2) is doing.
If the metal is going down, go further away. Also check if there might be a brace behind it, or maybe the damage might be too large.
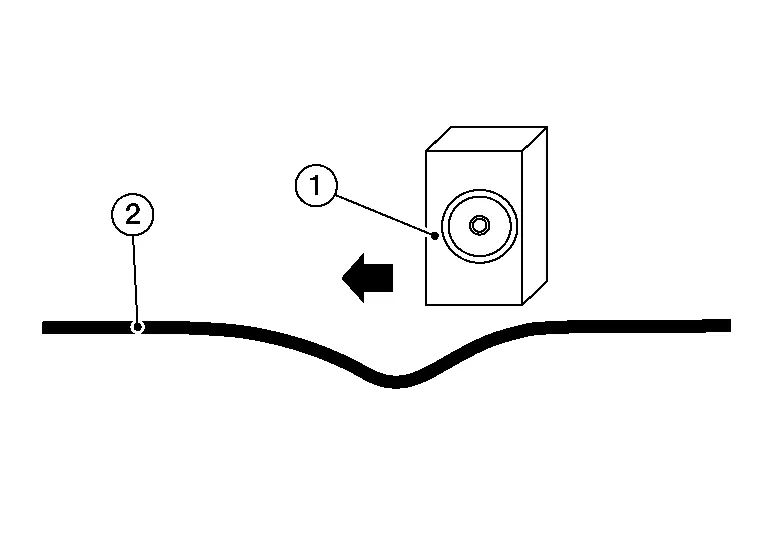
1 :Hotbox Then move closer to the dent, and again a short impulse (bee-beep). It is important to do an impulse on the edge or almost going down into the center of the dent.
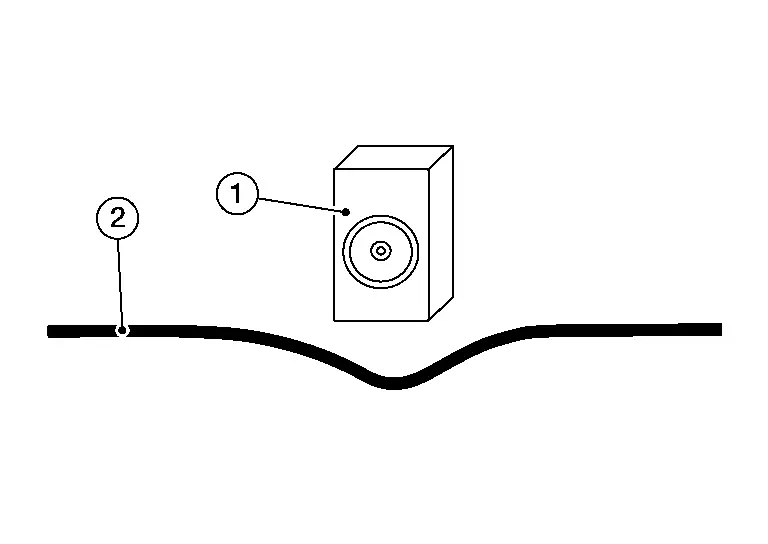
1 :Hotbox 2 :Sheet metal Then once the metal has come up, bring up the center by heating for at least .6 sec. The metal should be over-pulled. Also the raising of the metal can be done by short impulses, always raise the tool to see what the metal is doing. This will take some practice.
 Types and Uses of Tinman Shears
(1) STRAIGHT BLADE SHEARS
For cutting straight lines.
(2) CURVED BLADE SHEARS
The blades are smoothly curved. Suitable for straight or curved cutting.
(3) SCOOPED BLADE SHEARS
The entire blade is be ...
 Shrinking the Sheet Metal
Plastic deformation may cause reduced panel thickness and the panel may stretch. Even when it is repaired using a hammer and dolly, the panel tends to bulge, losing its original shape.
In such cases, ...
Other materials:
Work Procedure
Always perform the distance sensor configuration after replacing the distance sensor.
Always perform the radar alignment after removing and installing or replacing the distance sensor.
CAUTION:
The system does not operate normally unless the distance sensor configuration and the radar alignment are ...
Front Disc Brake
Unit: mm (in)
Item Limit Brake pad Wear thickness 2.0 (0.079) Disc rotor Wear thickness 27.4 (1.079) Thickness variation (measured at 8 positions)* 0.006 (0.0002) Runout (with it attached to the vehicle) 0.035 (0.0014)
*To check if rotor imbalance, rotor runout or rotor deformation is o ...
Maximum Gross Vehicle Weight (GVW)/maximum Gross Axle Weight (GAW)
The total Gross Vehicle Weight (GVW) of your Nissan Armada must never exceed
the Gross Vehicle Weight Rating (GVWR) indicated on the F.M.V.S.S./C.M.V.S.S. certification
label.
GVW represents the combined weight of the Nissan Armada, including passengers,
cargo, luggage, hitch equipment, t ...

0.0055