
Nissan Armada 2025-2026 Service and Repair Manual: Work Flow
WORK FLOW
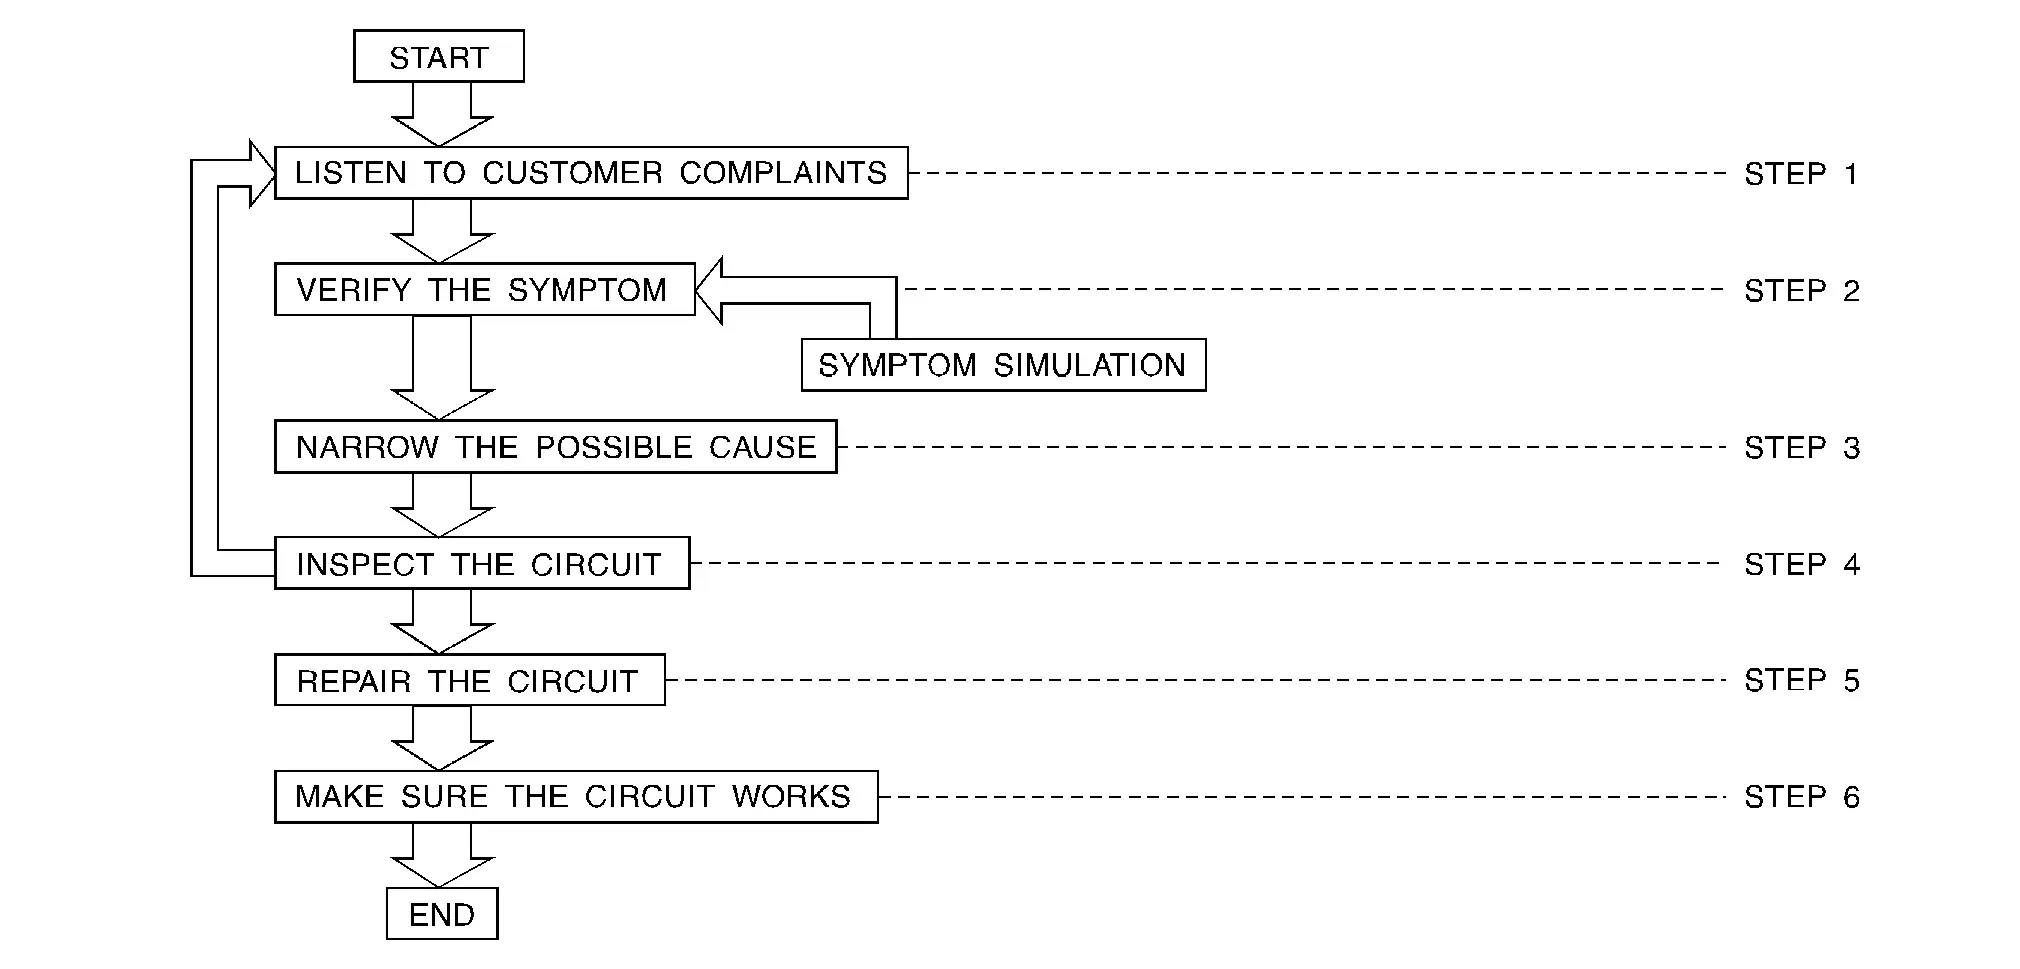
| STEP | DESCRIPTION | |
|---|---|---|
| STEP 1 | Get detailed information about the conditions and the environment when the incident occurred. The following are key pieces of information required to make a good analysis: | |
| WHAT | Vehicle Model, Engine, Transmission/Transaxle and the System (i.e. Radio). | |
| WHEN | Date, Time of Day, Weather Conditions, Frequency. | |
| WHERE | Road Conditions, Altitude and Traffic Situation. | |
| HOW | System Symptoms, Operating Conditions (Other Components Interaction). Service History and if any After Market Accessories have been installed. | |
| STEP 2 | Operate the system, road test if necessary. Verify the parameter of the incident. If the problem cannot be duplicated, refer to “Incident Simulation Tests�. | |
| STEP 3 | Get the proper diagnosis materials together including:
| |
| STEP 4 | Inspect the system for mechanical binding, loose connectors or wiring damage. Determine which circuits and components are involved and diagnose using the Power Supply Routing and Harness Layouts. | |
| STEP 5 | Repair or replace the incident circuit or component. | |
| STEP 6 | Operate the system in all modes. Verify the system works properly under all conditions. Check you have not inadvertently created a new incident during your diagnosis or repair steps. | |

 Control Units and Electrical Parts
PRECAUTIONS
Never reverse polarity of battery terminals.
Install only parts specified for a vehicle.
Before replacing the control unit, check the input and output and functions of the component parts. ...
Other materials:
Removal & Installation
CAUTION:
Before replacing audio amp, perform "ADDITIONAL SERVICE WHEN REPLACING audio AMP". Refer to Work Procedure.
REMOVAL
Remove luggage side lower finisher RH. Refer to Removal and Installation.
Remove the audio amp. mounting nut , and then remove the audio amp. .
Disconnect the audio amp. har ...
Inner Sill
WARNING:
Work after lower side dash assembly, center pillar, outer sill, and inner center pillar are removed.
Unit: mm (in) : Vehicle front : Drill φ7 mm (0.28 in) hole for the plug welding hole (ultra high strength steel). : Drill φ8 mm (0.31 in) hole for the plug welding hole (ultra high stren ...
Exploded View
Front cover Dowel pin Oil pressure sensor Oil temperature sensor Crankshaft pulley bolt Crankshaft pulley Front oil seal O-ring(oil line) O-ring(water line) Comply with the installation procedure when tightening. Refer to Removal & Installation. : N·m (kg-m, ft-lb) : Always replac ...

0.0058