
Nissan Armada 2025-2026 Service and Repair Manual: Work Flow
OVERALL SEQUENCE
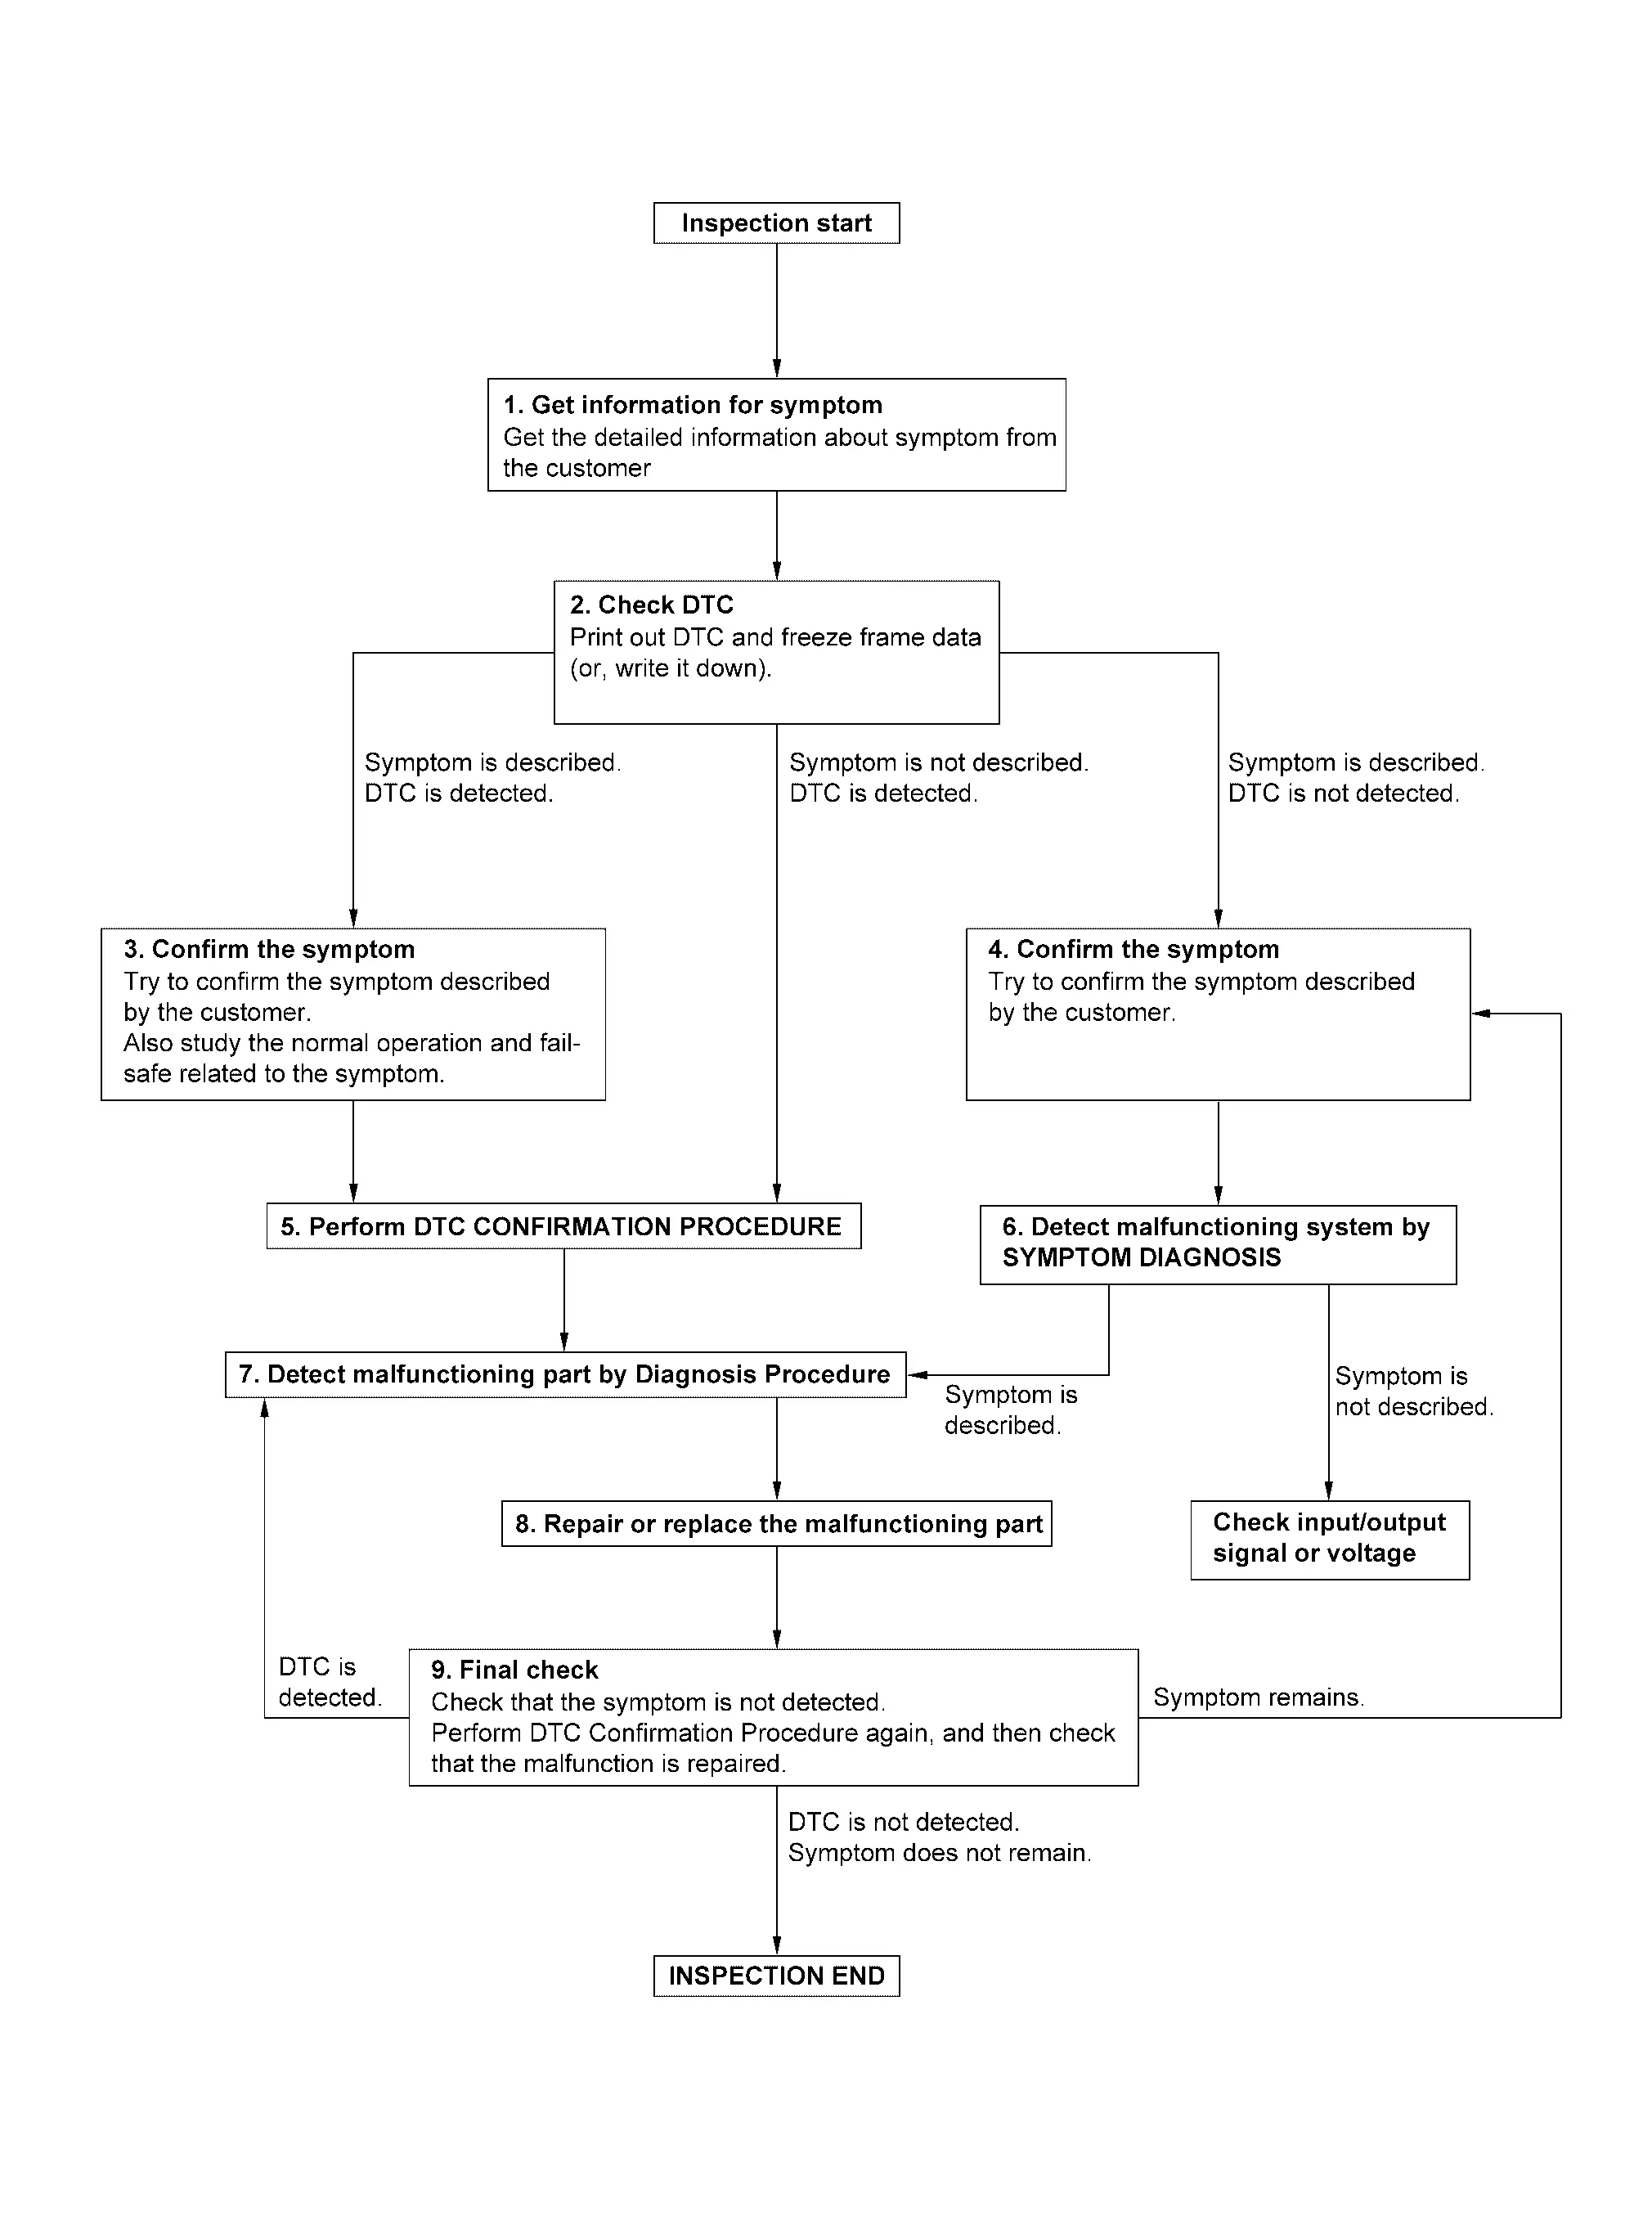
DETAILED FLOW
GET INFORMATION FOR SYMPTOM
Check operation condition of the function that is malfunctioning.
GO TO 2.
CHECK DTC
Check DTC.
Perform the following procedure if DTC is detected.
Record DTC and freeze frame data (Print them out using CONSULT.)
Erase DTC.
Are any symptoms described and any DTC detected?
Symptom is described, DTC is detected>>GO TO 3.
Symptom is described, DTC is not detected>>GO TO 4.
Symptom is not described, DTC is detected>>GO TO 5.
CONFIRM THE SYMPTOM
Try to confirm the symptom described by the customer.
Also study the normal operation and fail-safe related to the symptom.
>>GO TO 5.
CONFIRM THE SYMPTOM
Try to confirm the symptom described by the customer.
>>GO TO 6.
PERFORM DTC CONFIRMATION PROCEDURE
 NOTE:
NOTE:
Freeze frame data is useful if the DTC is not detected.
Is DTC detected?
YES>>GO TO 7.
NO>>Check according to Intermittent Incident.
DETECT MALFUNCTIONING SYSTEM BY SYMPTOM DIAGNOSIS
Is the symptom described?
YES>>GO TO 7.
NO>>DETECT MALFUNCTIONING PART BY DIAGNOSIS PROCEDURE
Inspect according to Diagnosis Procedure of the system.
Is malfunctioning part detected?
YES>>GO TO 8.
NO>>Check according to Intermittent Incident.
REPAIR OR REPLACE THE MALFUNCTIONING PART
Repair or replace the malfunctioning part.
Check DTC. If DTC is detected, erase it.
GO TO 9.
FINAL CHECK
Is DTC detected and does symptom remain?
YES-1>>DTC is detected: GO TO 7.
YES-2>>Symptom remains: GO TO 4.
NO>>Before returning the vehicle to the customer, always erase DTC.

 Additional Service When Replacing Power Window Motor
When each power window motor replaced, the initialization is necessary for normal operation of power window system. Refer to Work Procedure.
CAUTION:
The following specified operations cannot be perfo ...
Other materials:
Removal and Installation
REMOVAL
Fully open hood assembly.
Remove fixing clips .
Remove fixing clips .
Disengage front grille fixing clips to secure workspace, and then remove front grille upper .
: Clip
Disengage fixing clips and pawls, and then remove front grille.
: Clip : Pawl
Remove the following parts ...
Removal and Installation
REMOVAL
Remove back door inner finisher. Refer to Removal and Installation.
Disconnect back door touch sensor harness connector .
Remove back door touch sensor fixing clips.
: Clip
Remove harness grommet from back door panel, and then pull out back door touch sensor harness from back door pa ...
Inspection
INSPECTION AFTER REMOVAL
Check the following items, and replace the part if necessary.
Ball Joint Inspection
Check boots of upper link, lower link and steering outer socket ball joint for breakage, axial play, and swing torque:
Upper link: Refer to Inspection.
Lower link: Refer to Inspection.
Steeri ...

0.0049