Exploded View
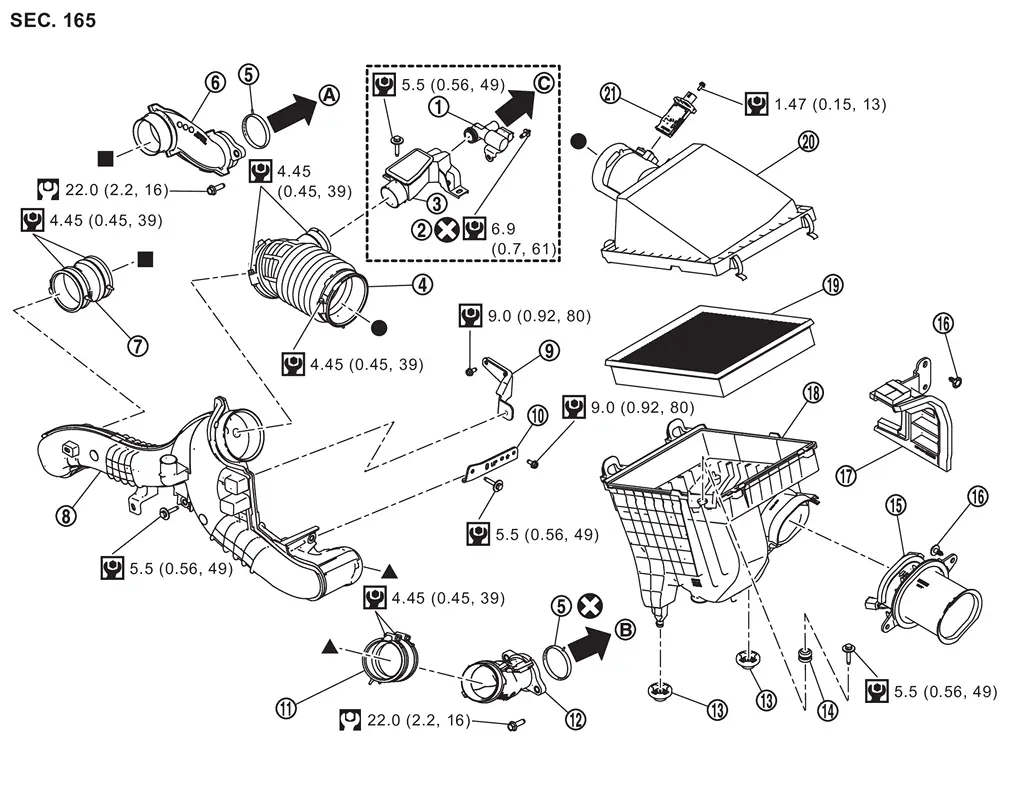
 |
Crankcase ventilation valve* |  |
Crankcase ventilation valve bolt* |  |
Resonator* |
 |
Air duct 1 |  |
Gasket |  |
Air duct 3 (bank 1) |
 |
Air duct 2 (bank 1) |  |
Inlet air duct 2 |  |
Bracket 1 |
 |
Bracket 2 |  |
Air duct 2 (bank 2) |  |
Air duct 3 (bank 2) |
 |
Grommet |  |
Mounting rubber |  |
Inlet air duct 1 |
 |
Clip |  |
Air guide |  |
Air cleaner body |
 |
Air cleaner filter |  |
Air cleaner cover |  |
Mass air flow sensor |
 |
To turbocharger assembly (bank 1). Refer to Exploded View. |  |
To turbocharger assembly (bank 2). Refer to Exploded View. |  |
To rocker cover (bank 2). Refer to Exploded View. |
 |
: Always replace after every disassembly. | ||||
 |
: N·m (kg-m, ft-lb) | ||||
 |
: N·m (kg-m, in-lb) | ||||
 , , , ,  : Indicates that the parts is connected at points with same symbols in actual vehicle. : Indicates that the parts is connected at points with same symbols in actual vehicle. |
|||||
* When removing the crankcase ventilation valve exchange as a set.
Removal & Installation
REMOVAL
 NOTE:
NOTE:
The mass airflow sensor can be removed while still installed on the air cleaner cover.
Pinch the clip on the air cleaner cover to release the lock, and remove the air cleaner cover.
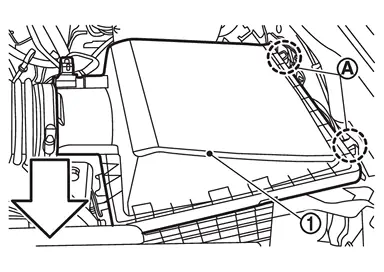
| : vehicle front |
Remove air cleaner filter from air cleaner body .
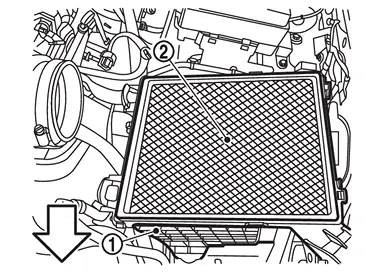
| : vehicle front |
INSTALLATION
Install in the reverse order of removal.
-
Insert part
of air cleaner cover into part of air cleaner body and lock it with clip .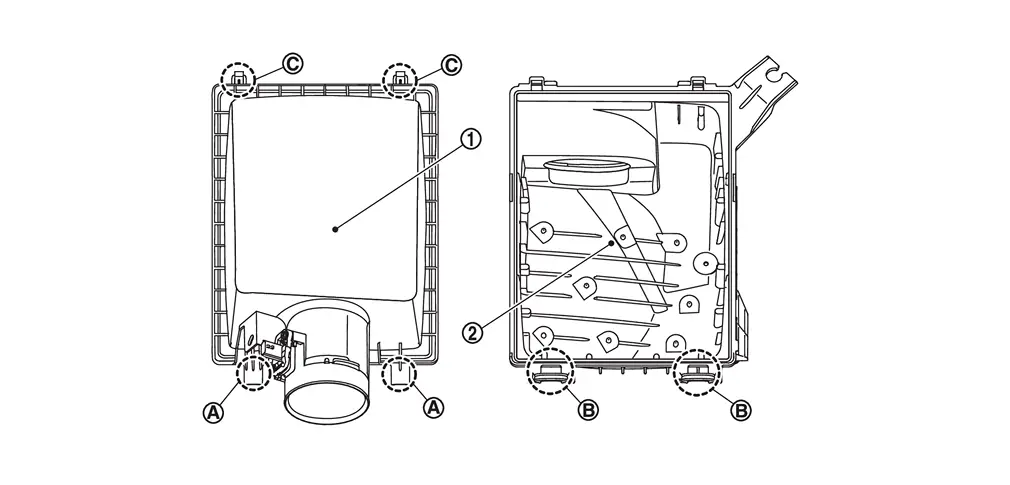
Inspection
INSPECTION AFTER REMOVAL
Examine with eyes that there is no stain, clogging, or damage on air cleaner filter.
-
Remove dusts (such as dead leafs) on air cleaner filter surface and inside cleaner case.
-
To clean air cleaner element, blow it from intake manifold side towards air intake side to remove trash or dust.
-
If clogging or damage is observed, replace the air cleaner filter.
MAINTENANCE INTERVAL
Refer to Periodic Maintenance.
Other materials
Vr35ddtt Tools and Preparation
Preparation
Special Service Tools
NOTE:
The actual shapes of TechMate tools may differ from those of special service tools illustrated here.
Tool number
(TechMate No.)
Tool name Description
KV10120000
(—)
Fuel tube adapter
Measuring fuel pressure
Commercial Service Tools
Tool name
(Te ...
Noise, Vibration and Harshness (nvh) Troubleshooting
NVH Troubleshooting Chart
Use the chart below to find the cause of the symptom. The numbers indicate the order of the inspection. If necessary, repair or replace these parts.
SUSPECTED PARTS
(Possible cause) Symptom Reference
Transfer fluid leakage Noise
TRANSFER FLUID (Level low)
1 ...
Cowl Top
Exploded View
Cowl top seal
Cowl top side seal
EPT seal [t: 15.0 mm (0.591 in)]
Cowl top cover
Cowl top clip
EPT seal [t: 3.0 mm (0.118 in)]
EPT seal [t: 10.0 mm (0.394 in)]
EPT seal [t: 10.0 mm (0.394 in)]
EPT seal [t: 3.0 mm (0.118 in)]
EPT seal [t: 3.0 mm (0.118 in ...