Exploded View
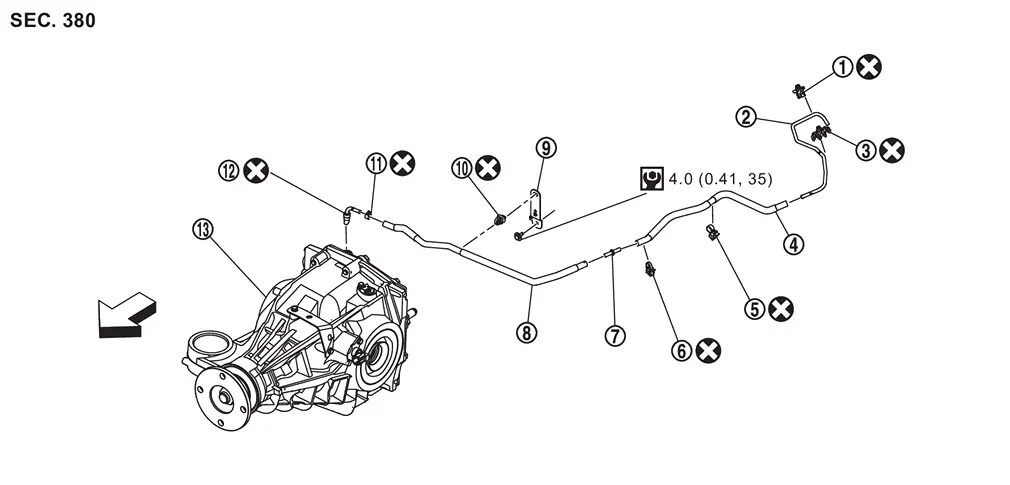
 |
Clip A |  |
Air breather tube |  |
Clip B |
 |
Air breather hose A |  |
Clip C |  |
Clip D |
 |
Hose connector |  |
Air breather hose B |  |
Bracket |
 |
Clip E |  |
Hose clamp |  |
Air breather |
 |
Rear final drive assembly | ||||
| : vehicle front | |||||
 : N·m (kg-m, in-lb) : N·m (kg-m, in-lb) |
|||||
 : Always replace after every disassembly. : Always replace after every disassembly. |
|||||
Removal and Installation
WARNING:
-
Jacking up or lift up the vehicle may the vehicle height to go down which cause a personal injury and/or damage to the air suspension component parts. Refer to Precaution for when Jacking and Lifting Up the vehicle with Electronic Air Suspension System.
REMOVAL
Remove the hose clamp and separate air breather hose B from air breather .
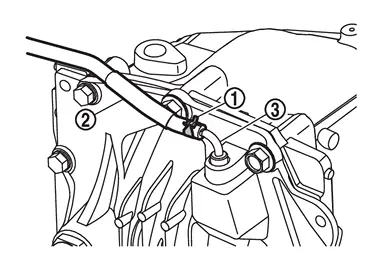
Remove clip E from bracket .
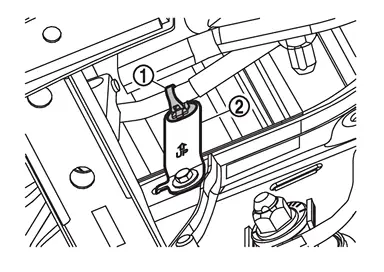
Remove bracket mounting bolt ( ) and remove bracket .
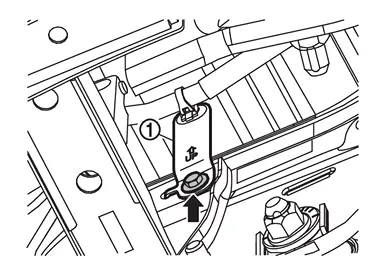
Remove clip D from body frame .
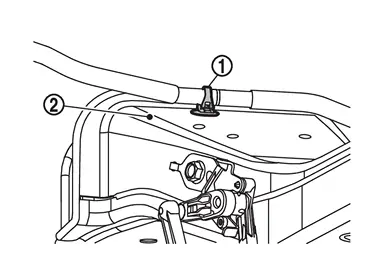
Remove clip C from body frame .
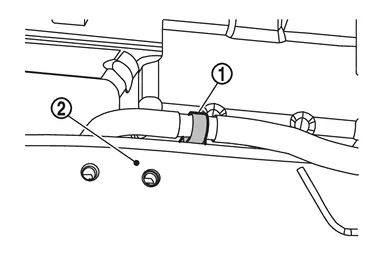
Remove air breather hose A from air breather tube .
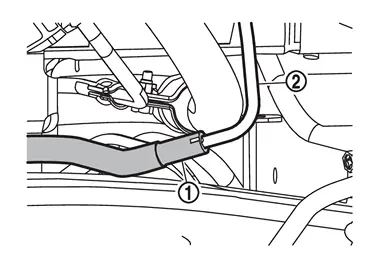
Remove air breather hose assembly.
Remove clip B from bracket .
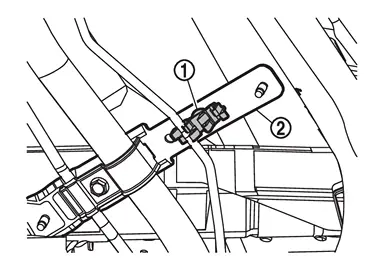
Remove clip A from bracket and remove air breather tube.
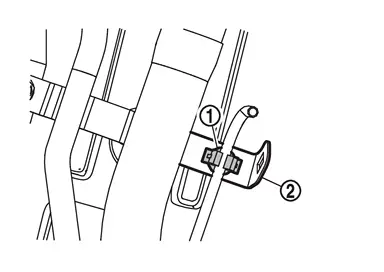
Separate each component part.
INSTALLATION
Note the following, and install in the reverse order of removal.
-
For non-reusable parts, refer to Exploded View.
-
When inserting air breather hose A to air breather tube, align the paint mark
 of air breather hose A with the paint mark
  of breather tube.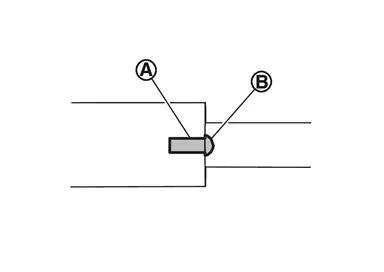
-
When inserting air breather hose to hose connector
, be sure to insert it fully until its end reaches the stop.CAUTION:
Align paint mark
on each air breather hose.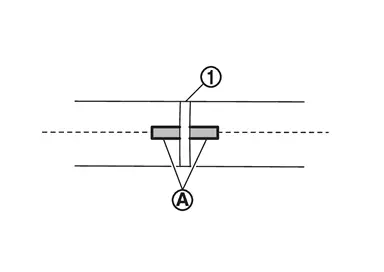
-
When installing air breather to final drive assembly, Install air breather so that the paint mark
on it faced forward of the vehicle.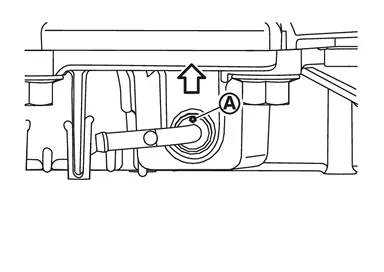
: vehicle front -
When inserting air breather hose B into the air breather, align paint mark
on air breather hose B and tab on the hose clamp with the paint mark on the air breather.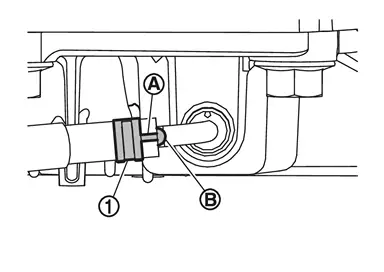
Other materials
Basic information
WARNING
In the Nissan Armada, always keep the doors securely locked while driving.
Combined with proper seat belt use, this significantly enhances passenger safety
by reducing the risk of ejection during an accident and preventing unauthorized
access from outside.
Before opening any d ...
Additional Service When Replacing Electrical Brake Control Unit
Work Procedure
DescriptionWhen replacing the electrical brake control unit, the procedures of AFTER REPLACEMENT must be performed.CAUTION:
If the electrical brake control unit is undamaged, do not decide to replace it based on DTC detected in the past.AFTER REPLACEMENTAfter replacing the electrical ...
Passenger Side
Removal and Installation
CAUTION:
Never bend the pawl of power window switch finisher.REMOVAL
Remove front door finisher (passenger side). Refer to Removal & Installation.
Disengage door lock and unlock switch (passenger side) fixing pawls using a remover tool (A), and then remove door lock a ...