Body Construction
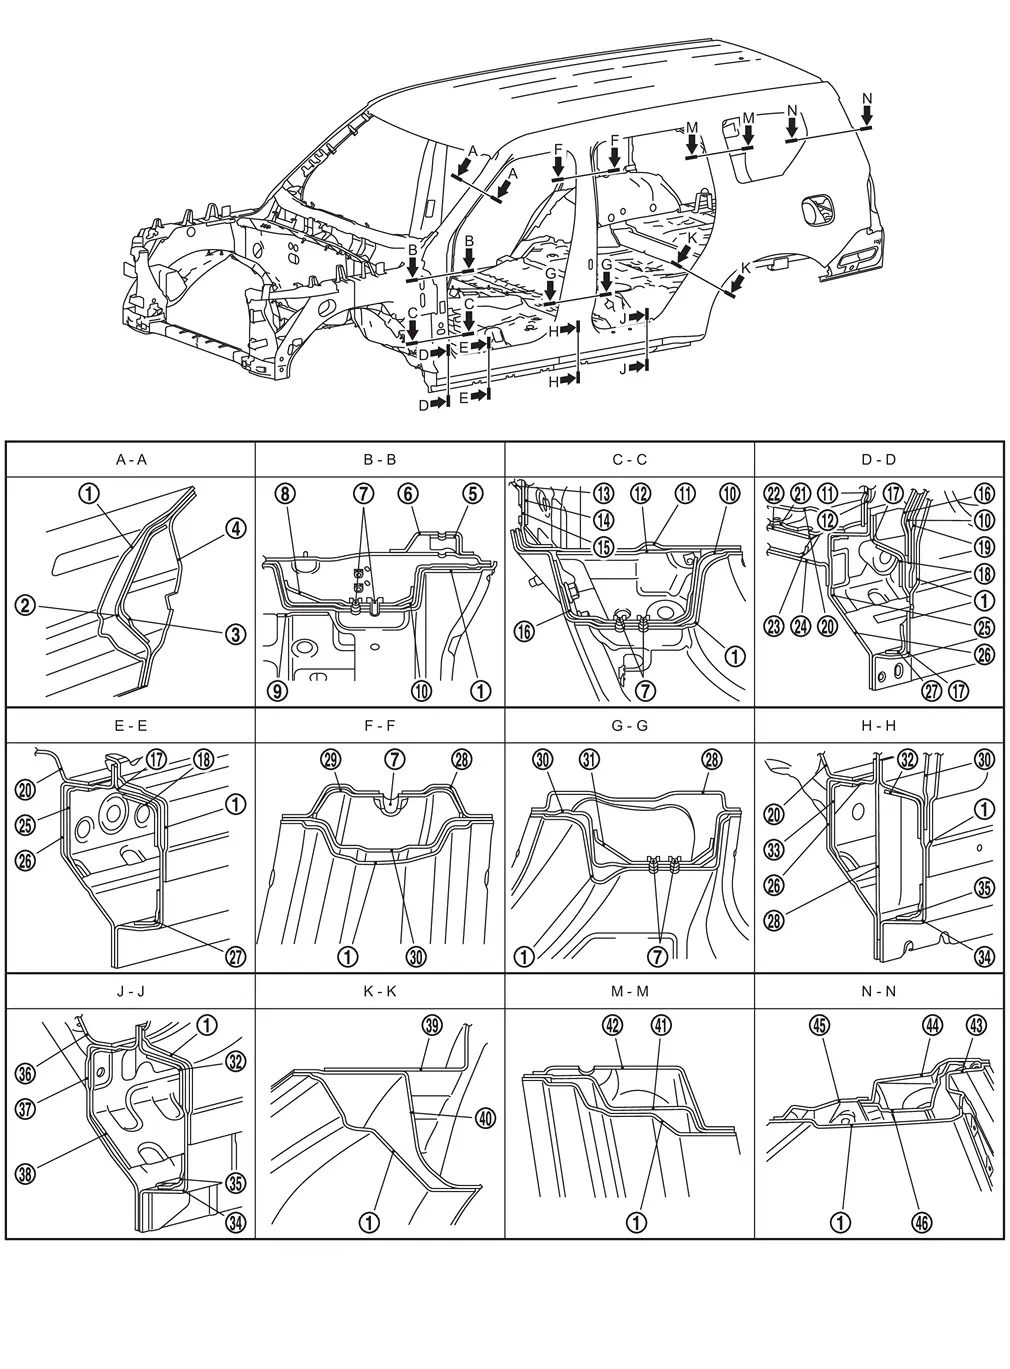
 |
Outer side body |  |
Outer front pillar reinforcement |  |
Upper front pillar reinforcement |
 |
Upper inner front pillar |  |
Side dash reinforcement (Upper) |  |
Upper side dash |
 |
Weld nut |  |
Upper hinge plate |  |
Hoodledge reinforcement |
 |
Upper front pillar hinge brace |  |
Side dash |  |
Side dash reinforcement (Lower) |
 |
Lower dash bracket |  |
Lower dash reinforcement |  |
Lower dash |
 |
Lower front pillar reinforcement |  |
Outer sill reinforcement (Outer front) |  |
Outer sill reinforcement (Upper front) |
 |
Outer front sill reinforcement |  |
Front floor |  |
Inner gusset reinforcement |
 |
2nd body member mounting |  |
Outer gusset reinforcement |  |
2nd body bracket mounting |
 |
Inner sill reinforcement (Front) |  |
Inner sill |  |
Outer sill reinforcement (Lower front) |
 |
Inner center pillar |  |
Inner center pillar reinforcement |  |
Center pillar hinge brace |
 |
Lower hinge plate |  |
Outer sill reinforcement (Upper rear) |  |
Inner sill reinforcement (Rear) |
 |
Outer sill reinforcement (Outer rear) |  |
Outer sill reinforcement (Lower rear) |  |
Rear floor front |
 |
Inner sill extension |  |
Side step bracket |  |
Sill closing plate |
 |
Outer rear wheelhouse |  |
Inner side panel reinforcement |  |
Inner rear pillar |
 |
Back pillar main |  |
Inner back pillar |  |
Lower inner rear pillar |
 |
Back pillar reinforcement |
Fusible Insulator Applying Part
Apply the fusible insulator (melsheet) to the floor upper surface and dashboard panel interior side to block noise, vibration, and exhaust gas heat.
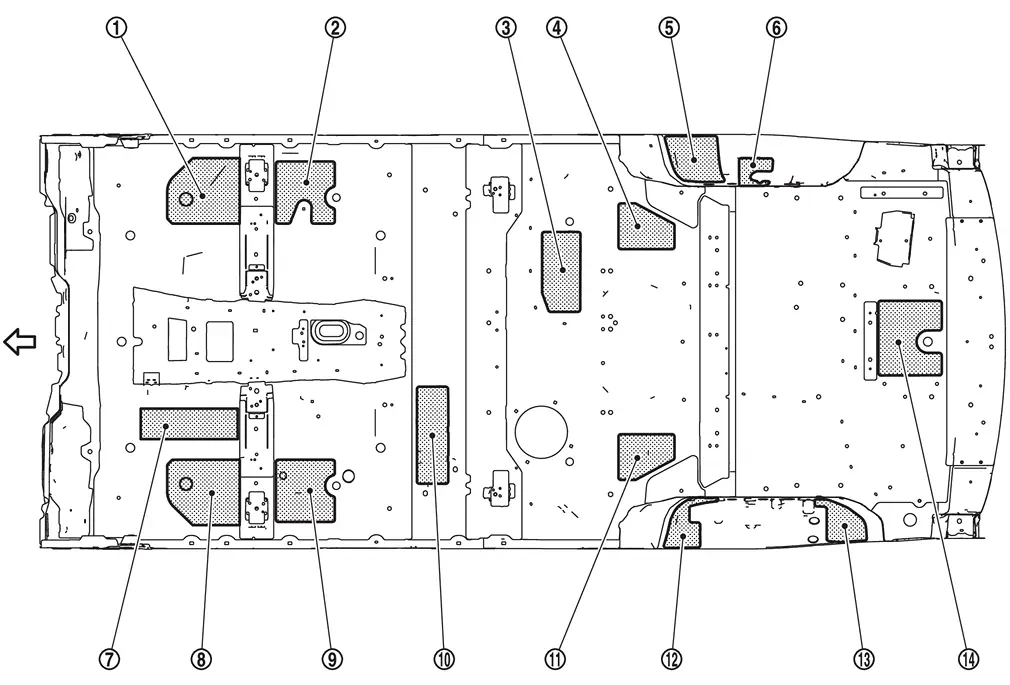
Unit: mm (in)
|
T=4.0 (0.157) | |
T=3.0 (0.118) | |
T=4.0 (0.157) |
|
T=4.0 (0.157) | |
T=3.0 (0.118) | |
T=3.0 (0.118) |
|
T=4.0 (0.157) | |
T=4.0 (0.157) | |
T=3.0 (0.118) |
|
T=4.0 (0.157) | |
T=4.0 (0.157) | |
T=3.0 (0.118) |
|
T=3.0 (0.118) | |
T=3.0 (0.118) | ||
|
: vehicle front  : Fusible insulator applying part : Fusible insulator applying part |
|||||
LEFT SIDE VIEW
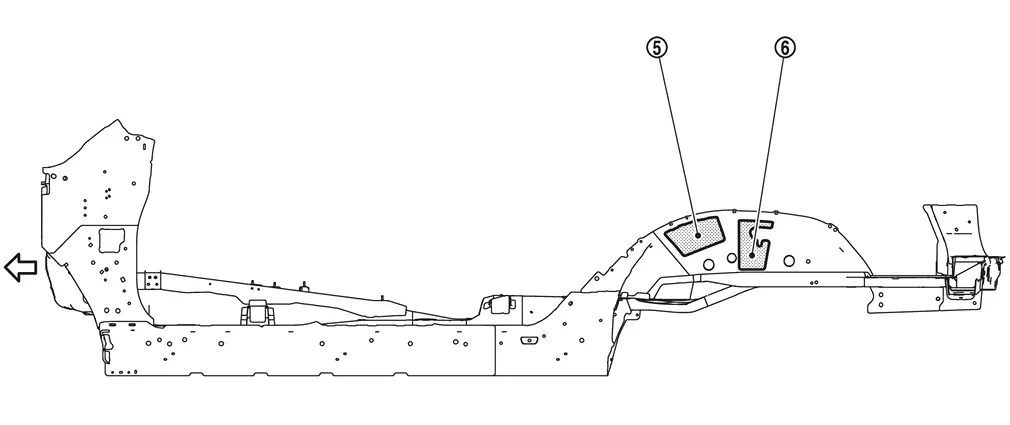
Unit: mm (in)
|
T=3.0 (0.118) | |
T=3.0 (0.118) | ||
|
: vehicle front : Fusible insulator applying part |
|||||
RIGHT SIDE VIEW
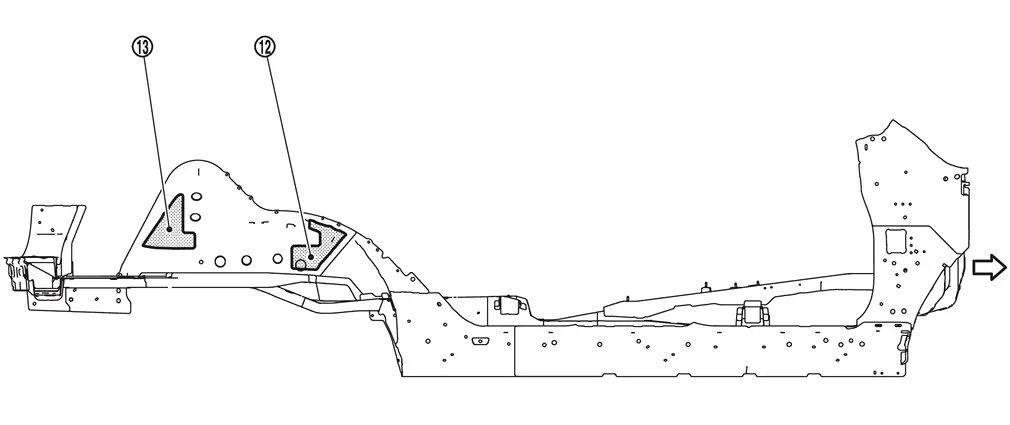
Unit: mm (in)
|
T=3.0 (0.118) | |
T=3.0 (0.118) | ||
|
: vehicle front : Fusible insulator applying part |
|||||
DASH PANEL
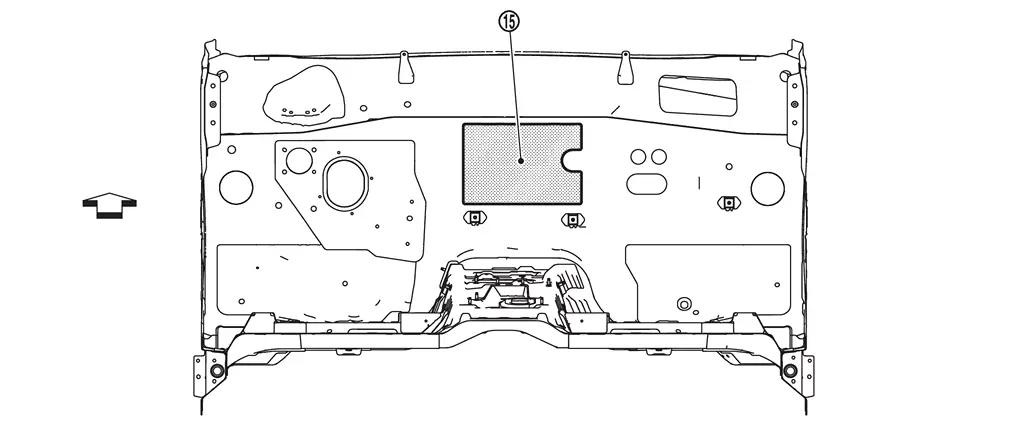
Unit: mm (in)
|
T=3.5 (0.138) | ||||
|
: vehicle front : Fusible insulator applying part |
|||||
Other materials
Sunshade Motor Assembly
Exploded View
Refer to Exploded View.
Removal and Installation
REMOVALCAUTION:
Before removing sunshade motor, check that sunshade is fully opened.
After removing sunshade motor, never attempt to rotate sunshade motor assembly as a single unit.
Remove headlining to make work space. Refer to Rem ...
Av Control Unit
Exploded View
Bracket RH
AV control unit
Bracket LH
: vehicle front
Removal & Installation
CAUTION:
Before replacing AV control unit, perform "ADDITIONAL SERVICE WHEN REPLACING AV CONTROL UNIT". For details, Refer to Work Procedure.ADDITIONAL SERVICE WHEN REPLACINGIf the following ...
Microphone
Removal & Installation
REMOVALRemove the map lamp assembly. Refer to Removal and Installation.
Remove the microphone harness connector .
Use a suitable tool to release pawls and remove the switch finisher .
: Pawls
CAUTION:
Do not damage pawls.
Use a suitable tool to release pawl and re ...