Removal & Installation
REMOVAL
Remove the map lamp assembly. Refer to Removal and Installation.
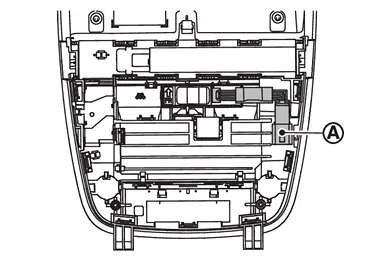
Remove the microphone harness connector  .
.
Use a suitable tool to release pawls and remove the switch finisher  .
.
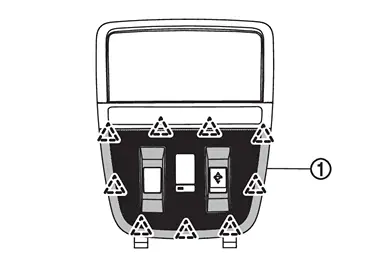
 |
: Pawls |
CAUTION:
Do not damage pawls.
Use a suitable tool to release pawl and remove the microphone .
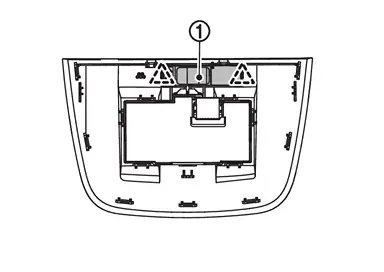
|
: Pawls |
CAUTION:
Do not damage pawls.
INSTALLATION
Installation is in the reverse order of removal.
 NOTE:
NOTE:
Check the microphone for looseness after the installation.
Other materials
STANDARD mode
The symbol of this Nissan Armada mode is
.
STANDARD mode is the default setting in the Nissan Armada and is optimized for
everyday driving. It provides a balanced combination of performance, comfort, and
efficiency suitable for most road conditions.
ECO mode
Basic information
The symbol of ...
Second Seat Cushion Finisher
Disassembly and Assembly
CAUTION:
When disassemble, always use a remover tool that is made of plastic to prevent damage.OUTSIDE SEAT CUSHION FINISHER OUTERDisassemblyDisengage fixing pawls, and then remove reclining knob cap.
: Pawl
Disengage fixing portion using a remover tool (A) according ...
Personal Lamp
Exploded View
Headlining assembly
Personal lamp
Personal lamp bracket
: Pawl
: vehicle front
Removal and Installation
CAUTION:
Disconnect the battery negative terminal or remove power circuit fuse when performing the operation for preventing electric leakage. Refer to Precautions ...