Inspection
WARNING:
-
Jacking up or lift up the vehicle may the vehicle height to go down which cause a personal injury and/or damage to the air suspension component parts. Refer to Precaution for when Jacking and Lifting Up the vehicle with Electronic Air Suspension System.
BRAKE FLUID LEVEL
-
Check that the brake fluid level in the reservoir tank is within the standard (between MAX − MIN lines).
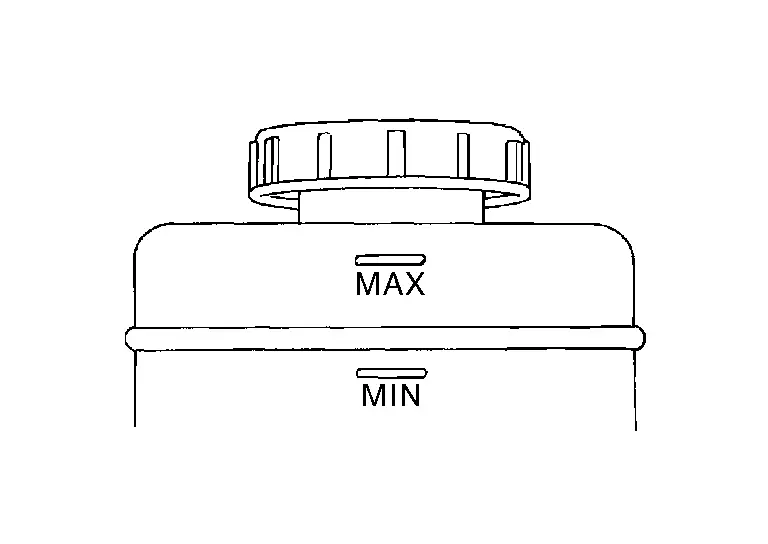
-
Visually check for any brake fluid leakage around the reservoir tank.
-
Check the brake system for any leakage if the fluid level is extremely low (lower than MIN).
-
Check the brake system for fluid leakage if the warning lamp remains illuminated even after the parking brake is released.
-
Check the reservoir tank for the mixing of foreign matter (e.g. dust) and oils other than brake fluid.
BRAKE LINE
Check brake line (tubes and hoses) for cracks, deterioration or other damage. Replace any damaged parts.
Depress the brake pedal with a force of 785 N (80 kg, 176 lb) and hold down the pedal for approximately 5 seconds with the engine running. Check for any fluid leakage.
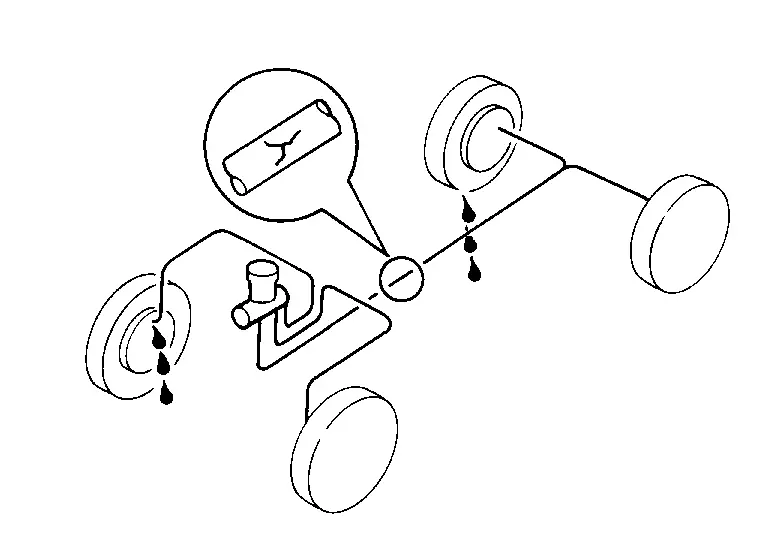
CAUTION:
Retighten the applicable connection to the specified torque and repair any abnormal (damaged, worn or deformed) part if any brake fluid leakage is present.
Draining
WARNING:
-
Jacking up or lift up the vehicle may the vehicle height to go down which cause a personal injury and/or damage to the air suspension component parts. Refer to Precaution for when Jacking and Lifting Up the vehicle with Electronic Air Suspension System.
IN CASE REPLACING OR REMOVING AND INSTALLING ELECTRICAL BRAKE CONTROL UNIT
Regarding brake fluid draining, refer to Work Procedure.
IN CASE NOT REPLACING OR REMOVING AND INSTALLING ELECTRICAL BRAKE CONTROL UNIT
CAUTION:
-
Never spill or splash brake fluid on painted surfaces. Brake fluid may seriously damage paint. Wipe it off immediately and wash with water if it gets on a painted surface.
-
The ignition switch OFF and disconnect the ABS actuator and electric unit (control unit) harness connector or the battery negative terminal before performing work.
Connect a vinyl tube to the bleed valve.
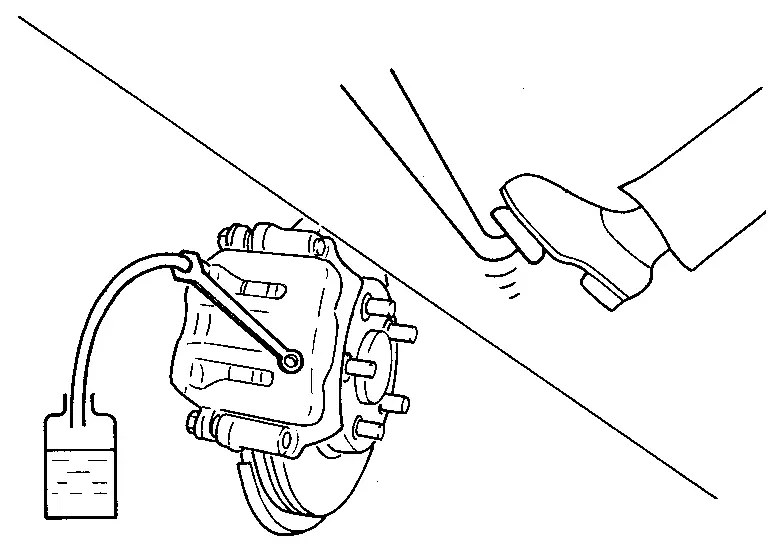
Depress the brake pedal and loosen the bleeder valve to gradually discharge brake fluid.
Refilling
WARNING:
-
Jacking up or lift up the vehicle may the vehicle height to go down which cause a personal injury and/or damage to the air suspension component parts. Refer to Precaution for when Jacking and Lifting Up the vehicle with Electronic Air Suspension System.
IN CASE REPLACING OR REMOVING AND INSTALLING ELECTRICAL BRAKE CONTROL UNIT
Regarding brake fluid draining, refer to Work Procedure.
IN CASE NOT REPLACING OR REMOVING AND INSTALLING ELECTRICAL BRAKE CONTROL UNIT
CAUTION:
-
The ignition switch OFF and disconnect the ABS actuator and electric unit (control unit) harness connector or the battery negative terminal before performing work.
-
Never spill or splash brake fluid on painted surfaces. Brake fluid may seriously damage paint. Wipe it off immediately and wash with water if it gets on a painted surface.
Check that there is no foreign material in the reservoir tank, and refill with new brake fluid.
| Recommended brake fluid | : Refer to Fluids and Lubricants. |
CAUTION:
-
Never reuse drained brake fluid.
-
Never allow foreign matter (e.g. dust) and oils other than brake fluid to enter the reservoir tank.
Loosen the bleeder valve, slowly depress the brake pedal to the full stroke, and then release the pedal. Repeat this operation at intervals of 2 or 3 seconds until new brake fluid is discharged. Then close the bleeder valve with the brake pedal depressed. Repeat the same work on each wheel.
Perform the air bleeding. Refer to Work Procedure.
Bleeding Brake System
WARNING:
-
Jacking up or lift up the vehicle may the vehicle height to go down which cause a personal injury and/or damage to the air suspension component parts. Refer to Precaution for when Jacking and Lifting Up the vehicle with Electronic Air Suspension System.
CAUTION:
Bleed the air using CONSULT. (Unable to bleed the air without using CONSULT)
Regarding brake fluid bleeding, refer to Work Procedure.
Other materials
Fuel Pressure Check
Work Procedure
FUEL PRESSURE RELEASEFUEL PRESSURE RELEASE
Remove fuel pump fuse.
NOTE:
For the fuse number, Refer to Wiring Diagram.
For the fuse arrangement.
Start engine.
After engine stalls, crank it two or three times to release all fuel pressure.
Ignition switch OFF.
Reinstall f ...
Side Oil Seal
Exploded View
Side oil seal
Front final drive assembly
: Always replace after every disassembly.
Removal and Installation
WARNING:
Jacking up or lift up the vehicle may the vehicle height to go down which cause a personal injury and/or damage to the air suspension component ...
Second Seat Cushion Finisher
Disassembly and Assembly
CAUTION:
When disassemble, always use a remover tool that is made of plastic to prevent damage.OUTSIDE SEAT CUSHION FINISHER OUTERDisassemblyDisengage fixing pawls, and then remove reclining knob cap.
: Pawl
Disengage fixing portion using a remover tool (A) according ...