Inspection and Adjustment
INSPECTION
Brake Pedal Height
Check the height (H1) between the floor panel  and the brake pedal upper surface.
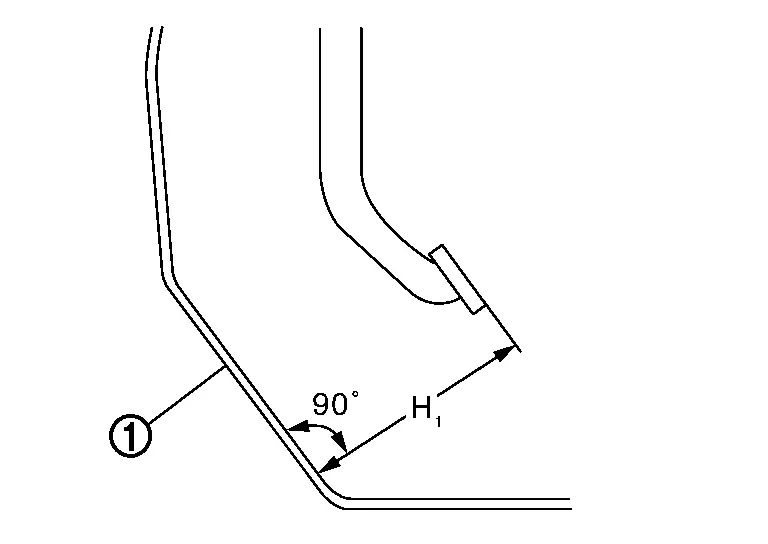
| H1 | : Refer to Brake Pedal. |
CAUTION:
Remove the front floor carpet.
Stop Lamp Switch
Check the clearance (A) among the brake pedal lever  and the stop lamp switch mounting bracket
  .
.
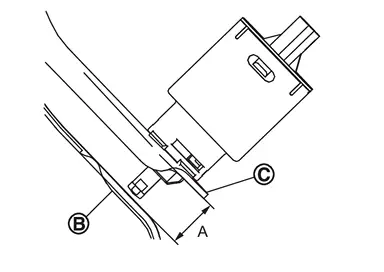
| A | : Refer to Brake Pedal. |
CAUTION:
The stop lamp must turn off when the brake pedal is released.
 NOTE:
NOTE:
Never touch the brake pedal (pad) when checking the clearance between brake pedal lever and stop lamp switch.
Brake Pedal Play
Press the brake pedal. Check the brake pedal play (A) (stroke until fluid pressure occurs).
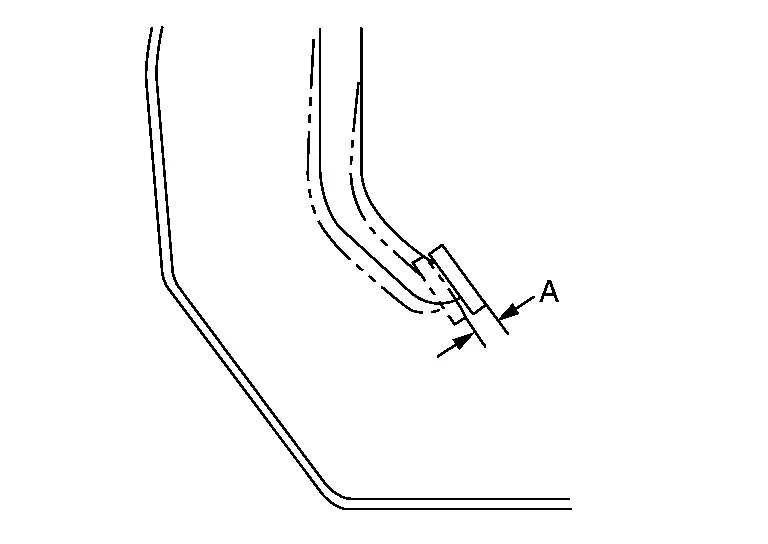
| A | : Refer to Brake Pedal. |
Depressed Brake Pedal Height
Check the height between the floor panel and the brake pedal upper surface (H2) when depressing the brake pedal at 490 N (50 kg, 110 lb) while engine ON.
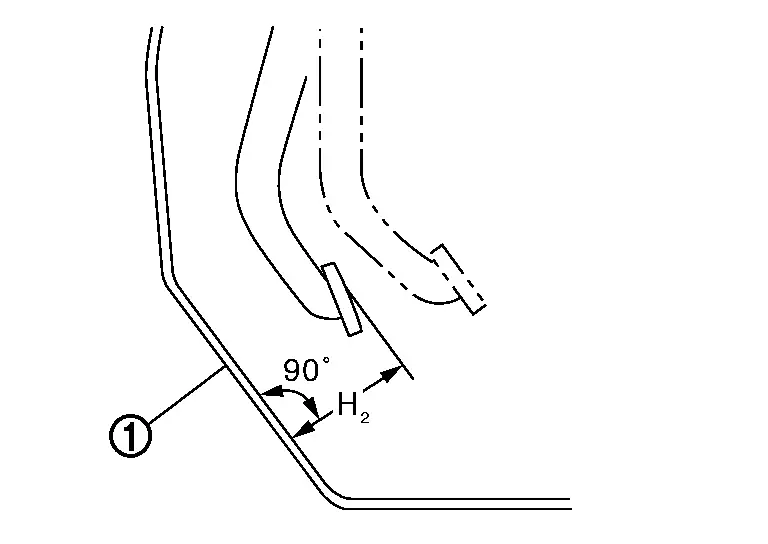
| H2 | : Refer to Brake Pedal. |
CAUTION:
Remove the front floor carpet.
ADJUSTMENT
Brake Pedal Height
Perform the following procedure when brake pedal height is not within the specified value because brake pedal height is not adjustable.
Replace brake pedal assembly when input rod length is within specified value. Refer to Inspection.
Stop Lamp Switch
Remove instrument lower panel LH. Refer to Removal and Installation.
Disconnect the harness connector from stop lamp switch.
Loosen the stop lamp switch 90 degree counterclockwise.
Install stop lamp switch , follow the procedure below.
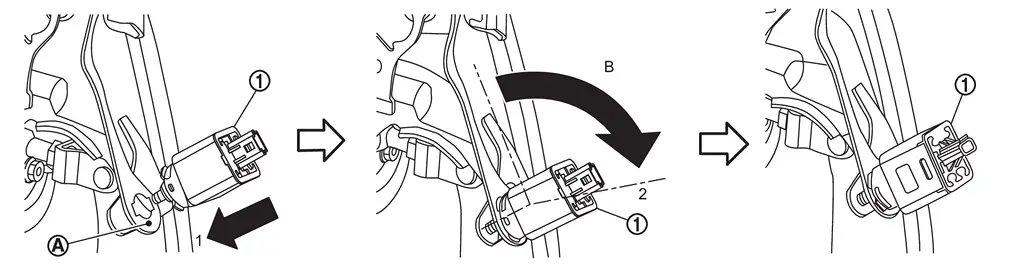
 .
.
| B | : About 90 degree |
CAUTION:
-
The clearance (A) between the brake pedal lever
and stop lamp switch mounting bracket must be the specified value.A : Refer to Brake Pedal. -
The stop lamp must be turned off when the brake pedal is released.
Depressed Brake Pedal Height
Perform the air bleeding. Refer to Work Procedure.
Check the height between the floor panel and the brake pedal upper surface (H2) when depressing the brake pedal at 490 N (50 kg, 110 lb) while engine ON.
| H2 | : Refer to Brake Pedal. |
CAUTION:
Remove the front floor carpet.
Other materials
File menu
The file menu in the Nissan Armada driving recorder system allows users to conveniently
manage all recorded content, including photos and video files. Through this interface,
you can view, organize, and delete stored media directly from the touchscreen display,
making it easy to maintain stora ...
Back Door Upper Garnish
Removal and Installation
CAUTION:
Never damage the back door panel.REMOVALCAUTION:
When removing, always use a remover tool that is made of plastic to prevent damage to the parts.Fully open back door.
Apply protective tape (A) on back door panel to protect it from damage.
Disengage back door upper ...
Advanced Ambient Light (instrument Panel Passenger Side)
Exploded View
Instrument finisher B
Advanced ambient light (instrument panel passenger side)
Indirect light RH
: Pawl
: vehicle front
Removal and Installation
CAUTION:
Disconnect the battery negative terminal or remove power circuit fuse when performing the operation for preventin ...