Removal and Installation
REMOVAL
CAUTION:
Never reuse combination switch. Always replace it with a new one when it is removed.
Remove spiral cable. Refer to Removal & Installation.
Disconnect harness connector from combination switch.
Remove the combination switch  mounting screw
  .
.
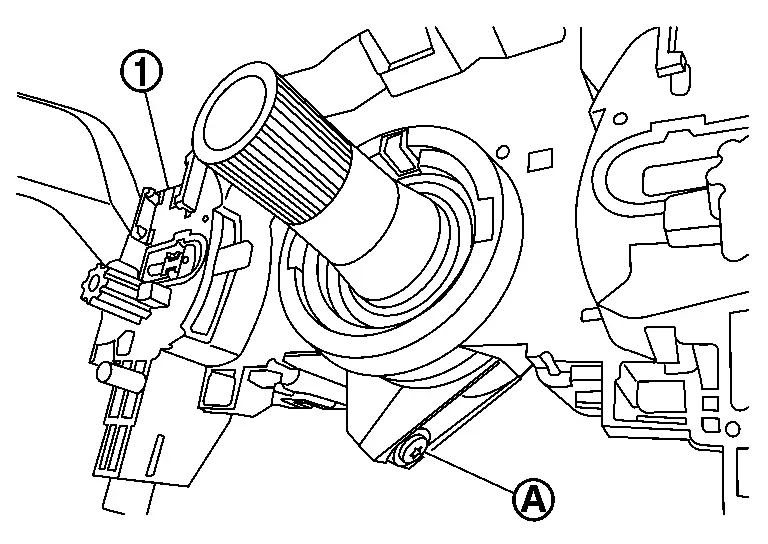
Pull out the combination switch by moving it alternately on the right and left side.
CAUTION:
Never deformation and damage the pawls. (With ProPILOT Assist 2.1)
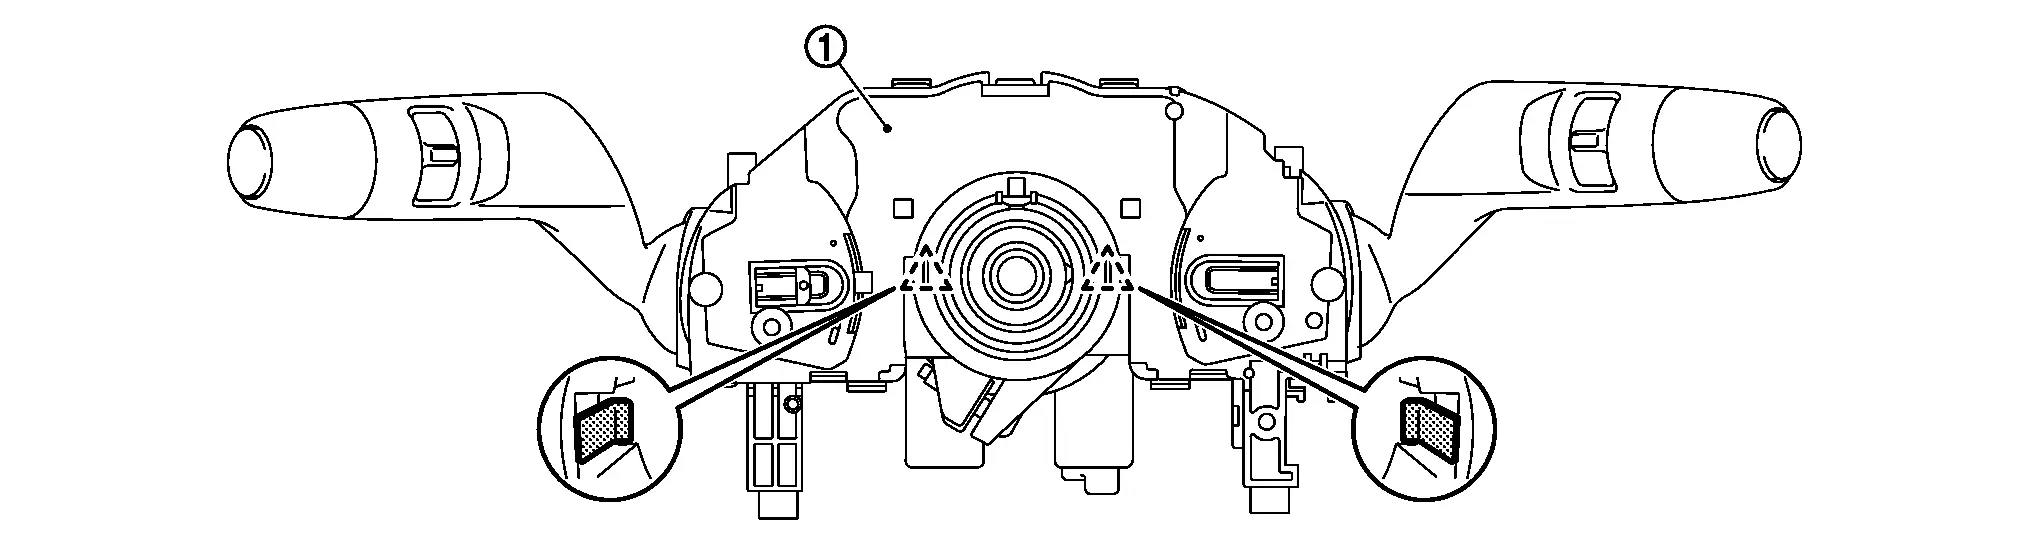
 |
: Pawl |
INSTALLATION
Note the following, and then install in the reverse order of removal.
CAUTION:
-
Never reuse combination switch. Always replace it with a new one when it is removed. (Without ProPILOT Assist 2.1)
-
Visually check the pawls for deformation and damage during installation. Replace with new ones if necessary. (With ProPILOT Assist 2.1)
-
Insert the combination switch so that the protrusion
of the combination switch and the cut-out  of the steering column
  match together.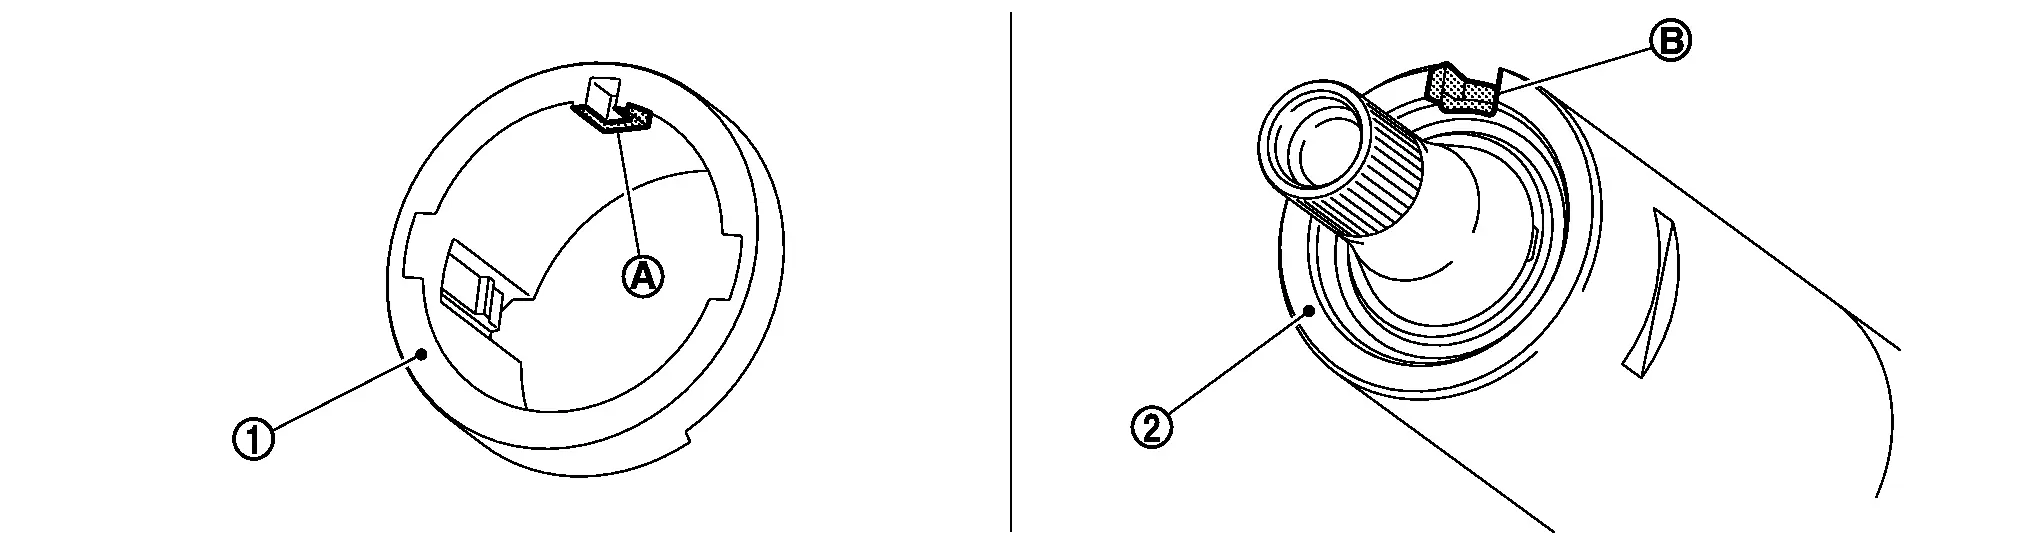
Other materials
Suspension Arm
Exploded View
Frame
Stopper rubber
Suspension arm
Axle housing
: Always replace after every disassembly.
: N·m (kg-m, ft-lb)
Removal and Installation
REMOVALWithout Dynamic Digital Suspension and Electronic Air SuspensionRemove tires. Refer to ROAD WHEEL TIRE : Removal &a ...
Insufficient Heating
Front Air Conditioner
Description
Symptom
Insufficient heating
No warm air comes out. (Air flow volume is normal.)
Diagnosis Procedure
NOTE:
Perform self-diagnoses with CONSULT before performing symptom diagnosis. If any DTC is detected, perform the corresponding diagnosis.CHECK COOLING SYSTEM ...
Driver Side Power Window Does Not Operate
Diagnosis Procedure
CHECK POWER WINDOW MAIN SWITCH POWER SUPPLY AND GROUND CIRCUIT
Check power window main switch power supply and ground circuit. Refer to Diagnosis Procedure.
Is the inspection result normal?
YES>>
GO TO 2.
NO>>
Repair or replace the malfunctioning parts.
CHECK FRONT ...