
Nissan Armada 2025-2026 Service and Repair Manual: Disassembly and Assembly
WARNING:
REMOVAL
CAUTION:
Never drain engine oil when the engine is hot to avoid the danger of being scalded.
Remove main muffler. Refer to EXHAUST SYSTEM : Removal & Installation.
Remove front propeller shaft. (4WD models) Refer to Removal and Installation.
Remove rear propeller shaft. Refer to following :
2WD models: Refer to Removal and Installation.
4WD models with rear final drive (R240): Refer to Removal and Installation.
4WD models with rear final drive [R240(DL)]: Refer to Removal and Installation.
Remove front final drive assembly. (4WD models) Refer to Removal and Installation.
Remove front stabilizer. Refer to Removal and Installation.
Remove A/T assembly. Refer to following:
2WD models: Refer to Removal and Installation.
4WD models: Refer to Removal and Installation.
Remove oil level gauge and oil level gauge guide.
Drain engine oil. Refer to Draining.
Remove oil filter. Refer to Removal and Installation.
Remove oil cooler.Refer to Removal and Installation.
Remove engine oil level sensor  .
.
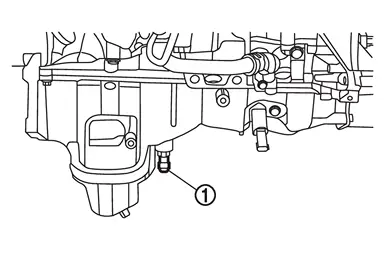
Remove oil pan (lower). Refer to Removal and Installation.
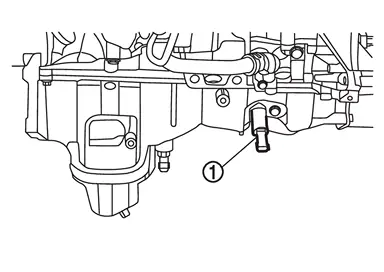
Remove engine oil pressure control solenoid valve .
Loosen mounting bolts in the order from 14 to 1 as shown in the figure using a power tool (commercial service tool) to remove.
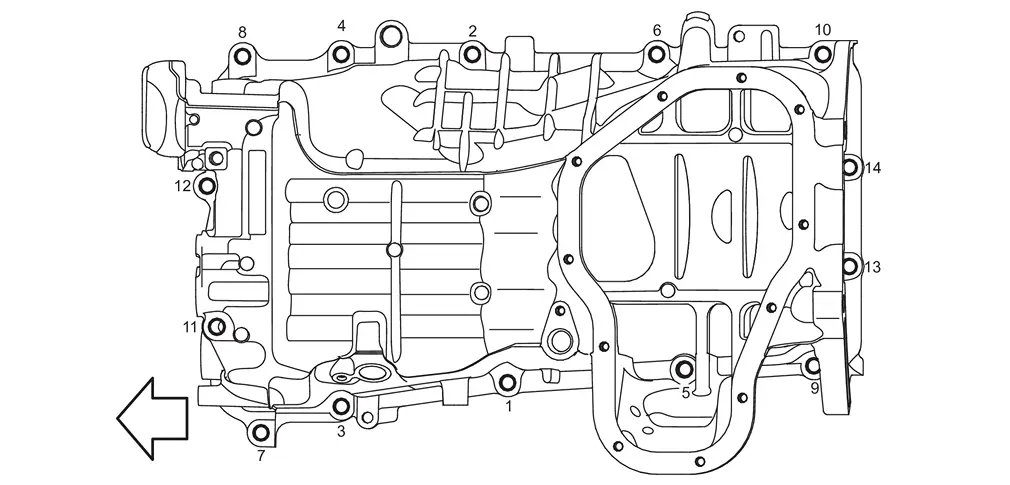
 | : Engine front |
Insert the seal cutter [SST: KV10111100 (NI-37228)] between oil pan (upper) and lower cylinder block. Slide seal cutter by tapping on the side of tool with a hammer. Remove oil pan (upper).
CAUTION:
Never damage the mating surfaces.
Never insert a screwdriver, because this damages the mating surfaces.
Remove O-ring  from bottom of lower cylinder block .
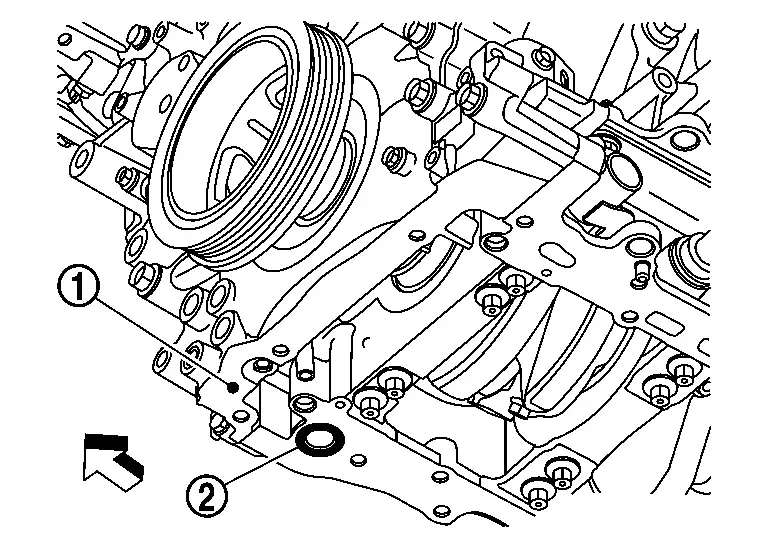
| : Engine front |
INSTALLATION
CAUTION:
Do not reuse O-rings.
Install oil pan (upper) as follows:Use a scraper (A) to remove old liquid gasket from mating surfaces.
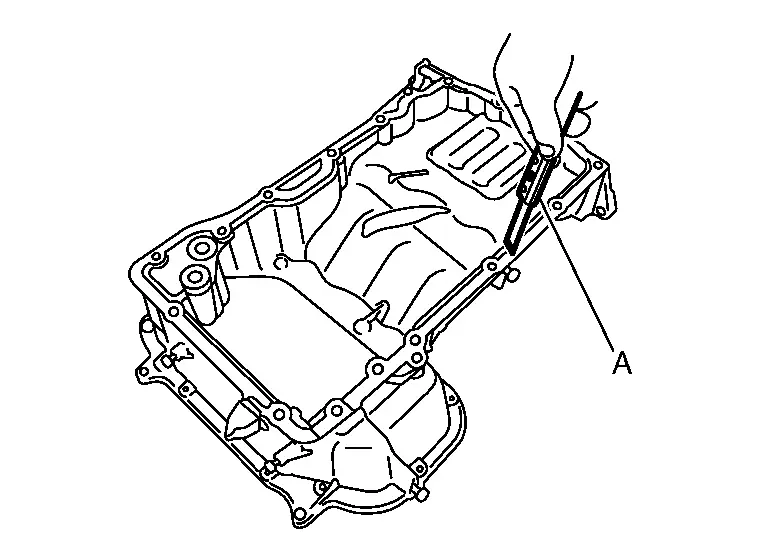
CAUTION:
Never scratch or damage the mating surfaces when cleaning off old liquid gasket.
Also remove old liquid gasket from mating surface of lower cylinder block.
Remove old liquid gasket from the bolt holes and threads.
on the bottom of lower cylinder block .
CAUTION:
Do not reuse O-rings.
| : Engine front |
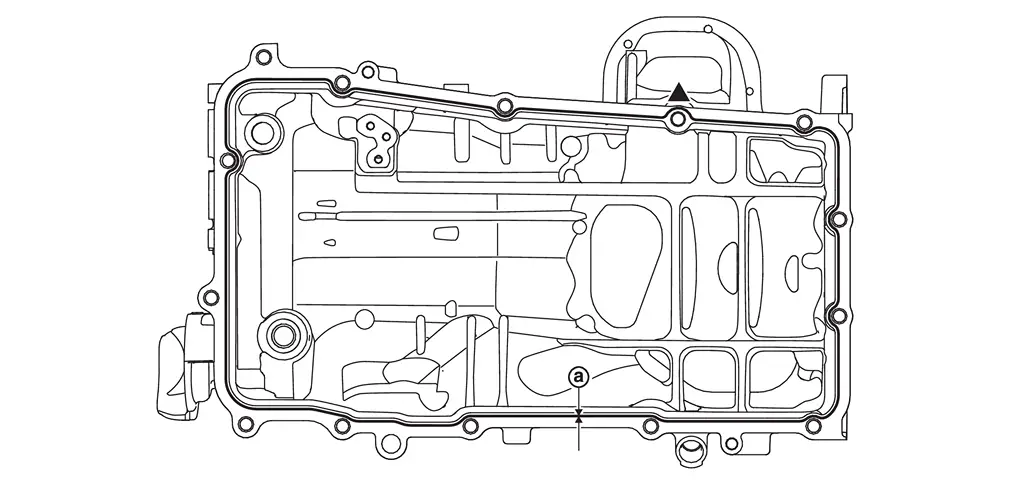
 | : φ3.4 - 4.4 mm (0.134 - 0.173 in) |
CAUTION:
For bolt holes with
 marks (6 locations), apply liquid gasket outside the holes.
Attaching should be done within 5 minutes after coating.
CAUTION:
Never misalign both O-rings during installation.
Tighten mounting bolts to the torque specified below in the order from 1 to 14 as shown in the figure.

: 17.9 N·m (1.8 kg-m, 13 ft-lb) : Engine front
Install oil pan (lower). Refer to Removal and Installation.
Install oil pan drain plug.
the figure of components on the prior page for installation direction of drain plug washer. Refer to Removal and Installation.
Install in the reverse order of removal after this step.
 NOTE:
NOTE:
Wait at least 30 minutes after oil pan is installed before pouring engine oil.
 Exploded View
Oil pan (upper) O-ring 1 Engine oil pressure control solenoid valve O-ring 2 Engine oil level sensor O-ring 3 Oil level gauge guide O-ring 4 Oil level gauge Comply with the installation pro ...
 Inspection
INSPECTION AFTER REMOVAL
Clean oil strainer if any object is attached.
INSPECTION AFTER INSTALLATION
Check the engine oil level and adjust engine oil. Refer to Inspection.
Start engine, and check ther ...
Other materials:
Inspection
Open and close rear door. Check that rear door hinge and rear door check link rotation portion moves smoothly.
Check rear door hinge rotating part for lubrication condition. Apply body grease if necessary.
: Body grease
Check rear door check link rotating part for lubrication condition. Apply ...
Removal and Installation
WARNING:
WITHOUT DYNAMIC DIGITAL SUSPENSION AND ELECTRONIC AIR SUSPENSION
Removal
Remove rear tire. Refer to ROAD WHEEL TIRE : Removal & Installation.
CAUTION:
Never depress brake pedal while caliper assembly is removed.
Remove disc rotor.
CAUTION:
Never drop disc rotor.
Remove wheel sensor h ...
Hands On Detection
Basic information
In the Nissan Armada, the Hands On Detection system is an essential safety feature
integrated within Steering Assist and ProPILOT Assist technologies. This system
continuously monitors the driver’s interaction with the steering wheel through built-in
sensors, ensuring that ...

0.0052