
Nissan Armada 2025-2026 Service and Repair Manual: Disassembly and Assembly
DISASSEMBLY
Remove door mirror assembly. Refer to Removal and Installation.
Remove door mirror cover. Refer to Removal and Installation.
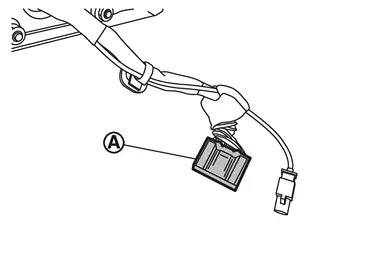
Disconnect all terminals from harness connector  .
.
 NOTE:
NOTE:
Make a mark (short note, photo, etc.) of terminals layout, before disassembly.
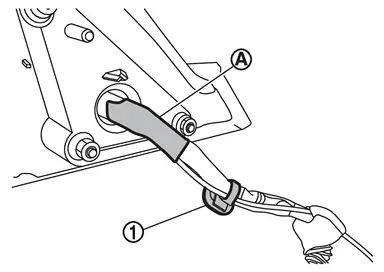
Remove harness clip  and vinyl tape .
Remove door mirror base gasket.
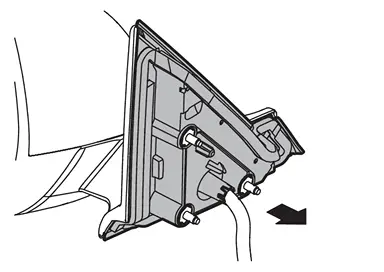
Disengage door mirror base cover fixing pawls, and then remove door mirror base cover.
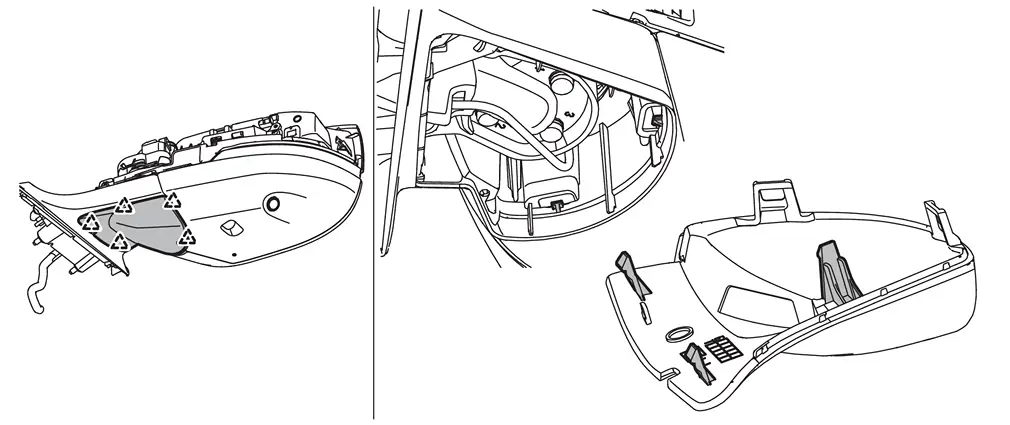
 | : Pawl |
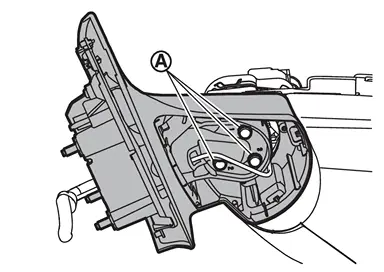
Remove door mirror base assembly fixing screws , and then remove door mirror base assembly.
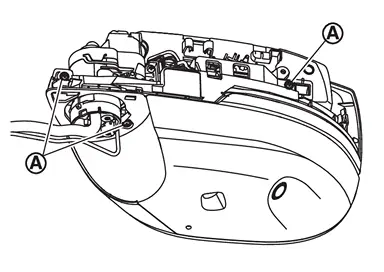
Remove door mirror finisher fixing screws .
Disengage door mirror finisher fixing pawls, and then remove door mirror finisher from door mirror housing assembly.
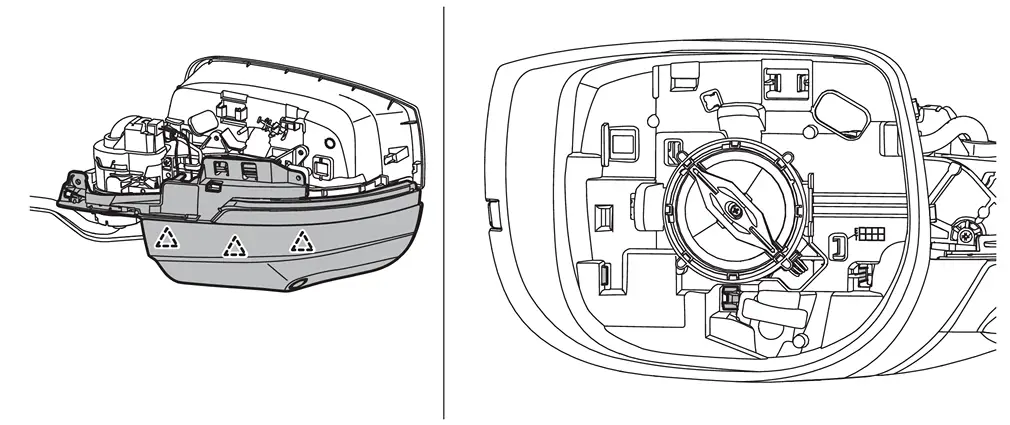
| : Pawl |
Remove side camera (with side camera) or side camera cover (without side camera). Refer to the follows.
Side camera: Removal and Installation.
Side camera cover: Remove side camera cover fixing pawls, and then remove side camera cover.
Remove side turn signal lamp. Refer to Removal & Installation.
Remove puddle lamp (with puddle lamp) or puddle lamp cover (without puddle lamp). Refer to the follows.
Puddle lamp: Removal and Installation.
Puddle lamp cover: Remove puddle lamp cover fixing pawls, and then remove puddle lamp cover.
Disconnect harness connector .
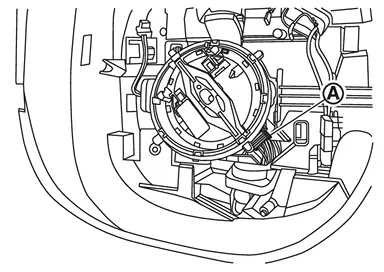
Remove power folding motor fixing screws , and then remove power folding motor.
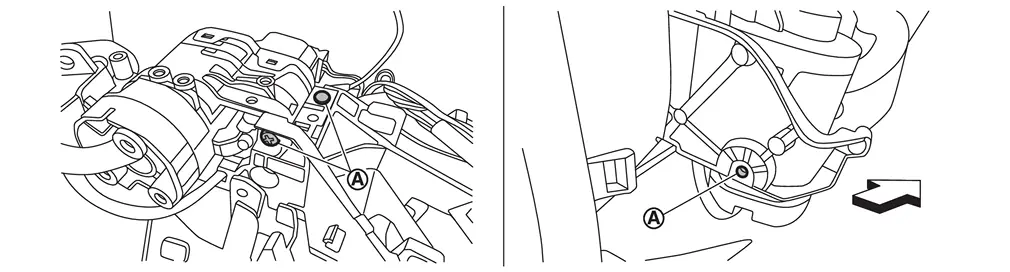
 | : Vehicle front |
Remove harness from power folding motor.
NOTE:
Make a mark (short note, photo, etc.) of harness layout, before removal.
Disconnect side camera harness A and side camera harness B (with side camera).
ASSEMBLY
CAUTION:
Never reuse door mirror base assembly fixing screws, vinyl tape, and harness clip. Always replace it with a new one when it is removed.
After installation, visually check that fixing pawls are securely engage.
 Removal and Installation
REMOVAL
CAUTION:
Never damage the front door panel and any parts.
Remove front door sash inner cover. Refer to Removal & Installation.
Disconnect door mirror assembly harness connectors and .
N ...
 Glass Mirror
...
Other materials:
Disassembly and Assembly
DISASSEMBLY
NOTE:
Never remove the torque member and brake pad when disassembling and assembling the cylinder body.
Remove the sliding pin bolt, and remove the cylinder body from the torque member. Refer to Removal and Installation.
CAUTION:
Fix the brake pad at suitable tape so that the brake pad ...
Inspection
INSPECTION AFTER REMOVAL
Appearance
Check the following items, and replace the part if necessary.
Suspension arm and bushing for deformation, cracks or damage.
Boot of ball joint for cracks or damage, and also for grease leakage.
Ball Joint Inspection
Manually move ball stud to confirm it moves smo ...
Windshield deicer
Example
The Nissan Armada windshield deicer is specifically designed to remove ice buildup
from the lower windshield area, especially when wiper blades are frozen to the glass.
To activate the deicer in the Nissan Armada, start the engine and press the corresponding
switch. The indicator l ...

0.009