Exploded View
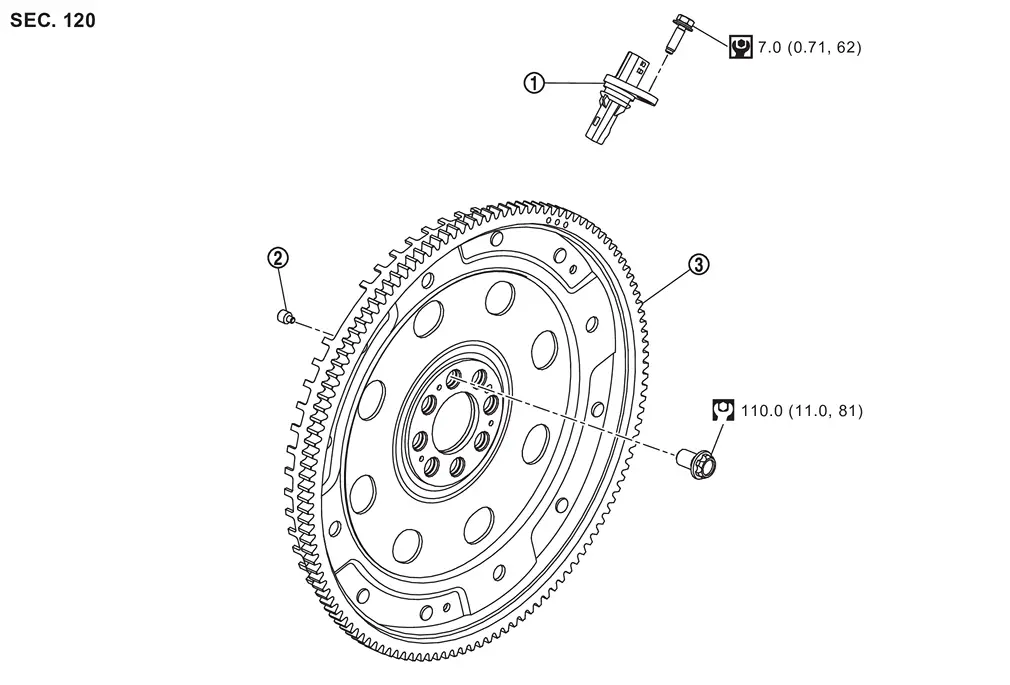
 |
Crankshaft position sensor |  |
Dowel pin |  |
Drive plate |
 |
: N·m (kg-m, ft-lb) | ||||
 |
: N·m (kg-m, in-lb) | ||||
Removal and Installation
REMOVAL
Remove A/T assembly from the vehicle. Refer to following :
-
2WD models: Refer to Removal and Installation.
-
4WD models: Refer to Removal and Installation.
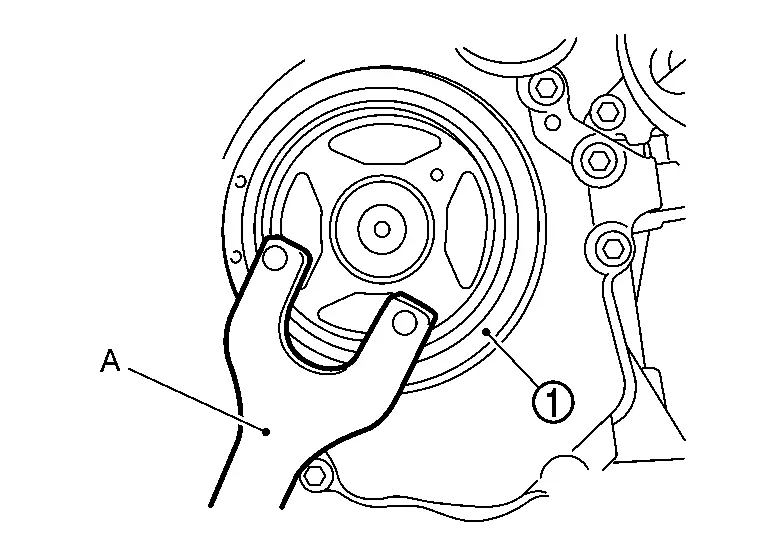
Remove the drive plate using the following procedure:Secure crankshaft pulley with a pulley holder (A).
CAUTION:
-
Do not disassemble drive plate.
-
Do not place drive plate with signal plate facing down.
-
When handling signal plate, take care not to damage or scratch drive plate and signal plate.
-
Handle signal plate in a manner that prevents them from becoming magnetized.
Remove the crankshaft position sensor if necessary.
INSTALLATION
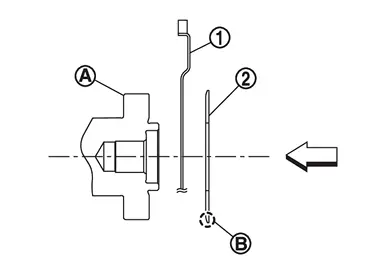
Install drive plate , drive plate reinforcement as shown.
CAUTION:
Be careful not to damage or scratch the drive plate and signal plate.
 |
: Crankshaft |
 |
: Rounded |
| : Engine front |
Hand tighten drive plate bolts in a diagonal order over several steps.
Tighten drive plate bolts using a suitable tool in a diagonal order over several steps.
If removed, install the crankshaft position sensor.
Installation of the remaining components is in the reverse order of removal.
CAUTION:
If crankshaft position sensor replaced, perform "ELECTRIC IVT CONTROL ACTUATOR POSITION LEARNING". Refer to Work Procedure
Inspection
DRIVE PLATE DEFLECTION
Appearance of Drive Plate
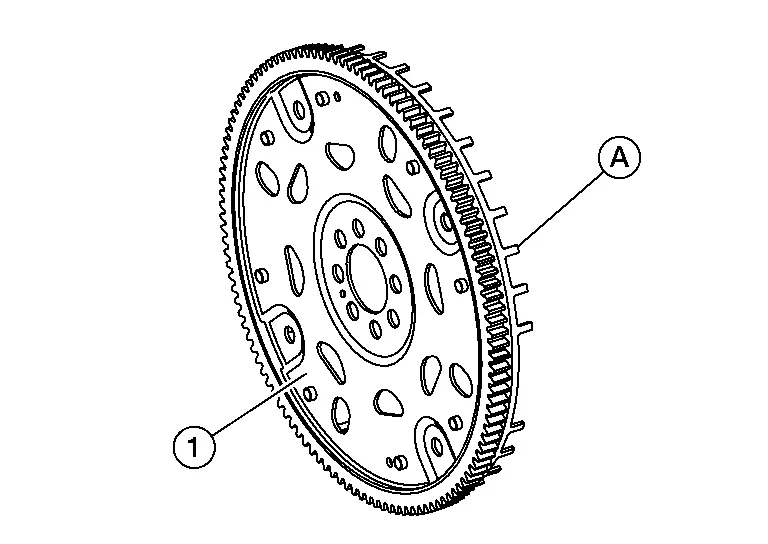
Check the drive plate and signal plate for defamation or damage.
CAUTION:
-
Do not disassemble drive plate.
-
Do not place drive plate with signal plate
facing down. -
When handling signal plate, take care not to damage or scratch it.
-
Handle signal plate that prevents it from becoming magnetized.
Replace drive plate if dents, scratches or damage exist.
Drive Plate Lateral Run-Out
-
Install drive plate to crankshaft and measure deflection with dial indicator (A).
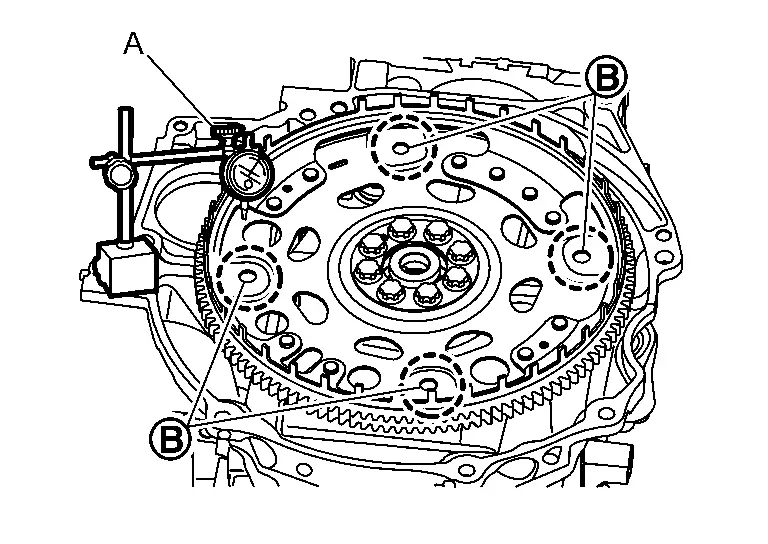
CAUTION:
-
Do not disassemble drive plate.
-
Do not place drive plate with signal plate facing down.
-
When handling signal plate, take care not to damage or scratch it.
-
Handle signal plate that prevents it from becoming magnetized.
-
If damage is found, replace drive plate.
-
-
Measure deflection on the drive plate to torque converter contact surface
. Measurements should be taken 11.0 - 20.6 mm (0.43 - 0.811 in) from the center of the torque converter bolt hole.Standard : 0.35 mm (0.0138 in) or less. -
If the measurement value is outside the reference value, replace drive plate.
Other materials
Front Wheel Hub and Knuckle
Exploded View
Upper ball seat
Steering knuckle
Baffle
Splash guard
Wheel hub and bearing assembly
Disc rotor
Hub lock nut
Hub bolt
Cotter pin
Lower ball seat
: Comply with the installation procedure when tightening. Refer to Removal and ...
Calibration of Automatic Back Door Position Information
Description
When the following work is performed, it is necessary to perform initial setting of automatic back door position information to operate automatic back door system. Refer to Work Procedure.
After removing and installing, or replacing back door assembly
After removing and installing, or ...
Fuel Filler Lid
Exploded View
Fuel filler base assembly
Fuel filler lid
Fuel filler lid lock assembly
Fuel filler base mask
: Pawl
: Always replace after every disassembly.
...