
Nissan Armada 2025-2026 Service and Repair Manual: Exploded View
REMOVAL
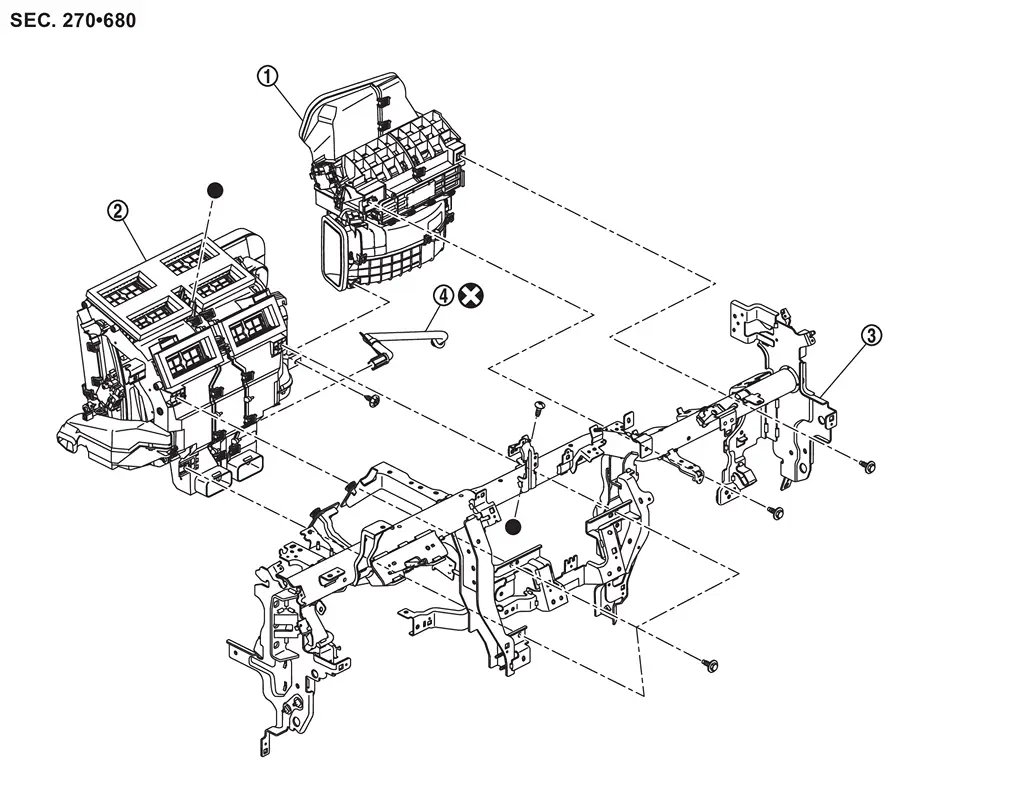
 | Front blower unit assembly |  | Front heater & cooling unit assembly |  | Steering member |
 | Drain hose | ||||
 | : Always replace after every disassembly. | ||||
 : Indicates that the part is connected at points with same symbol in actual vehicle. : Indicates that the part is connected at points with same symbol in actual vehicle. | |||||
DISASSEMBLY
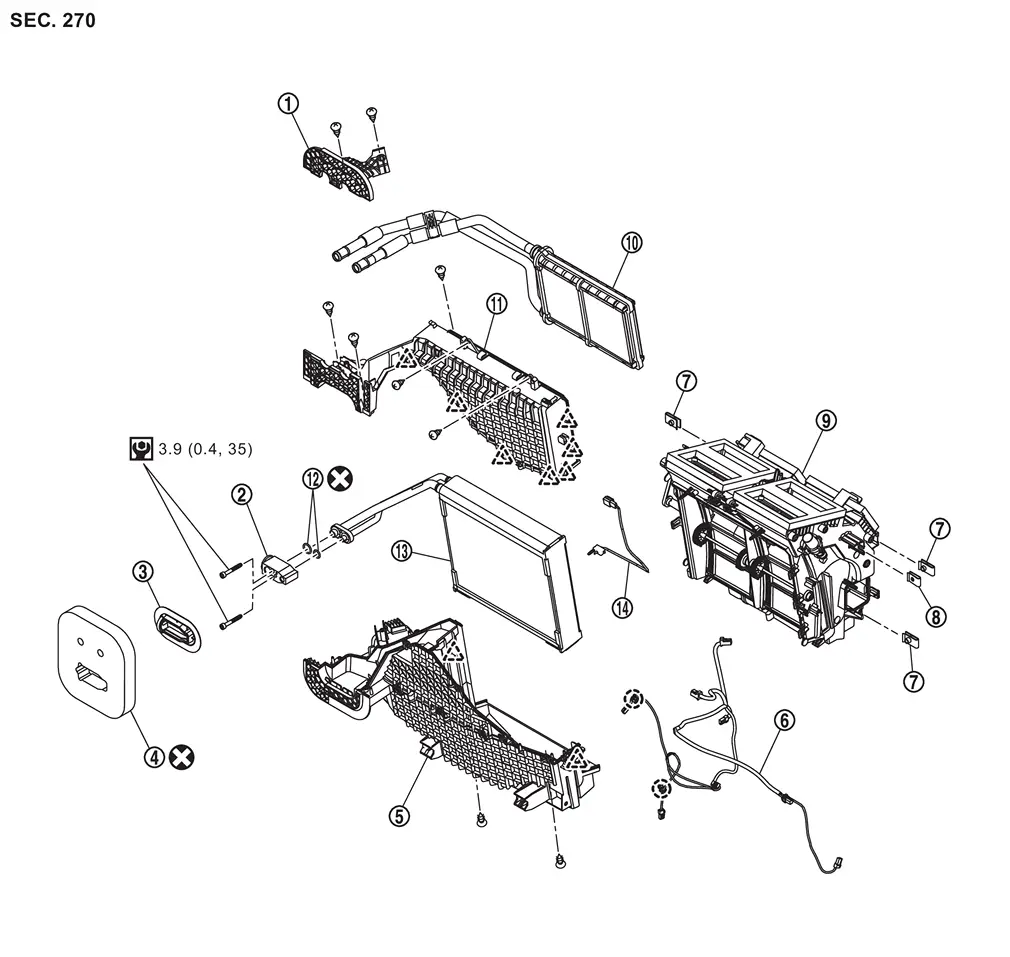
| Heater pipe support | | Front expansion valve | | Cooler grommet |
| Cooler packing |  | Front case lower assembly |  | Sub harness |
 | J nut |  | Spring nut |  | Front heater & cooling unit |
 | Front heater core |  | Front case upper |  | O-ring |
 | Front evaporator |  | Intake sensor | ||
 | : Clip | ||||
 | : Pawl | ||||
| : Always replace after every disassembly. | ||||
 | : N·m (kg-m, in-lb) | ||||


Other materials:
Removal and Installation
WARNING:
REMOVAL
CAUTION:
When removing the A/T assembly from engine, first remove the crankshaft position sensor (POS) from the A/T assembly.
Be careful not to damage sensor edge.
When replacing A/T assembly, Perform "ADDITIONAL SERVICE WHEN REPLACING TRANSMISSION ASSEMBLY". Refer to Description.
...
Exploded View
Bracket A/T assembly Bracket Bracket : N·m (kg-m, ft-lb) ...
Cockpit
Example
The cockpit of the Nissan Armada is engineered to provide maximum control, comfort,
and advanced driver assistance integration. Every switch and control element is
strategically positioned to ensure intuitive access, allowing the driver of the
Nissan Armada to stay focused on the ...

0.0053