Exploded View
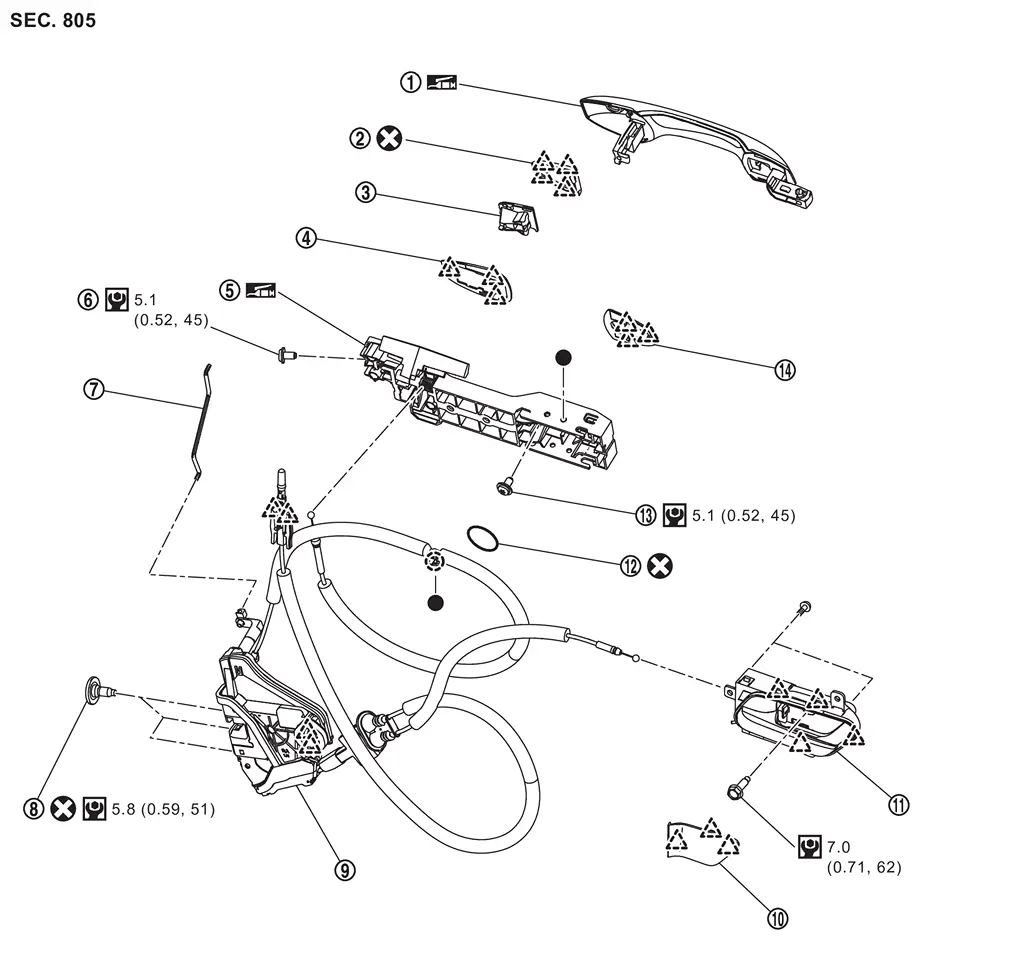
 |
Front door outside handle |  |
Escutcheon cover |  |
Escutcheon base |
 |
Rear gasket |  |
Front door outside handle bracket |  |
TORX bolt |
 |
Key rod (Driver side) |
 |
TORX bolt |  |
Front door lock assembly |
 |
Inside handle cap |  |
Front door inside handle |  |
Hole seal |
 |
TORX bolt |  |
Front gasket | ||
 |
: Clip | ||||
 |
: Pawl | ||||
 |
: Always replace after every disassembly. | ||||
 |
: N·m (kg-m, in-lb) | ||||
 |
: Body grease | ||||
 : Indicates that the part is connected at points with same symbol in actual vehicle. : Indicates that the part is connected at points with same symbol in actual vehicle. |
|||||
Front Door Lock Assembly
Removal and Installation
REMOVAL
Remove front door finisher. Refer to Removal and Installation.
Remove front door module assembly. Refer to Removal and Installation.
Remove front door outside handle bracket. Refer to Removal and Installation.
Remove front door lock assembly mounting TORX bolts.
Disengage front door lock assembly fixing pawls, and then remove front door lock assembly.
INSTALLATION
Note the following items, and then install in the reverse order of removal.
CAUTION:
-
Never reuse front door lock assembly mounting TORX bolt. Always replace it with a new one when it is removed.
-
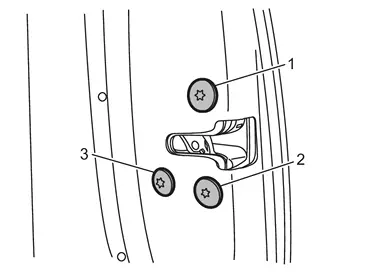
When installing, tighten mounting TORX bolts according to numerical order 1→3 as shown in figure.
-
When installing, be careful that cable is routed normally.
-
When connecting front door inside handle cable to front door inside handle, check that front door inside handle cable is properly engaged with front door inside handle.
-
When connecting front door lock knob cable to front door finisher, check that front door lock knob cable is properly engaged with front door finisher.
-
After installation, check front door lock. Refer to Inspection.
Inspection
After opening and closing the door, check that door is fixed to the vehicle body normally.
Check the lock/unlock operation of door lock.
Front Door Inside Handle
Removal and Installation
REMOVAL
Remove front door finisher. Refer to Removal and Installation.
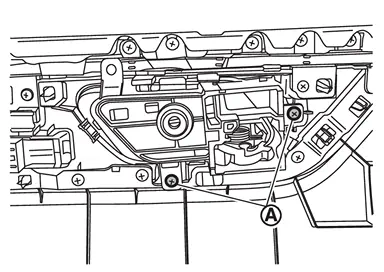
Remove front door inside handle fixing screws  .
.
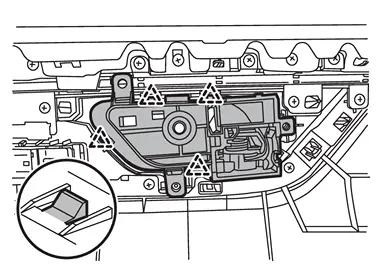
Remove front door inside handle fixing pawls, and then remove front door inside handle.
|
:Pawl |
INSTALLATION
Note the following items, and then install in the reverse order of removal.
CAUTION:
-
When connecting front door inside handle cable to front door inside handle, check that front door inside handle cable is properly engaged with front door inside handle.
-
After installation, check front door lock. Refer to Inspection.
Front Door Outside Handle
Removal and Installation
REMOVAL
Remove front door finisher. Refer to Removal and Installation.
Remove front door module assembly. Refer to Removal and Installation.
Disconnect front door outside handle harness connector  , and then disengage front door outside handle harness connector fixing clip (if equipped).
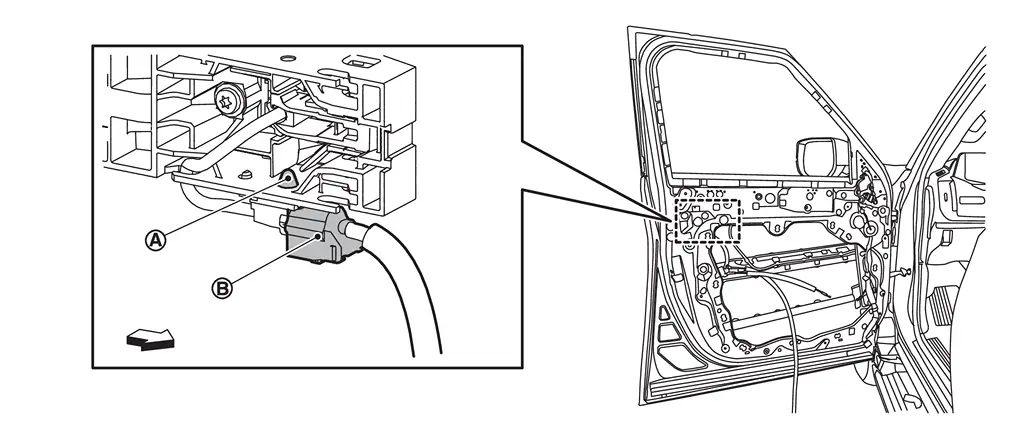
| : vehicle front |
Remove key rod from key rod holder of front door lock assembly according to the numerical order 1→2 indicated by arrows as shown in figure (driver side).
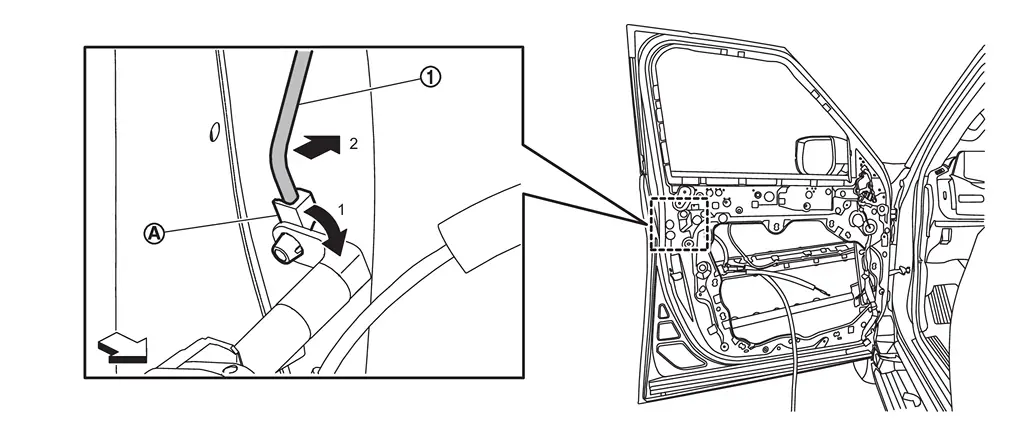
| : vehicle front |
Apply protective tape (A) on the part to protect it from damage.
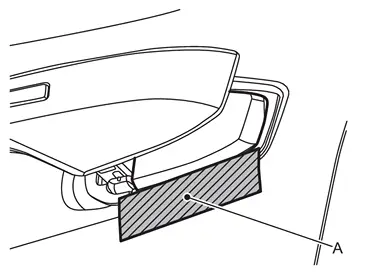
Insert a remover tool (A) at the notch of the escutcheon cover bottom and disengage fixing pawls, and then remove escutcheon cover.
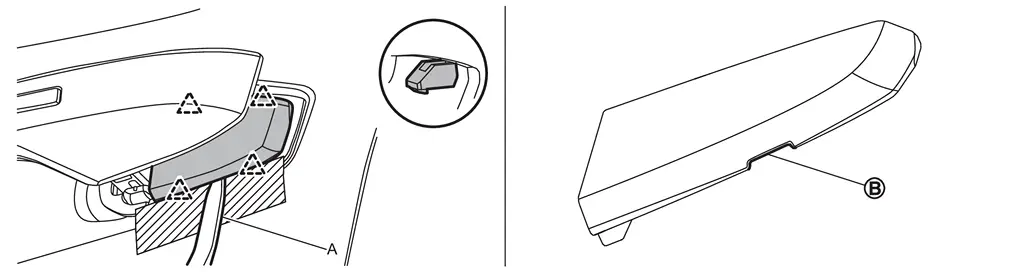
|
: Pawl |
 NOTE:
NOTE:
If escutcheon cover cannot be removed from the bottom, remove it from the top.
Slide front door outside handle grip toward rear of vehicle and remove it according to the numerical order 1→2 indicated by arrows as shown in figure.
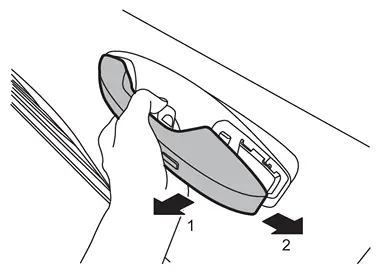
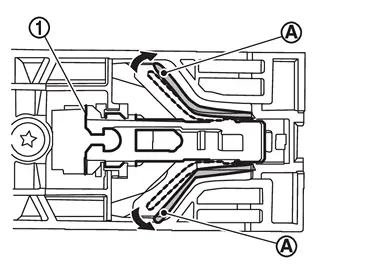
NOTE:
Expand the lib of front door outside handle bracket indicated by arrows as shown in figure to remove the handle easily.
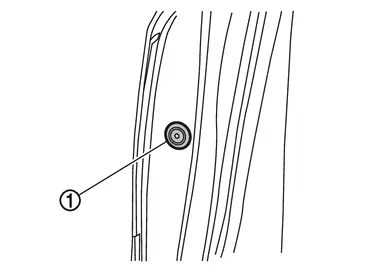
Remove door side grommet .
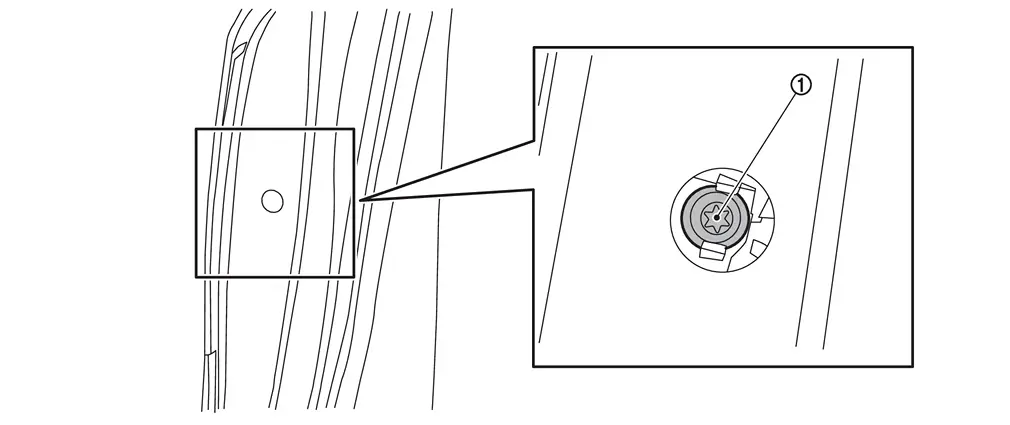
Loosen TORX bolt from grommet hole.
Remove escutcheon base from front door panel.
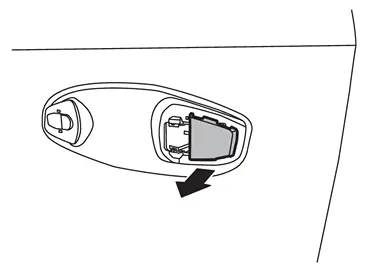
Disengage front gasket and rear gasket fixing pawls, and then remove front gasket and rear gasket.
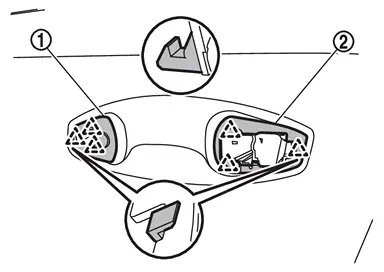
|
: Pawl |
Disengage front door outside handle cable fixing clip from front door outside handle bracket.
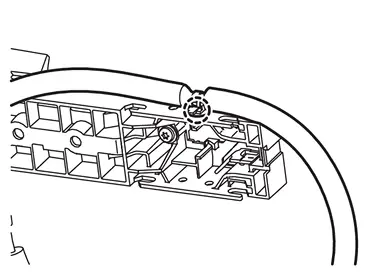
|
: Clip |
Remove hole seal .
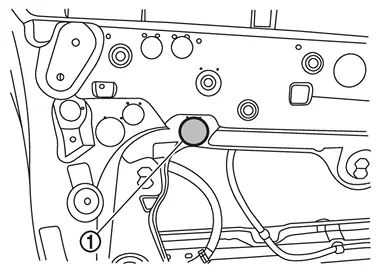
Loosen front door outside handle bracket mounting TORX bolt from service hole.
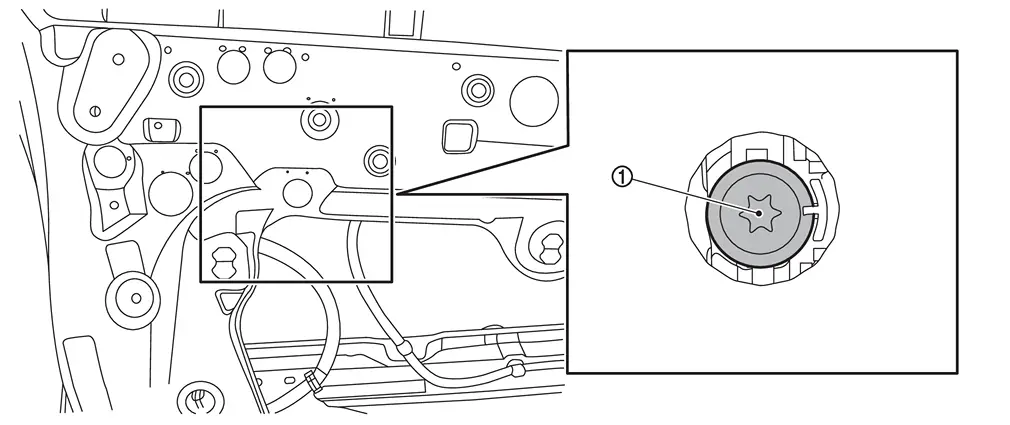
Slide front door outside handle bracket toward front of vehicle and remove it.
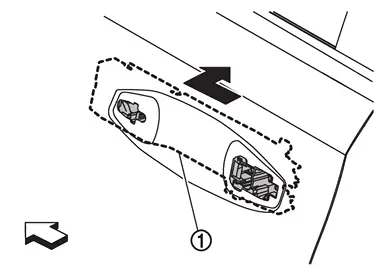
| : vehicle front |
Disconnect front door outside handle cable from front door outside handle bracket according to the numerical order 1→3 indicated by arrows as shown in figure.
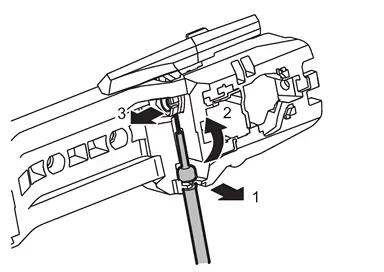
INSTALLATION
Note the following items, and then install in the reverse order of removal.
CAUTION:
-
Check front door outside handle grip part for lubrication condition. Apply body grease if necessary.
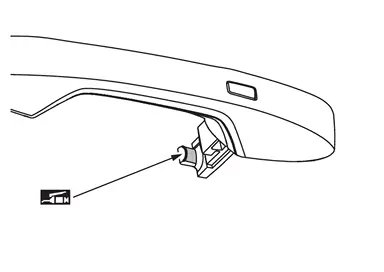
: Body grease -
Check front door outside handle bracket parts for lubrication condition. Apply body grease if necessary.
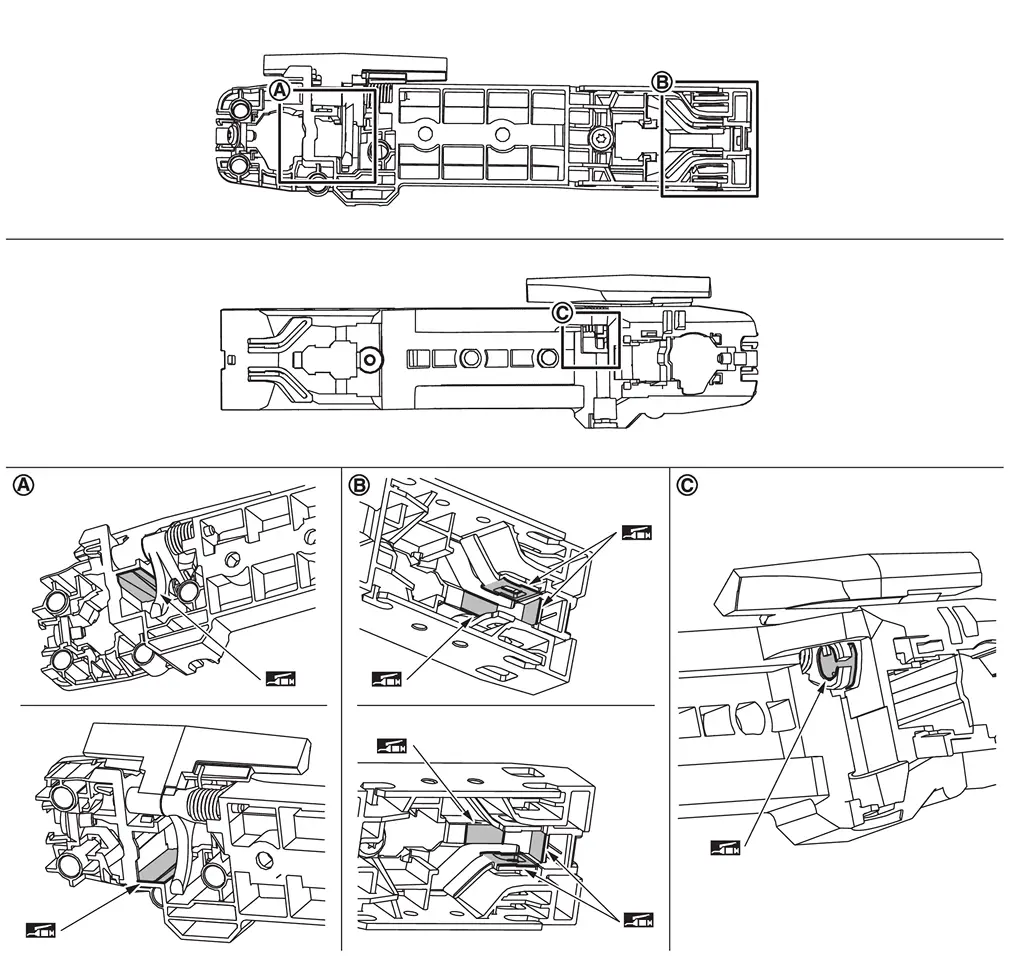
: Body grease -
When connecting front door outside handle cable to front door outside handle assembly, check that front door outside handle cable is properly engaged with front door outside handle assembly.
-
When installing front door outside handle, be careful that front door outside handle harness and body side harness are routed normally.
-
When installing, be careful that front door outside handle cable is routed normally.
-
When installing key rod, rotate key rod holder until a click is felt (driver side).
- After installation, check front door lock. Refer to Inspection.
-
Never reuse hole seal. Always replace it with a new one when it is removed.
-
Never reuse escutcheon cover. Always replace it with a new one when it is removed.
Other materials
Emergency Call (SOS) button
Emergency support
Basic information
In the Nissan Armada, NissanConnect Services provide a comprehensive range of
emergency assistance features designed to support both the driver and passengers
in critical situations.
For instance, in the event of illness, injury, or any emergency scenario, ...
Basic information
WARNING
Never leave children, individuals who require assistance, or pets unattended
inside the Nissan Armada. They may unintentionally operate vehicle systems or
place themselves and others at risk of injury. In addition, on hot and sunny
days, the interior temperature of a parked Niss ...
I-BSI system limitations
WARNING
The following limitations apply to the Nissan Armada Intelligent Blind Spot
Intervention (I-BSI) system. Failure to operate the vehicle within these limitations
may result in serious injury or death.
The Nissan Armada I-BSI system cannot detect all vehicles or objects
in every si ...