Removal and Installation
REMOVAL
CAUTION:
-
Perform lubricant return operation before each refrigeration system disassembly. However, if a large amount of refrigerant or lubricant leak is detected, never perform lubricant return operation. Refer to Perform Lubricant Return Operation.
-
When disconnect the A/C piping related parts, cap or wrap the joint of those parts with suitable material such as vinyl tape to avoid the entry of air.
Use a refrigerant collecting equipment (for HFO-1234yf) to discharge the refrigerant. Refer to Recycle Refrigerant.
Drain engine coolant from cooling system. Refer to ENGINE COOLANT : Draining.
Disconnect front heater pipe assembly from front heater core. Refer to Removal and Installation.
Disconnect low-pressure pipe from front expansion valve. Refer to Removal and Installation.
Disconnect high-pressure pipe from front expansion valve. Refer to Removal and Installation.
Remove instrument panel assembly and steering member as a set. Refer to Removal and Installation.
Remove instrument panel assembly from steering member. Refer to Removal and Installation.
Remove each duct.
-
Side ventilator duct (RH and 2 LH). Refer to Removal and Installation.
-
Center ventilator duct. Refer to Removal and Installation.
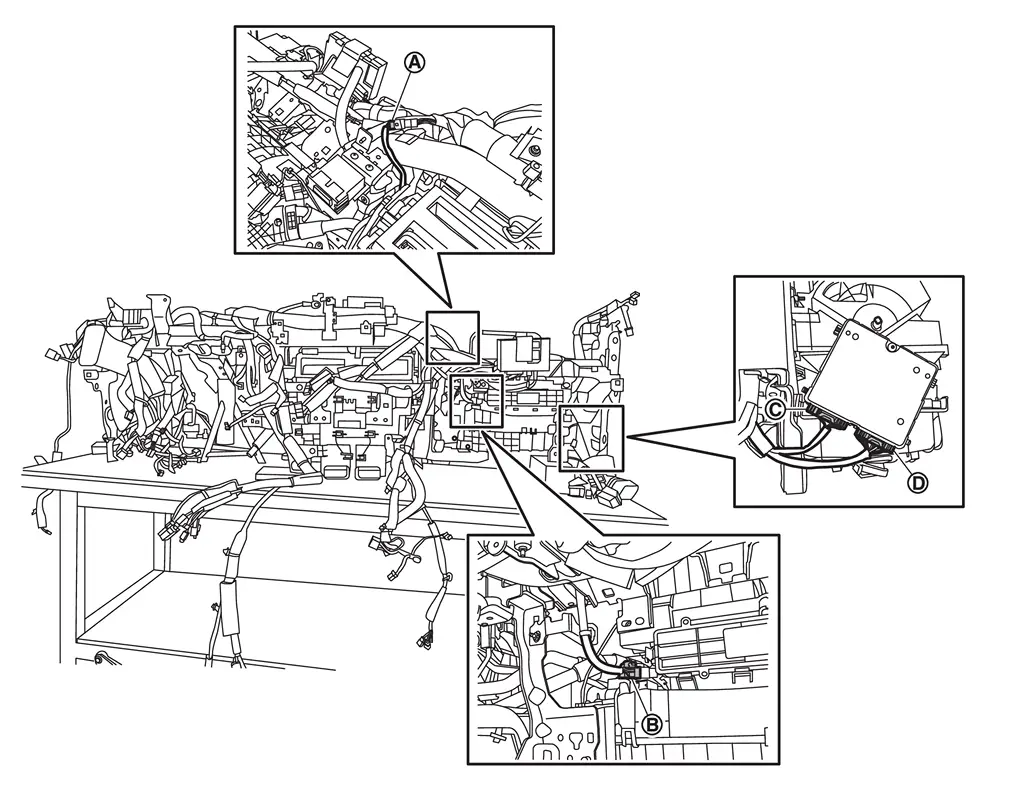
Disconnect harness connectors  ,
,  ,
,  , and
, and  .
.
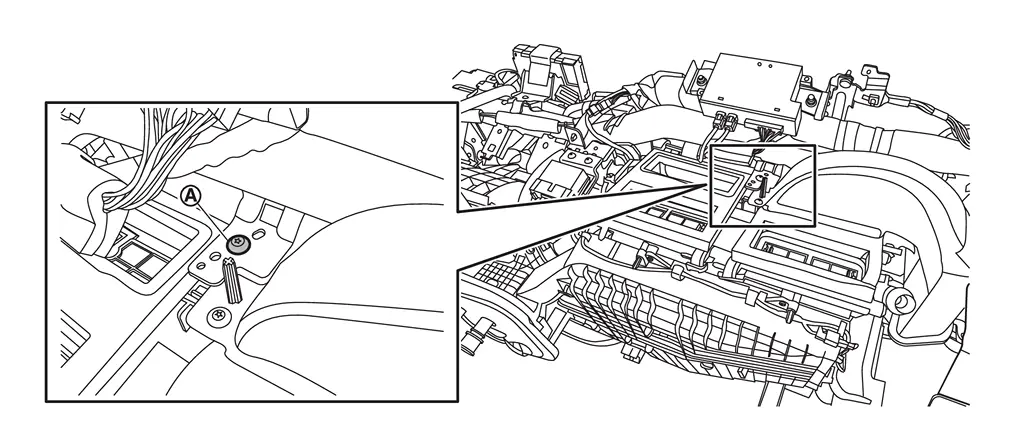
Remove front heater & cooling unit assembly fixing screw .
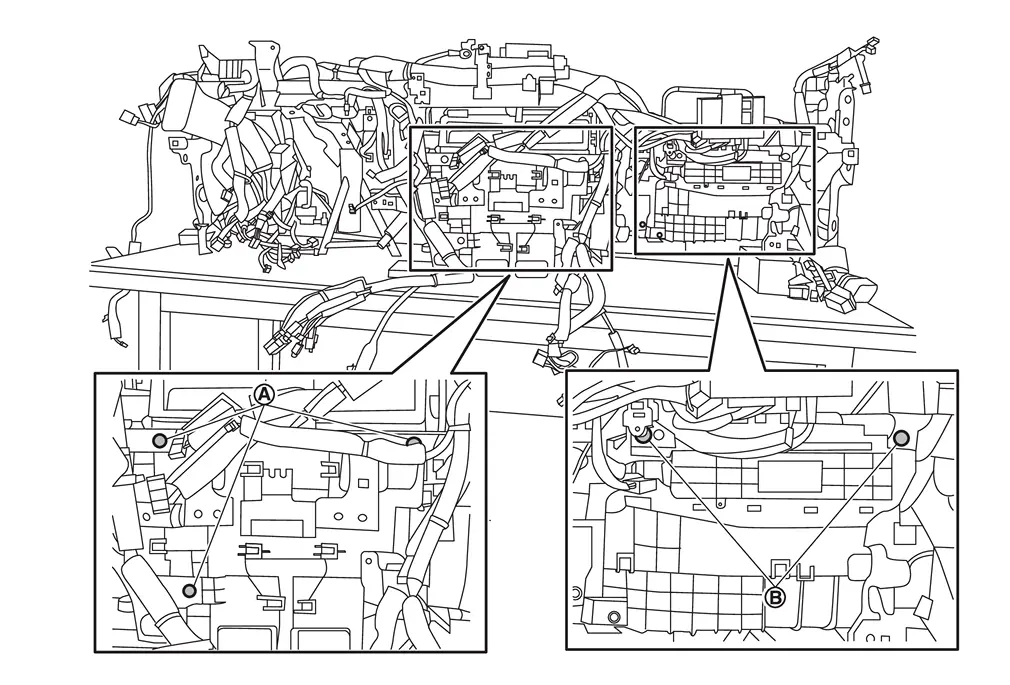
Remove front heater & cooling unit mounting bolts and front blower unit mounting bolts .
Remove front heater & cooling unit assembly and front blower unit assembly as a set.
CAUTION:
When removing front heater & cooling unit assembly, 2 workers are required to prevent it from dropping.
Remove each duct from front heater & cooling unit assembly.
-
Side ventilator duct 1 LH. Refer to Removal and Installation.
-
Front foot duct (RH and LH). Refer to Removal and Installation.
Remove front blower unit assembly from front heater & cooling unit assembly. Refer to Removal and Installation.
INSTALLATION
Note the following items, and then install in the reverse order of removal.
CAUTION:
-
Use a refrigerant collecting equipment (for HFO-1234yf) to charge the refrigerant. Refer to Charge Refrigerant.
-
Perform a check for refrigerant leakage when charging with refrigerant. Refer to Leak Test.
 NOTE:
NOTE:
When filling radiator with engine coolant. Refer to ENGINE COOLANT : Refilling.
Other materials
Heated steering wheel
Example
Example
The Nissan Armada heated steering wheel can be controlled either via the touch
screen display or by using the dedicated switch on the instrument panel.
1. Start the engine of the Nissan Armada.
2. Touch the
key A or press the heated steering wheel switch to turn the ...
Hood Assembly
Removal and Installation
CAUTION:
Perform work with 2 workers, because it is heavy weight.
Support hood with a proper material and use protective tape or shop cloth to protect hood and body from falling and damage when removing and installing hood assembly.
REMOVALSupport hood assembly with a p ...
Front Door Glass
Exploded View
Front door glass run
Front door panel
Front door glass
Front door module assembly
Hole seal
Front door power window motor
Front door regulator fastener
Front door lower sash
: Pawl
: Always replace after every disassembly.
: N·m (kg-m ...