
Nissan Armada 2025-2026 Service and Repair Manual: How to Heat Sheet Metal
Use a carburizing flame when shrinking sheet metal with a gas welding torch.
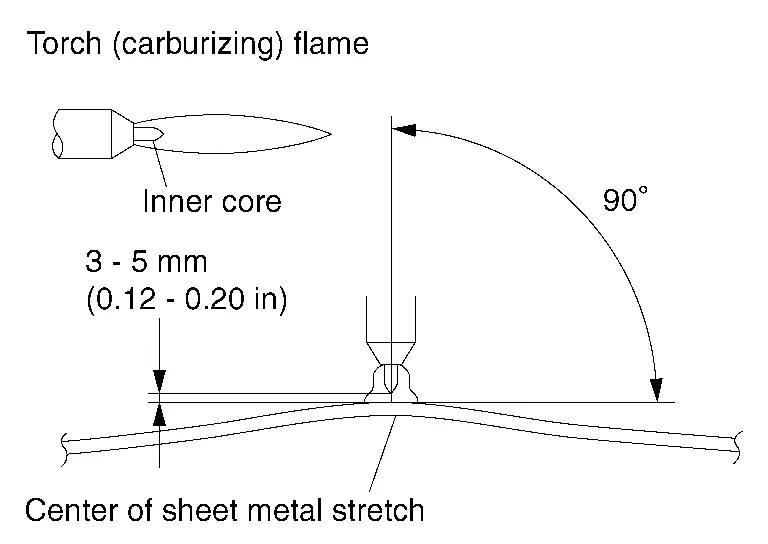
Hold the torch at a right angle to the center of the sheet metal.
Maintain a distance of 3 mm - 5 mm (0.12 in - 0.20 in) between the inner core and sheet metal.
Heat the sheet metal to approximately 800°C (1,472°F) (until the heated portion turns red). Increase the temperature if sheet metal stretching is insufficient.
Locate the stretched portion of the panel.
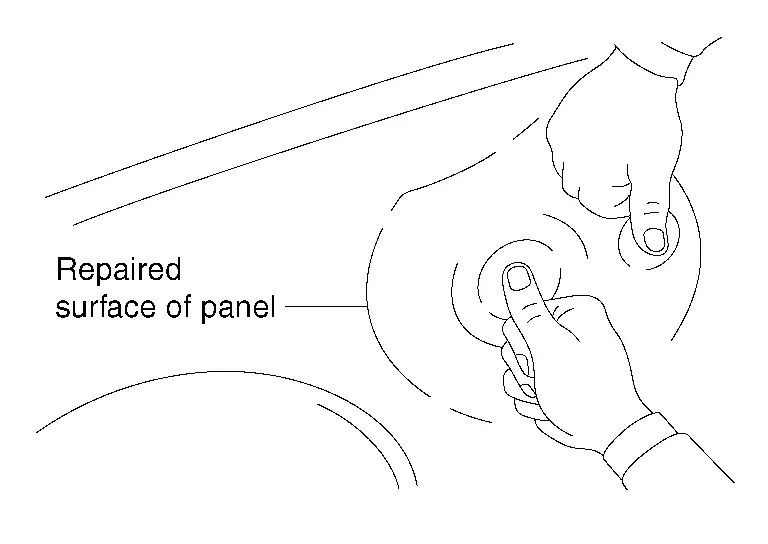
Press the surface being repaired in several places.
The point where the largest elastic dent is formed is the center, where the stretch is the maximum. The highest portion of the panel being repaired can also be considered the most stretched portion.
The area heated with a welding torch must be approximately 3 mm - 5 mm (0.12 in - 0.20 in) in diameter if the panel shape is complex, and approximately 6 mm - 15 mm (0.24 in - 0.59 in) in diameter if it is flat.
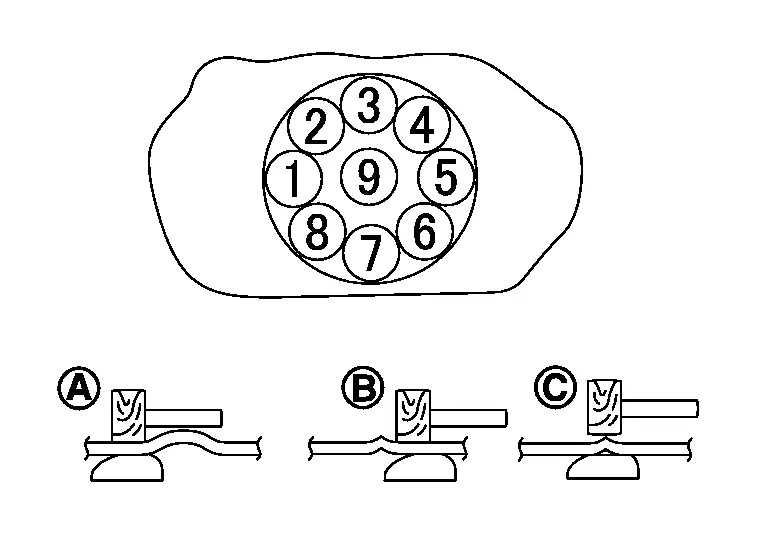
Small stretch
Apply a dolly to the back of the heated panel. Tap the panel with a wooden hammer using the hammer-ondolly method in the sequence shown in the figure.
(A) and (B) → 1 - 8 (C) → 9 Excessive stretch
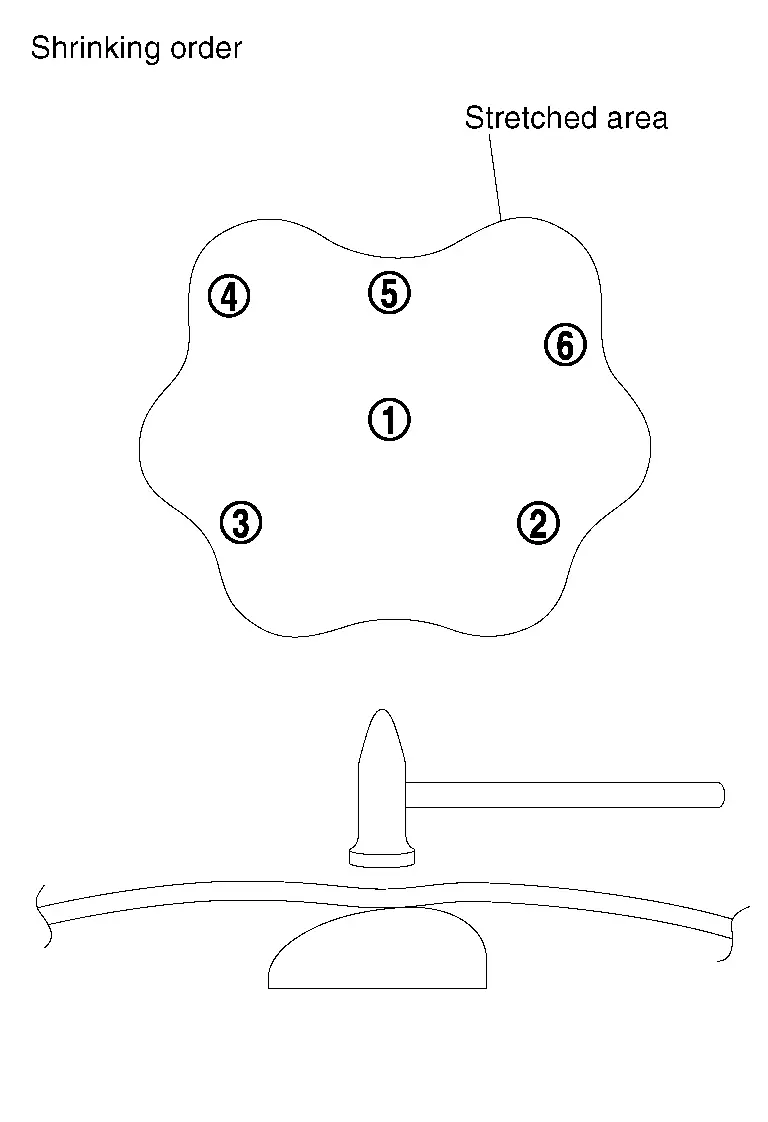
Shrink the panel, starting with the most stretched portion, and proceed toward the edge of the dent so that the dent surface is lower than the original surface.
Using a gas welding torch makes the panel concave.
To correct this, strike the concave portion using the hammer-on-dolly method to stretch the panel bit by bit until the original surface is restored.
Apply wet cloths to the shrunken portion of the panel to cool it quickly.
 Shrinking Methods
(1) ELECTRIC WELDING MACHINE
The body panel is connected to the negative power supply terminal and the tip is connected to the positive terminal. Then, an electric current is supplied to heat the pane ...

Other materials:
Removal & Installation
REMOVAL
Remove the map lamp assembly. Refer to Removal and Installation.
Remove the microphone harness connector .
Use a suitable tool to release pawl and remove the switch finisher .
: Pawls
CAUTION:
Do not damage pawl.
Use a suitable tool to release pawls and remove the moonroof switch asse ...
Removal and Installation
REMOVAL
Remove instrument lower panel LH. Refer to Removal and Installation.
Remove steering column control module bracket mounting screw .
Disconnect steering column control module connector.
Remove steering column control module.
INSTALLATION
Note the following items, and then install in the rev ...
Removal and Installation
WARNING:
REMOVAL
The ignition switch OFF.
CAUTION:
Wait for 60 seconds after the ignition switch OFF.
Disconnect negative battery terminal. Refer to Removal and Installation
Disconnect the transfer control actuator connector .
Remove harness clip .
Remove transfer control actuator mounting bolt ...

0.0052