
Nissan Armada 2025-2026 Service and Repair Manual: Inspection
WARNING:
COMPONENT PART
Check the mounting conditions (looseness, backlash) of each component and component conditions (wear, damage) are normal.
Ball Joint Axial End Play
WARNING:
When moving the rear tires up and down by hand, place a jack at the front garage jack point to stabilize the vehicle or the vehicle could rock and fall off the lift resulting in serious personal injury or death.
Check ball joint boot for cracks or other damage. If there are cracks or other damage, replace suspension arm or front lower link.
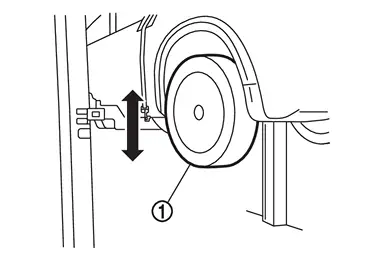
Lift the vehicle and vertically swing tires
 by hand to check if the ball joint has a backlash. If it has a backlash, replace suspension arm or front lower link.
CAUTION:
Never depress brake pedal when measuring.
Never perform with tires on level ground.
Be careful not to damage ball joint boot. Do not apply excessive force.
SHOCK ABSORBER
Check for oil leakage and damage. Replace it if necessary.
Oil Leakage Inspection
If oil
 does not extend beyond the spring seat
  or upper half (C) of strut/shock absorber , this is slight oil seepage and the strut/shock absorber should not be replaced.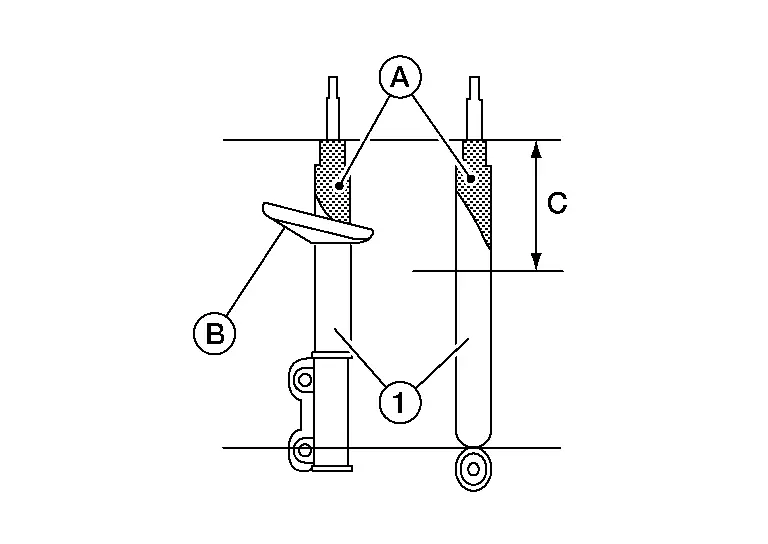
If oil
does extend beyond the spring seat or upper half (C) of strut/shock absorber as shown, perform the following.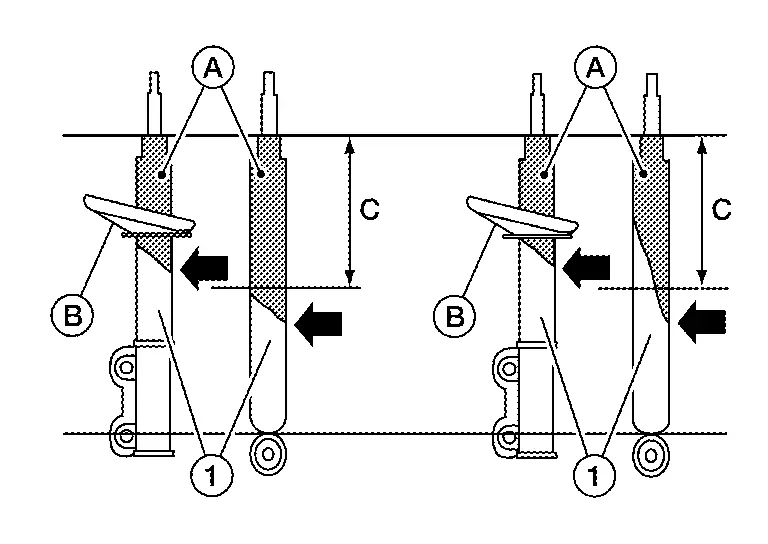
Use a finger to touch the oil that has extended beyond the spring seat or upper half of strut/ shock absorber.
If the oil layer is thick and contains large pieces of dust and debris, replace the strut/shock absorber.
If the oil layer is thin and does not contain large pieces of dust and debris, do not replace the strut/shock absorber.
 NOTE:
NOTE:
If strut/shock absorber leakage is diagnosed in one strut/shock absorber, do not automatically replace both sides. Replace only the leaking strut/shock absorber.

 Wheel Alignment
...
Other materials:
Removal and Installation
REMOVAL
Remove front evaporator. Refer to Removal and Installation.
Disconnect sub harness connector from intake sensor harness connector.
Remove intake sensor harness connector from front case upper.
Remove intake sensor from front evaporator.
CAUTION:
Mark the mounting position of intake se ...
Removal and Installation
REMOVAL
Remove rear A/C unit assembly. Refer to Removal and Installation.
Remove cooler packing.
Remove cooler grommet.
Remove heater pipe support fixing screws .
Disengage fixing pawls, and then remove heater pipe support from rear A/C unit case LH.
: Pawl
Remove fixing screw , and then remo ...
Seats, seat belts and Supplemental Restraint System (SRS)
Example
This illustrated section of the Nissan Armada manual provides a comprehensive
overview of critical safety systems, including advanced Supplemental Restraint System
(SRS) components designed to enhance passenger protection in various driving conditions.
Understanding these elements ...

0.0049