
Nissan Armada 2025-2026 Service and Repair Manual: Inspection and Adjustment
WARNING:
INSPECTION
Appearance
Check surface of disc rotor for uneven wear, cracks, and serious damage. Replace it if necessary.
2WD: Refer to Removal and Installation.
4WD: Refer to Removal and Installation.
Runout
Fix the disc rotor to the wheel hub and bearing assembly with wheel nuts (2 points at least).
Check the wheel bearing axial end play.
2WD: Refer to Inspection.
4WD: Refer to Inspection.
Inspect the runout with a dial indicator to measure at 10 mm (0.39 in) inside the disc edge.
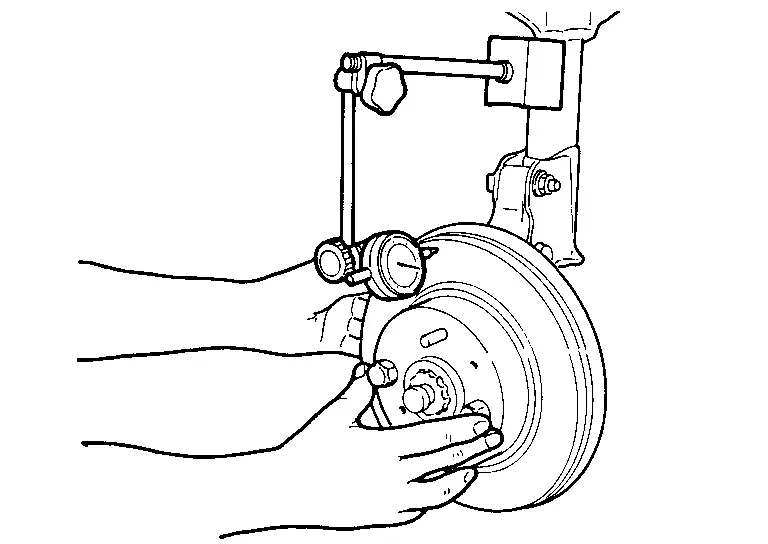
| Runout (with it attached to the vehicle) | : Refer to Front Disc Brake. |
Find the installation position that has a minimum runout by shifting the disc rotor-to-wheel hub and bearing assembly installation position by one hole at a time if the runout exceeds the limit value.
Refinish the disc rotor if the runout is outside the limit even after performing the above operation.
CAUTION:
Check in advance that the thickness of the disc rotor is wear thickness + 0.3 mm (0.012 in) or more.
If the thickness is less than wear thickness + 0.3 mm (0.012 in), replace the disc rotor.
2WD: Refer to Removal and Installation.
4WD: Refer to Removal and Installation.
| Wear thickness | : Refer to Front Disc Brake. |
Thickness
Check the thickness of the disc rotor using a micrometer. Replace the disc rotor if the thickness is below the wear limit.
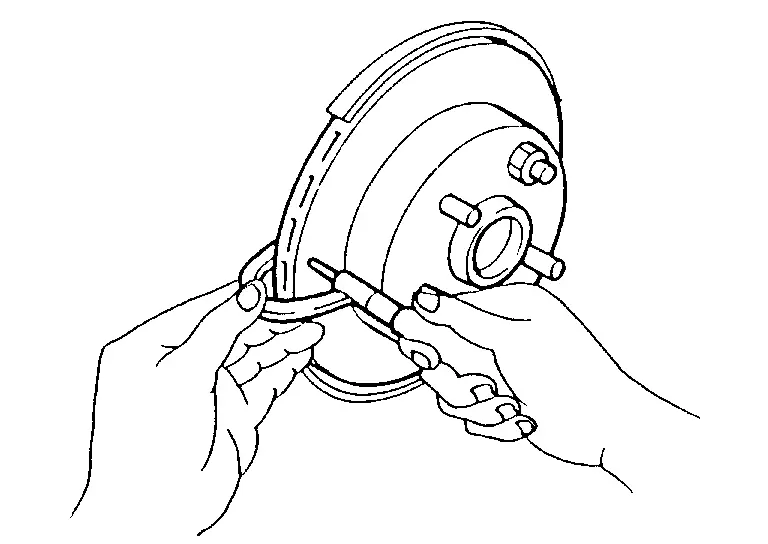
2WD: Refer to Removal and Installation.
4WD: Refer to Removal and Installation.
| Wear thickness | : Refer to Front Disc Brake. |
ADJUSTMENT
Burnish contact surfaces between disc rotors and brake pads according to the following procedure after refinishing or replacing disc rotor, or if a soft pedal occurs at very low mileage.
CAUTION:
Be careful of vehicle speed because the brake does not operate firmly/securely until pad and disc rotor are securely fitted.
Drive vehicle on straight, flat road.
Drive without depressing brake for a few minutes to cool the brake.
Repeat steps 1 to 3 until pad and disc rotor are securely fitted.
 Disc Rotor
...
 Rear Disc Brake
...
Other materials:
Removal and Installation
REMOVAL
Remove glass mirror. Refer to Removal and Installation.
Apply protective tapes (A) on the part to protect it from damage.
Disengage door mirror cover fixing pawls from door mirror housing assembly .
: Pawl
Remove door mirror cover.
INSTALLATION
Note the following item, and then insta ...
Removal and Installation
REMOVAL
CAUTION:
Never damage the rear door panel.
Fully open rear door glass.
Apply protective tapes (A) on the part to protect it from damage.
Disengage rear door outside molding fixing pawls of front and rear side using remover tool (A) and (B).
CAUTION:
Never lift rear door outside molding ...
Exploded View
Rear body side welt Assist grip Center pillar upper garnish Front body side welt Front pillar garnish Assist grip Front kicking plate Dash trim clip Dash side finisher Harness protector Front side bracket Center pillar lower garnish Center pillar lower escutcheon Rear side bracket Tr ...

0.0053