Exploded View
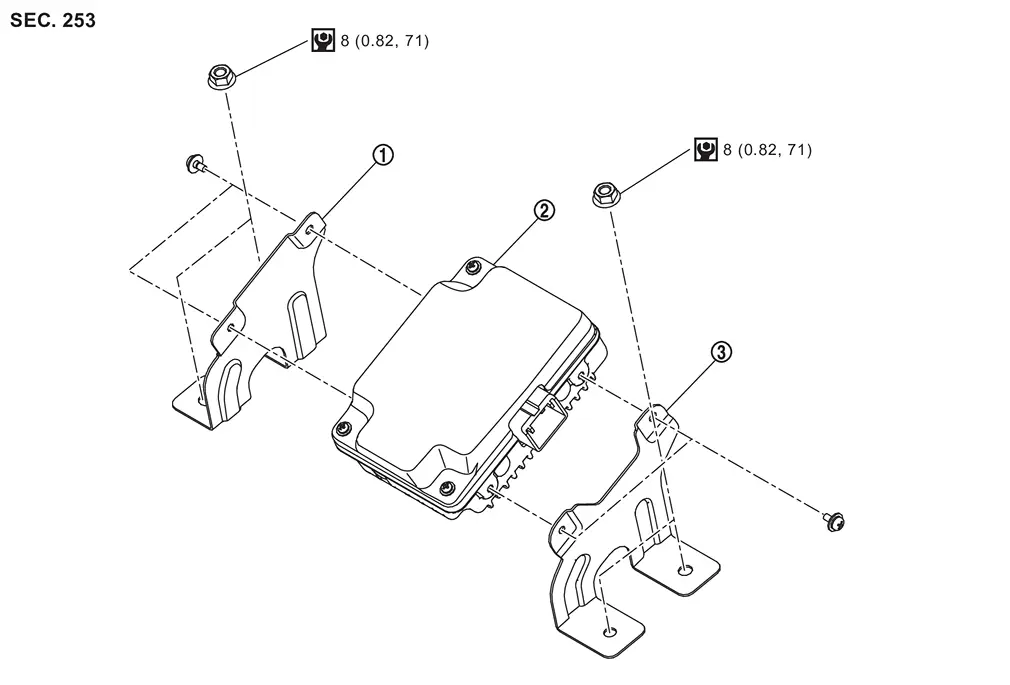
 |
Bracket LH |  |
Inverter unit |  |
Bracket RH |
 |
:N·m (kg-m, in-lb) | ||||
Removal and Installation
REMOVAL
Remove luggage side lower finisher LH. Refer to Removal and Installation.
Disconnect inverter unit harness connector.
Remove inverter unit mounting nuts.
Remove the bracket from the inverter unit if necessary.
INSTALLATION
Note the following, and install in the reverse order of removal.
To install mounting nuts of inverter unit, referring tightening to the specified torque to the numerical order shown in the figure.
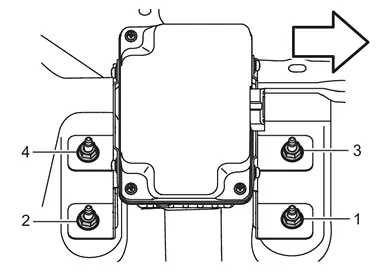
| Specified torque | : 1 → 2 → 3 → 4 | ||||
| : vehicle front | |||||
Other materials
Chassis control
Basic information
The Nissan Armada chassis control system is an advanced electronic module designed
to enhance driving stability and comfort by managing multiple dynamic functions.
Intelligent Trace Control
Intelligent Trace Control
The Intelligent Trace Control system in the Nissan Arma ...
Precautions
Precautions for Removing Battery Terminal
When disconnecting the 12V battery terminal, turn off the ACC power before disconnecting the 12V battery terminal, observing “How to disconnect 12V battery terminal� described below.
NOTE:
Some ECUs operate for a certain fixed time even after ignit ...
Rear Propeller Shaft: 2f C-C
Inspection
WARNING:
Jacking up or lift up the vehicle may the vehicle height to go down which cause a personal injury and/or damage to the air suspension component parts. Refer to Precaution for when Jacking and Lifting Up the vehicle with Electronic Air Suspension System.
LOOSENESS OF CONNECT ...