Exploded View
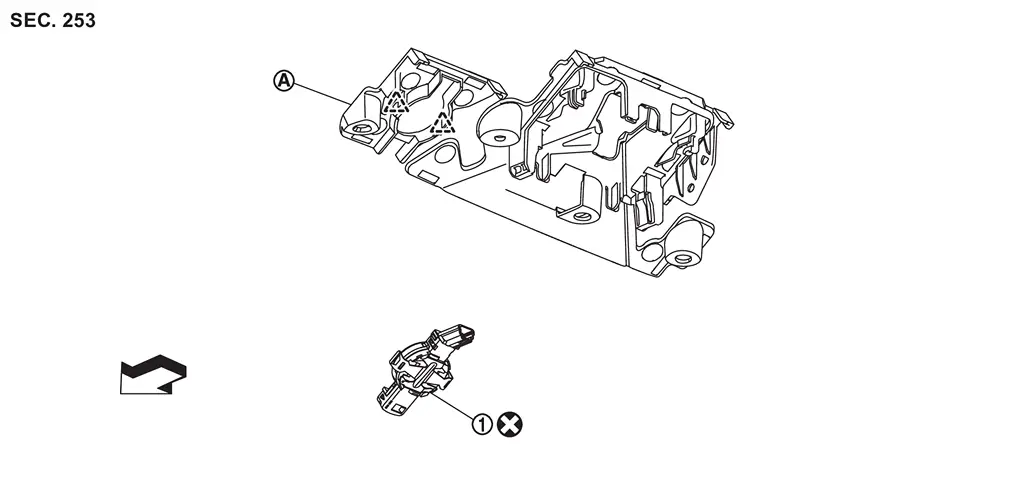
 |
Light & rain sensor | ||||
 |
Bracket | ||||
 |
: Pawl | ||||
| : vehicle front | |||||
 |
: Always replace after every disassembly. | ||||
Removal and Installation
REMOVAL
Remove cover. Refer to Removal and Installation.
Disconnect light & rain sensor harness connector.
Disengage light & rain sensor fixing pawls, and then peel off light & rain sensor.
INSTALLATION
Note the following items, and then install in the reverse order of removal.
CAUTION:
-
Never reuse light & rain sensor. Always replace it with a new one when it is removed.
-
Never use light & rain sensor that is dropped.
-
Before installation, wipe off silicon pad remaining on windshield glass surface and clean sensor installation portion of windshield glass.
-
Just before installation, remove sensor protective cover. Never touch silicon pad
after removal of sensor protective cover. And when installing light & rain sensor, never allow silicon pad to touch bracket and other parts.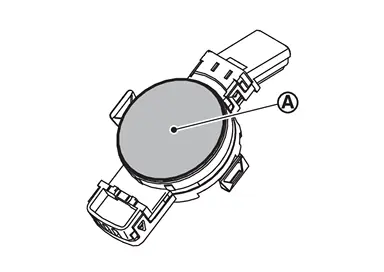
-
Install light & rain sensor so that connector faces vehicle upward.
-
Compress lock spring portions
vertically to windshield glass surface and fully engage both ends of lock spring.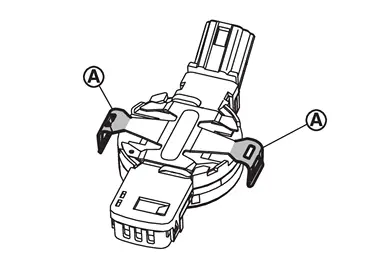
-
After installation, perform check light & rain sensor. Refer to Inspection.
Inspection
CAUTION:
Clean windshield glass and front wiper refill so that windshield glass may not be damaged by dust, etc.
Push ignition switch to ON position and set combination switch to AUTO.
Spray water mist toward light & rain sensor.
If front wiper does not operate, perform diagnosis of light & rain sensor. Refer to Component Function Check.
Other materials
Performance Test
Inspection
INSPECTION PROCEDURE
Connect recovery/recycling/recharging equipment (for HFO-1234yf) or manifold gauge.
Start the engine, and set to the following condition.
Test condition Surrounding condition
Indoors or in the shade
(in a well-ventilated place)
vehicle condition
Door
Closed ...
Rear Door Glass Run
Removal and Installation
REMOVALCAUTION:
Never excessively pull rear door glass run.Remove rear door sash cover. Refer to Removal and Installation.
Remove rear door sash inner cover and inside seal. Refer to Removal and Installation.
Reconnect power window main switch connector with rear door finish ...
Facial Recognition Check
Work Procedure
If system detects that driver is not facing forward even though driver is facing forward, perform face recognition check.PREPARATION BEFORE FACE RECOGNITION CHECK
Make sure that all of the following conditions are satisfied
vehicle speed is 0 km/h (stopped).
Shift position is "P" ...