Exploded View
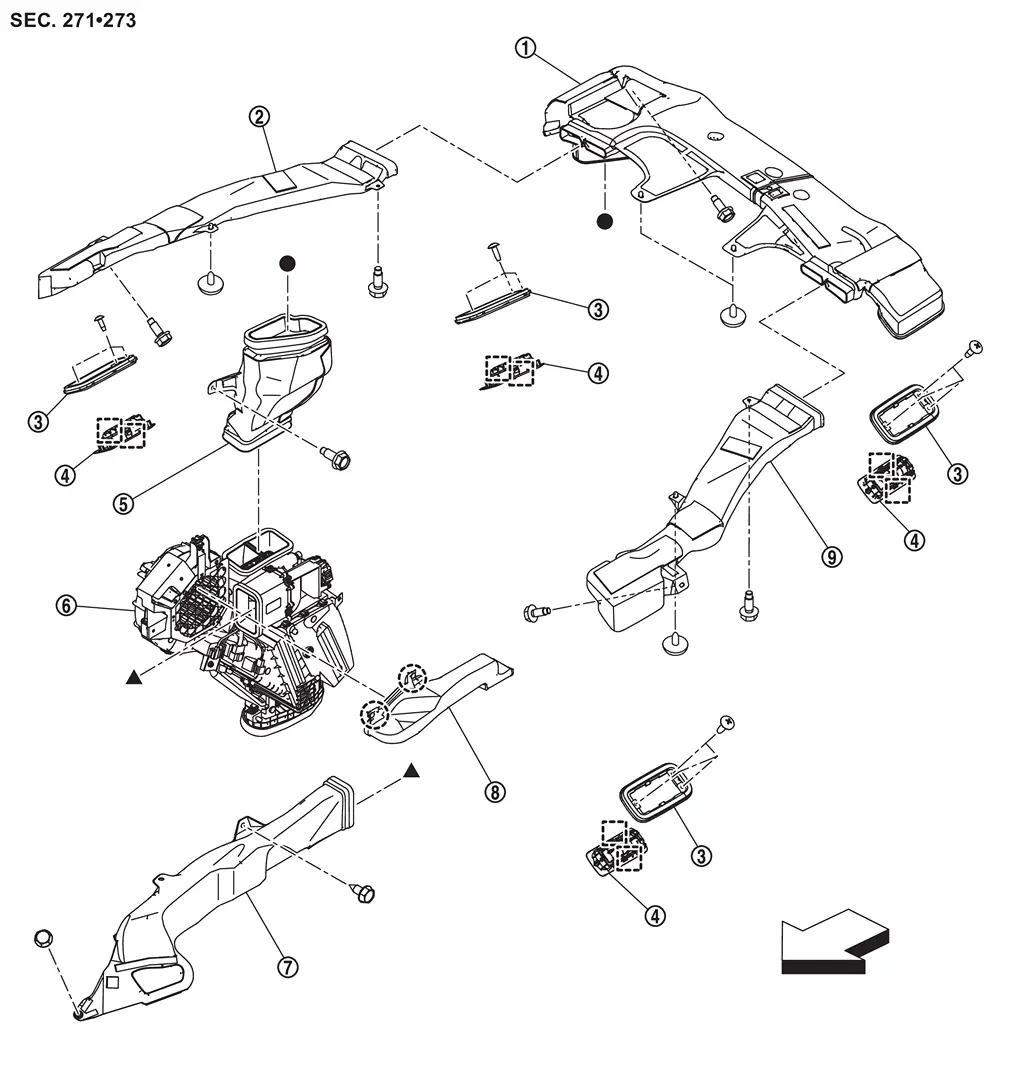
 |
Rear ventilator duct 1 |  |
Rear ventilator duct 2 RH |  |
Rear ventilator grille housing |
 |
Rear ventilator grille |  |
Rear ventilator connecting duct |  |
Rear A/C unit assembly |
 |
Rear foot duct |  |
Rear inlet duct |  |
Rear ventilator duct 2 LH |
 |
: Clip | ||||
 |
: Metal clip | ||||
| : vehicle front | |||||
 , : Indicates that the part is connected at points with same symbol in actual vehicle. , : Indicates that the part is connected at points with same symbol in actual vehicle. |
|||||
Rear Inlet Duct
Removal and Installation
REMOVAL
Remove luggage side lower finisher RH. Refer to Removal and Installation.
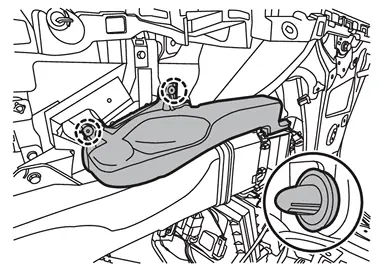
Disengage fixing clips, and then remove rear inlet duct.
|
: Clip |
INSTALLATION
Install in the reverse order of removal.
Rear Foot Duct
Removal and Installation
REMOVAL
Remove luggage side lower finisher RH. Refer to Removal and Installation.
Remove rear foot duct mounting screws  .
.
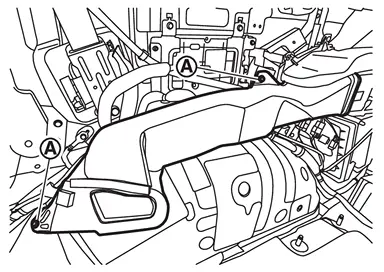
Disengage harness fixing clip, and then remove rear foot duct.
INSTALLATION
Install in the reverse order of removal.
Rear Ventilator Duct
Removal and Installation
REMOVAL
Rear Ventilator Duct 1
Remove headlining assembly. Refer to Removal and Installation.
Remove rear ventilator duct 1 mounting bolt .
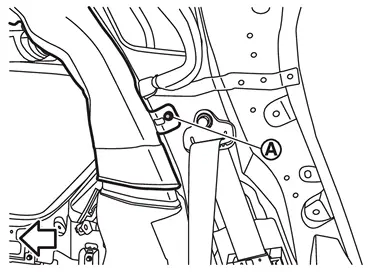
| : vehicle front |
Remove fixing clips , and then remove rear ventilator duct 1.
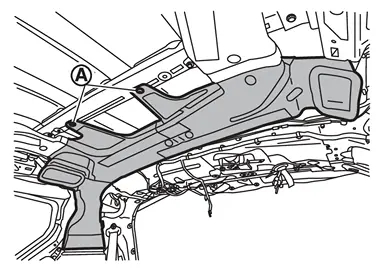
Rear Ventilator Duct 2
Remove headlining assembly. Refer to Removal and Installation.
Disconnect rear drain hose LH and RH from moonroof unit assembly. Refer to Removal and Installation.
Remove mounting bolts and fixing clip  , and then remove rear ventilator duct 2.
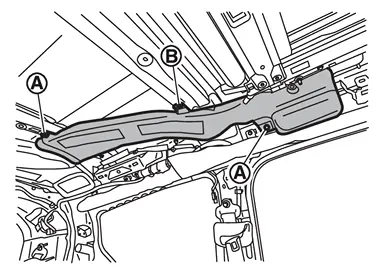
INSTALLATION
Install in the reverse order of removal.
Rear Ventilator Grille
Removal and Installation
REMOVAL
Remove headlining assembly. Refer to Removal and Installation.
Remove fixing screws and disengage metal clips , and then remove rear ventilator grille housing.
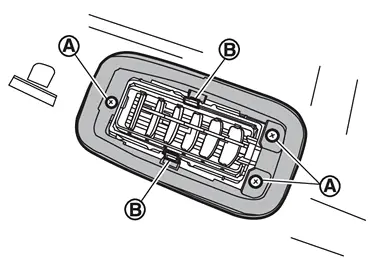
Disengage fixing metal clips , and then remove rear ventilator grille.
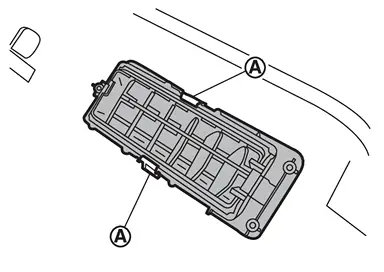
INSTALLATION
Install in the reverse order of removal.
Rear Ventilator Connecting Duct
Removal and Installation
REMOVAL
Remove rear ventilator duct 1. Refer to Removal and Installation.
Remove mounting bolt , and then remove rear ventilator connecting duct.
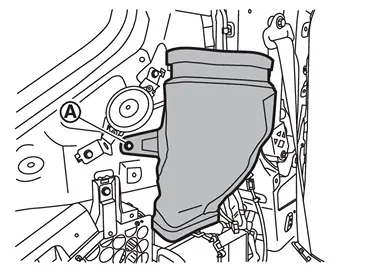
INSTALLATION
Install in the reverse order of removal.
Other materials
Diagnosis and Repair Work Flow
Work Flow
DETAILED FLOWINTERVIEW FROM THE CUSTOMER
CAUTION:
Customers are not professional. Never guess easily like “maybe the customer means that...,� or “maybe the customer mentions this symptom�.
>>
GO TO 2.
CHECK SYMPTOM
Reproduce the symptom that is indicated by the customer, b ...
Second Heated Seat System
Symptom Table
Symptom Possible causeInspection item
Second heated seat system does not operate
Display unit and rear A/C control operation does not operate
Fuse
Second seat heater power supply/ground/LIN signal circuit
Second seat cushion heater
Second seatback heater
A/C auto amp.
Check second ...
Battery Terminal with Fusible Link
Exploded View
Without ProPILOT ASSIST 2.1
Battery fix frame
Battery cover
Negative cable
Battery current sensor
12V battery
Battery fix rod
Battery fix rod clip
Battery tray
Battery positive terminal
Battery positive terminal cover
Battery terminal with fusible link ...