
Nissan Armada 2025-2026 Service and Repair Manual: MIG Welding Method
(1) PLUG WELDING
MIG plug welding method is used to repair the spot welded portions.
Keep the upper panel and lower panel tightly together. Before welding, contact closely the points to be plug welded.
Observe the welding condition described in the Body Repair Manual.
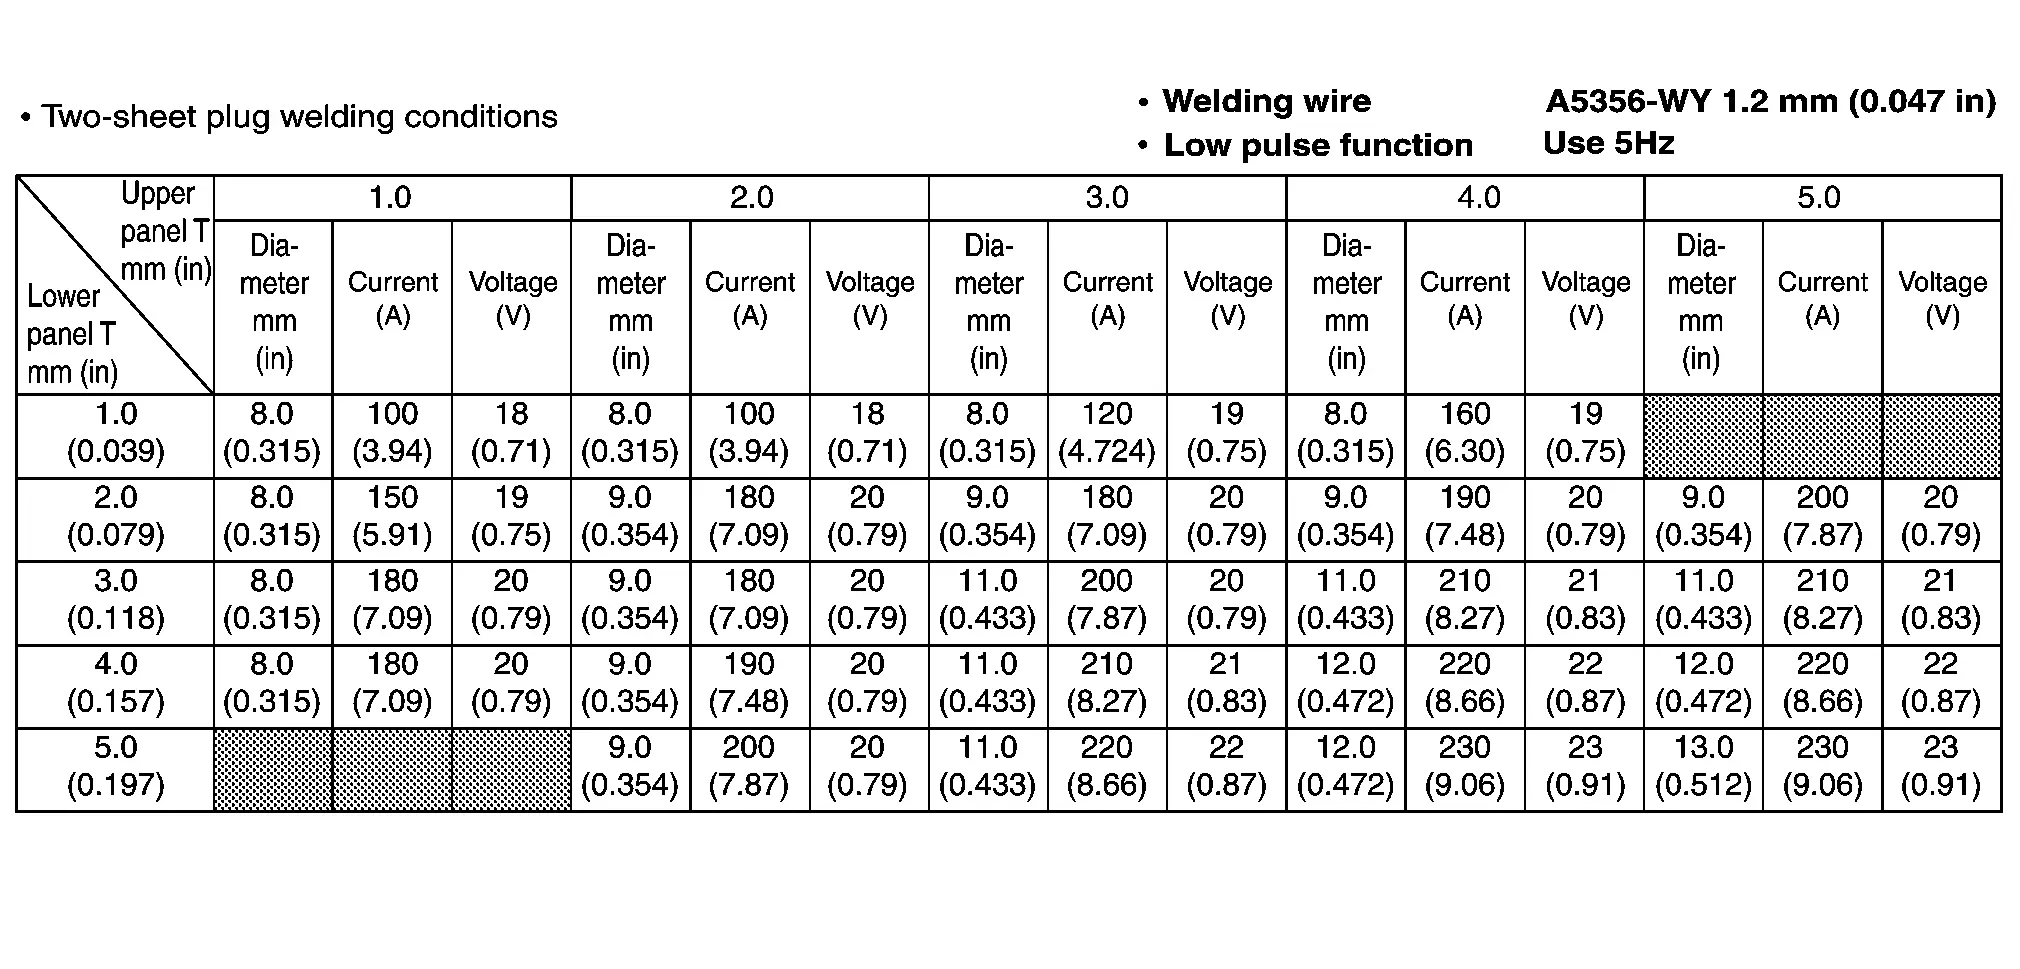
(a) Welding condition (plug welding)
Basically, the following welding conditions are intended for horizontal welding. Therefore, depending on the welding direction, adjustment may be necessary.
(b) Three-sheet plug welding condition
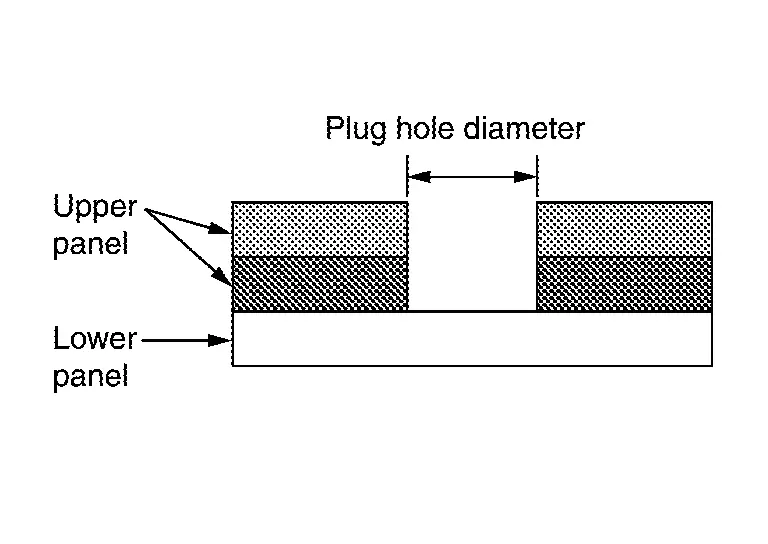
Consider the total thickness of two upper panels as the upper panel thickness. Using this thickness, apply the two-sheet plug welding conditions to set plug hole diameter, current, and voltage.
(c) Torch movement
Thickness of lower panel
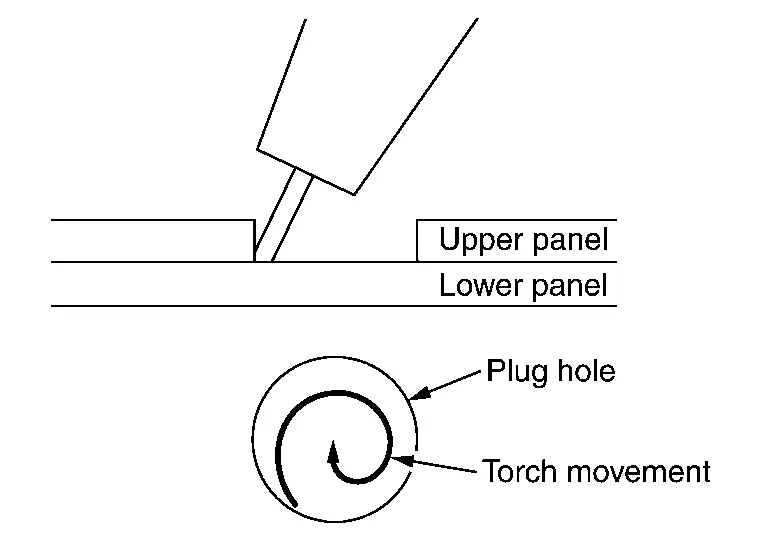
1.4 mm (0.055 in) or less Weld from the plug hole circumference toward the center in a circular motion.
Thickness of lower panel
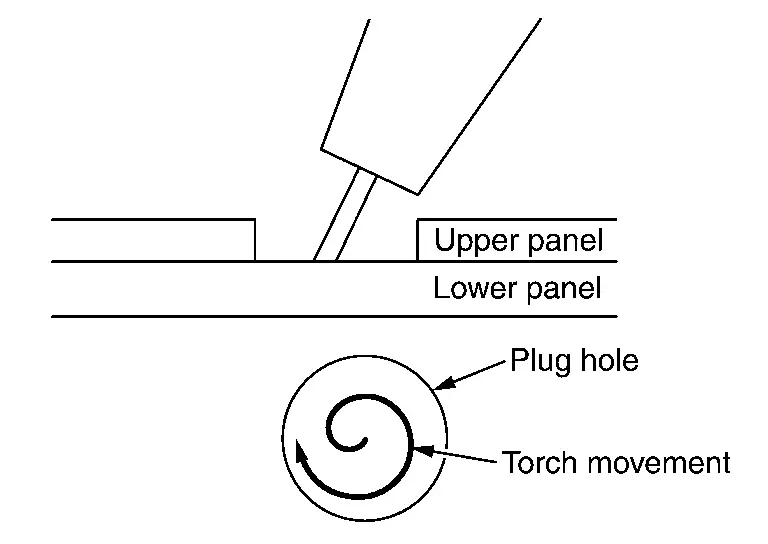
1.5 mm (0.059 in) or more Weld from the plug hole center toward the circumference in a circular motion.
(d) Backing block
When thin panels are plug welded, a backing block, as shown in the figure, is placed on the underside of the panels, and fixed onto the plug hole side with a clamp.
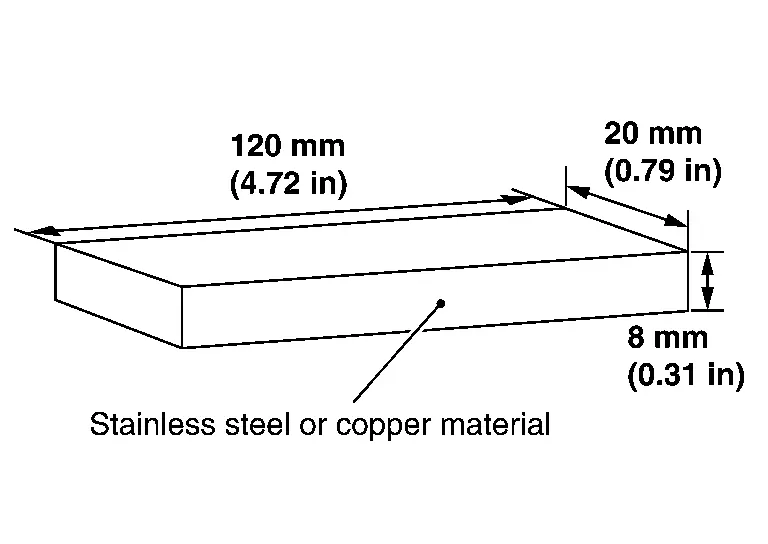
This is to prevent thin panels from burning through.
For locations where backing strips cannot be applied, be careful not to burn through.
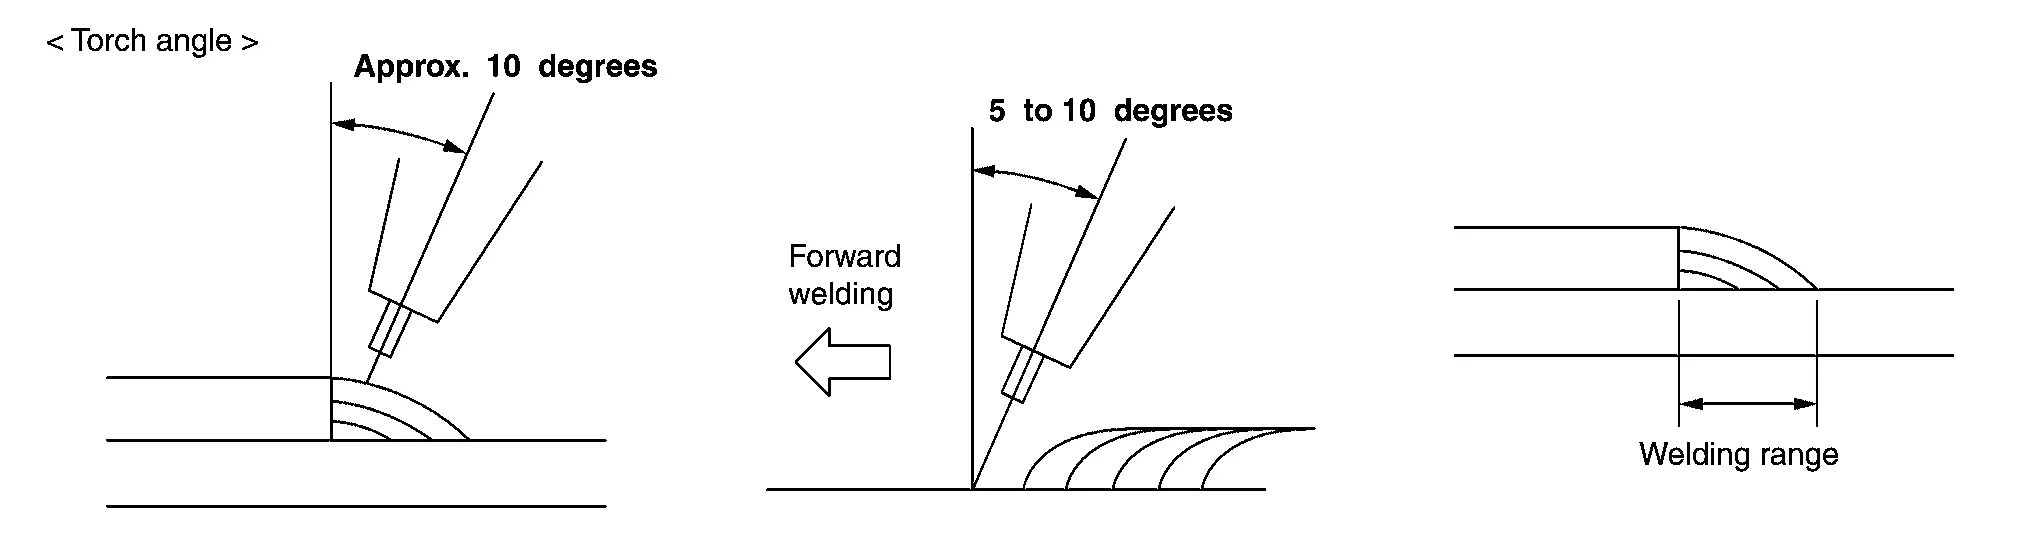
(2) FILLET WELDING
Before welding, contact closely the points to be fillet welded.
Observe the welding conditions and lengths specified in the Body Repair Manual.
Set the welding range for the fillet welding cross section so that it is same as the panel thickness or wider. When the panels have different thicknesses, perform welding according to the welding conditions applicable to the thinner panel.
(3) SLOT WELDING
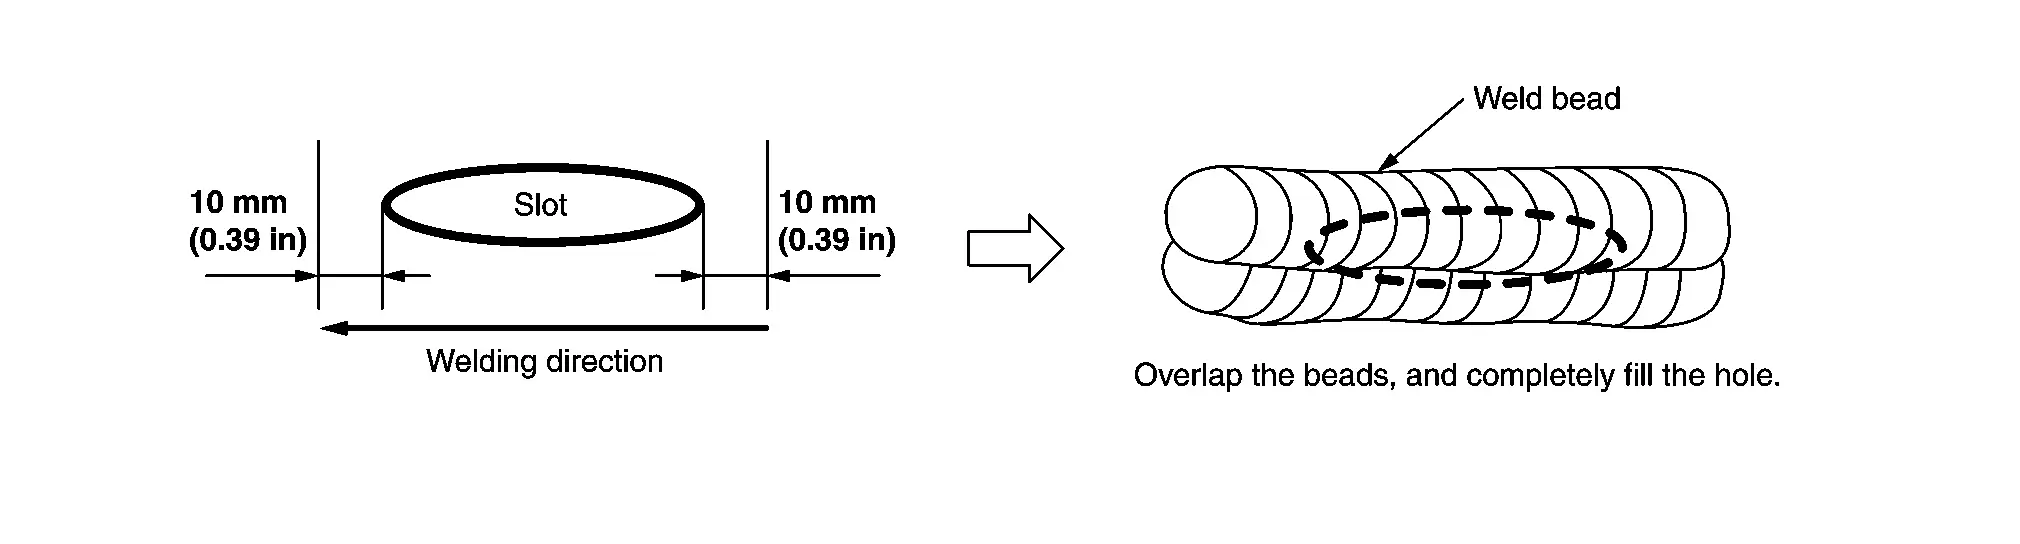
Before welding, contact closely the points to be slot welded.
Observe the welding conditions specified in the Body Repair Manual.
Welding range is from 10 mm (0.39 in) before the slot to 10 mm (0.39 in) after the slot.
(4) BUTT WELDING
Observe the welding conditions specified in the parts replacement procedure.
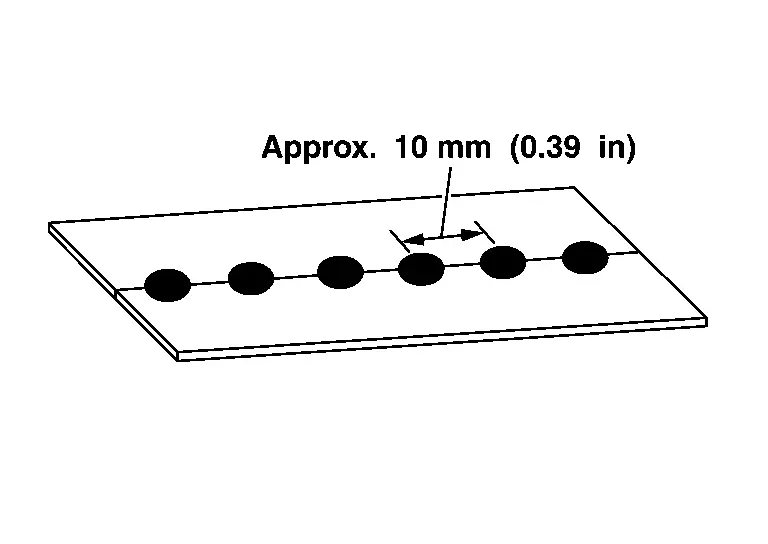
Tack welding: Temporarily, but securely weld at approximately 10 mm (0.39 in) intervals.
Remove aluminum oxides and magnesium oxides generated at tack welded points. Not doing so results in a welding malfunction.
Regular welding.
 MIG Welding
MIG is the abbreviation for metal inert gas shielded arc welding. MIG welding has the following special features.
(1) NORMAL MIG WELDING
MIG welding is the most commonly used welding method. As shown ...
 Precautions during Welding
Wear long sleeved work uniform, work cap, and safety shoes. Wear safety goggles, gloves, earplugs, and dustproof respirator if necessary.
MIG arc welding for aluminum plates emits sparks. Do not stare ...
Other materials:
Removal and Installation
REMOVAL
Place glass mirror upward.
Apply protective tapes (A) on the part to protect it from damage.
Insert remover tool (A) into the recess at between glass mirror and door mirror actuator, and then disengage glass mirror fixing pawls.
CAUTION:
Disengage the fixing pawls slowly so they are not ...
Diagnosis Procedure
REAPPLY THE PARKING BRAKE (1)
Pull the parking brake switch, and apply the parking brake.
Pull the parking brake switch 2 seconds ore mode.
Is the vehicle moving backward?
YES>>
GO TO 2.
NO>>
NORMAL
PERFORM THE SELF-DIAGNOSIS
With CONSULT
Perform self-diagnosis for “ABS�.
Is any D ...
Supplemental air bag warning labels
The Nissan Armada is equipped with clearly visible warning labels related to
the supplemental front-impact air bag system. These labels are strategically placed
within the vehicle to remind occupants of critical safety precautions.
SRS air bag
The warning labels 1 in the Nissan Armada are ...

0.0056