Exploded View
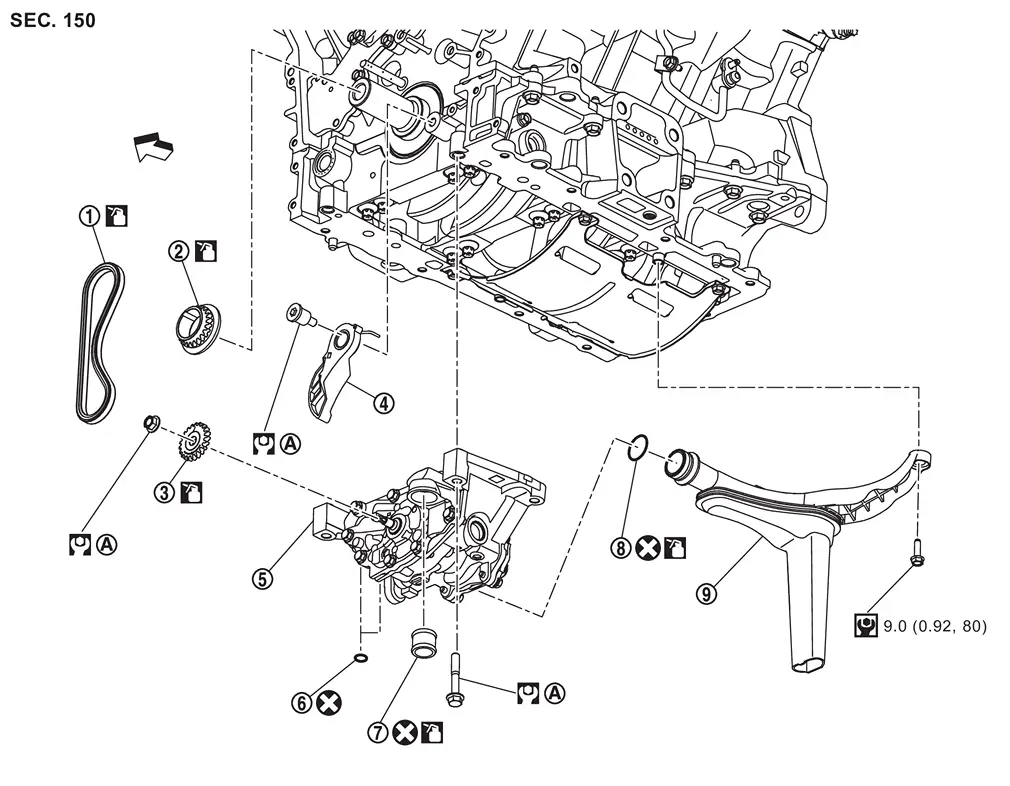
 |
Oil pump drive chain |  |
Oil pump sprocket |  |
Oil pump drive sprocket |
 |
Oil pump drive chain tensioner |  |
Oil pump assembly |  |
O-ring |
 |
Oil pump seal |  |
O-ring |  |
Oil strainer |
 |
Comply with the installation procedure when tightening. Refer to Removal and Installation | ||||
| : Engine front | |||||
 |
: Always replace after every disassembly. | ||||
 |
: N·m (kg-m, ft-lb) | ||||
 |
: N·m (kg-m, in-lb) | ||||
 |
: Should be lubricated with oil. | ||||
Removal and Installation
REMOVAL
Remove the following parts:
-
VTC. Refer to Removal & Installation.
-
Front cover. Refer to Removal & Installation.
-
Timing chain. Refer to Removal and Installation.
-
Oil pan (lower). Refer to Removal and Installation.
-
Oil pan (upper). Refer to Disassembly and Assembly.
Remove oil strainer mounting bolt and remove the oil strainer .
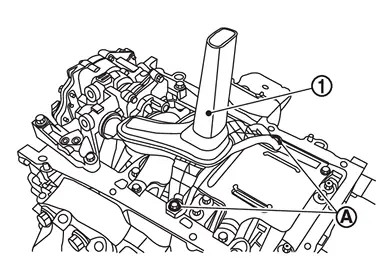
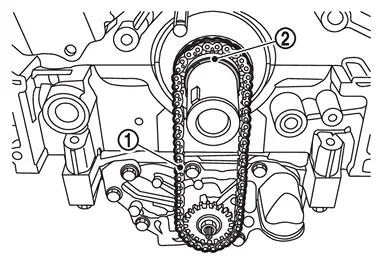
Remove oil pump drive related parts with the following procedure.Remove oil pump drive chain tensioner .
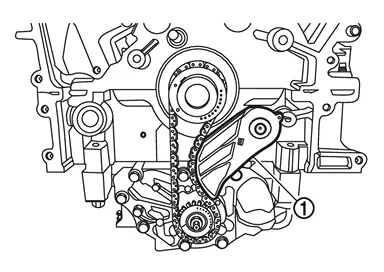
of the oil pump shaft with a Torx socket (commercial service tool) and loosen and remove the oil pump drive sprocket nut  .
.
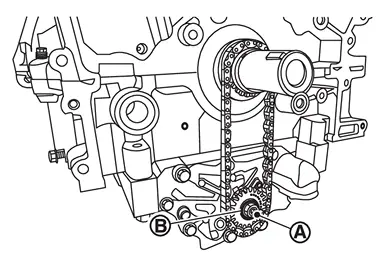
and the oil pump sprocket as a set.
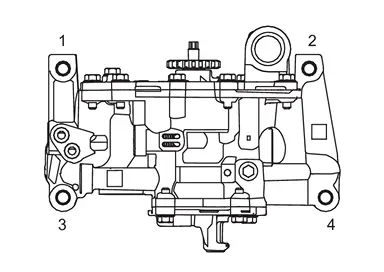
Loosen oil pump mounting bolts in the reverse order of the figure and remove the oil pump.
INSTALLATION
CAUTION:
-
Check that oil pump chain is correctly install on the oil pump sprocket.
-
Before crank the engine, rotate crankshaft by hand to be sure that oil pump chain is correctly.
-
Do not reuse O-ring.
Tighten mounting bolts of the oil pump assembly to the specified torque in the order shown in the figure.
| : 28.0 N·m (2.9 kg-m, 21 ft-lb) |
Install oil strainer.
Install the oil pump drive related parts with the following procedure:Install oil pump drive chain and the oil pump sprocket as a set.
 NOTE:
NOTE:
-
There is no matching mark in the oil pump drive related parts.
-
Oil pump drive chain cannot be installed after installing the oil pump sprocket.
of the oil pump shaft with a Torx socket (commercially available service tool) and tighten the oil pump sprocket nut to the specified torque.
| : 28.0 N·m (2.9 kg-m, 21 ft-lb) |
.
| : 16.7 N·m (1.7 kg-m, 12 ft-lb) |
-
Check that the tension is applied to the oil pump drive chain after installing.
Install the following in the reverse order of removal.
Inspection
INSPECTION AFTER INSTALLATION
Check the engine oil level. Refer to Inspection.
Start the engine, and check there is no leakage of engine oil.
Stop the engine and wait for 10 minutes.
Check the engine oil level and adjust the level. Refer to Inspection.
Other materials
Additional Service When Replacing Control Valve & Tcm
Description
WARNING:
Jacking up or lift up the vehicle may the vehicle height to go down which cause a personal injury and/or damage to the air suspension component parts. Refer to Precaution for when Jacking and Lifting Up the vehicle with Electronic Air Suspension System.
When replacing the ...
Second Seatback
Disassembly and Assembly
CAUTION:
When disassemble, always use a remover tool that is made of plastic to prevent damage.DISASSEMBLYRemove inside and outside seat cushion finisher outer. Refer to Disassembly and Assembly.
Remove armrest (LH seat).Disengage fixing pawls using a remover tool (A), and t ...
Precautions
Precaution for Supplemental Restraint System (SRS) "AIR BAG" and "SEAT BELT PRE-TENSIONER"
The Supplemental Restraint System such as “AIR BAG� and “SEAT BELT PRE-TENSIONER�, used along with a front seat belt, helps to reduce the risk or severity of injury to the driver and front passenger fo ...