
Nissan Armada 2025-2026 Service and Repair Manual: RADIATOR : Removal & Installation
WARNING:
REMOVAL
WARNING:
Never remove radiator cap and reservoir tank cap when engine is hot. Serious burns could occur from high-pressure engine coolant escaping from engine cooling system. Wrap a thick cloth around the cap. Slowly turn it a quarter of a turn to release built-up pressure. Carefully remove radiator cap and reservoir tank cap by turning it all the way.
 NOTE:
NOTE:
When removing components such as hoses, tubes/lines, etc.,cap or plug openings to prevent fluid from spilling.
Remove front under cover using a power tool. Refer to Removal and Installation.
Drain engine coolant. Refer to ENGINE COOLANT : Draining.
CAUTION:
Perform this step when the engine is cold.
Never spill engine coolant on drive belt.
Discharge refrigerant from A/C circuit. Refer to Recycle Refrigerant.
Remove front bumper fascia.
OFF ROAD MODELS: Refer to Removal and Installation.
CITY MODELS: Refer to Removal and Installation.
Remove cooling fan assembly. Refer to ENGINE COOLING FAN : Removal & Installation.
Remove mounting bolt  of the radiator pipe assembly
  .
.
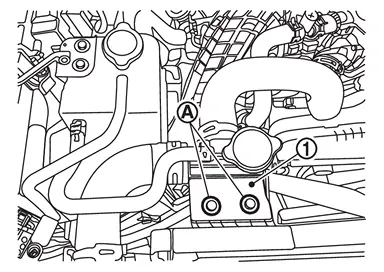
Remove radiator hose lower .
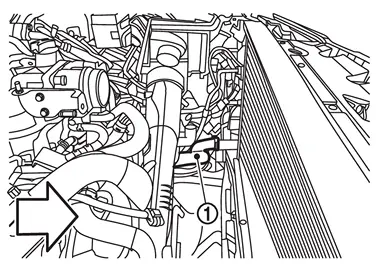
 | : Vehicle front |
Disconnect engine coolant temperature sensor 2 harness connector .
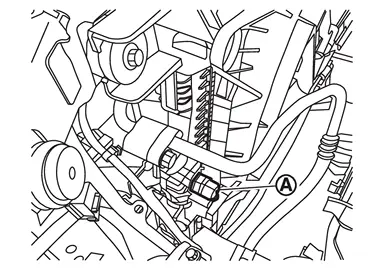
Remove radiator air guide RH and radiator air guide LH  .
.
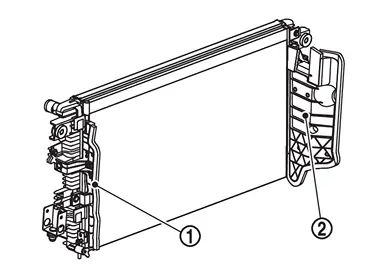
Disconnect refrigerant pressure sensor harness connector .
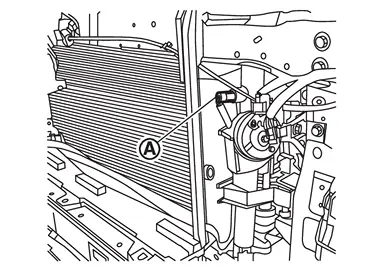
Remove condenser outlet pipe and condenser inlet pipe. Refer to Exploded View.
Remove radiator and condenser as a set.
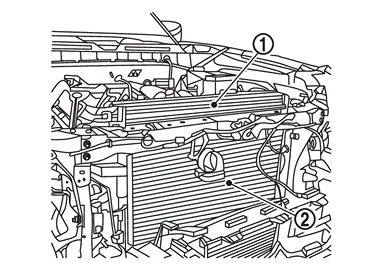
CAUTION:
Never damage or scratch radiator core when removing.
Remove condenser from the radiator.
CAUTION:
Be careful not to damage radiator core.
INSTALLATION
Note the following, and install in the reverse order of removal.
CAUTION:
Do not reuse O-rings.
Use genuine mounting bolts for the cooling fan assembly and strictly observe the tightening torque. (Breakage prevention for radiator)
NOTE:
Insert the radiator hose
 all the way to the stopper
  or by 33 mm (1.30 in) (hose without a stopper).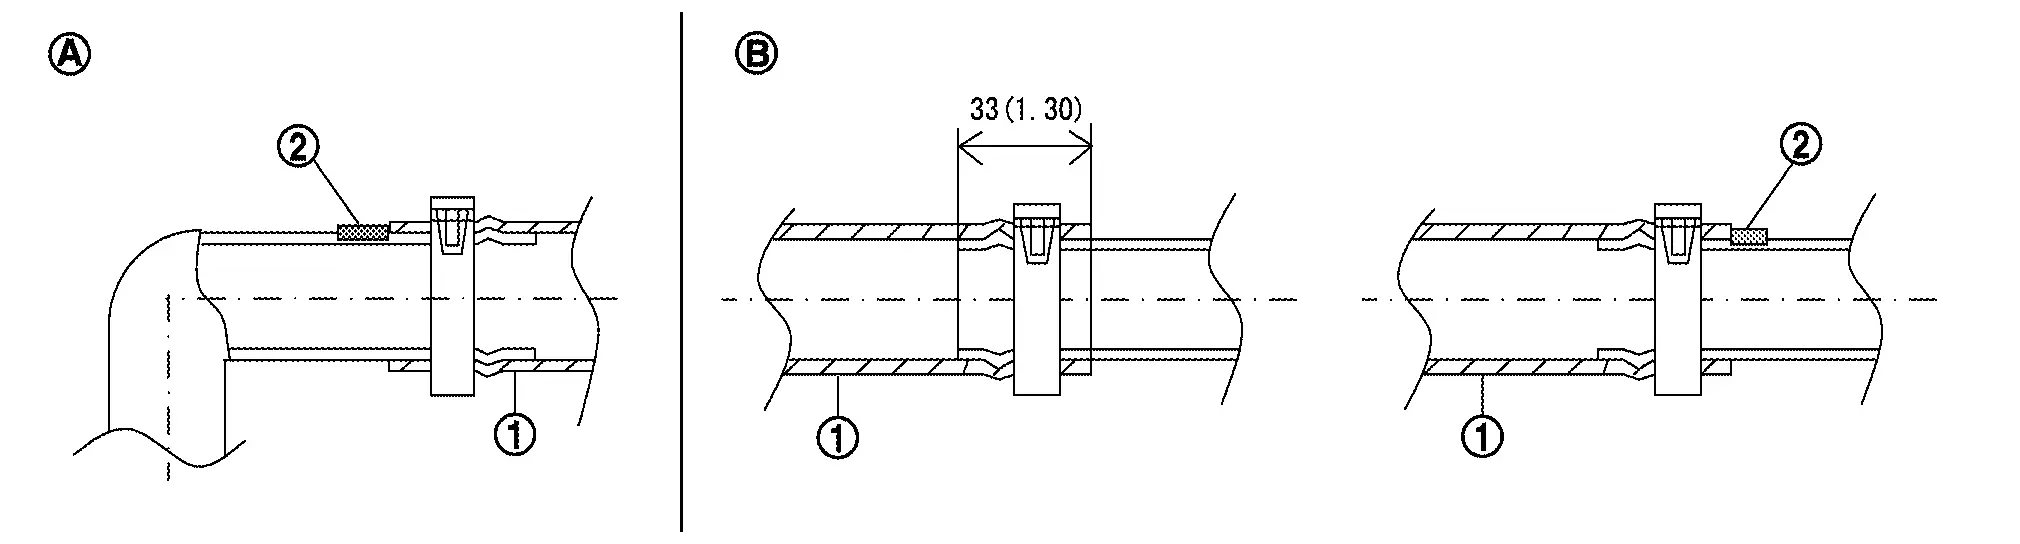
Radiator side 
Engine side Refer to the following table when installing the hose clamps.
Hose location Hose end Direction of paint mark Direction of hose clamp tabs
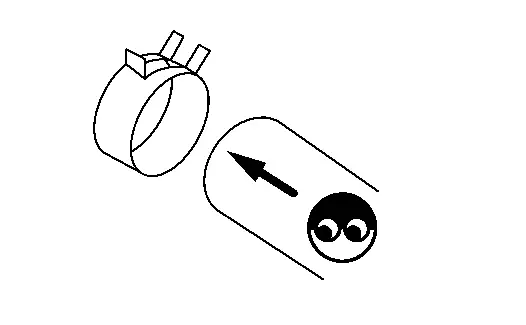 : Vehicle upper
 Radiator hose
(upper)Radiator side Vehicle left 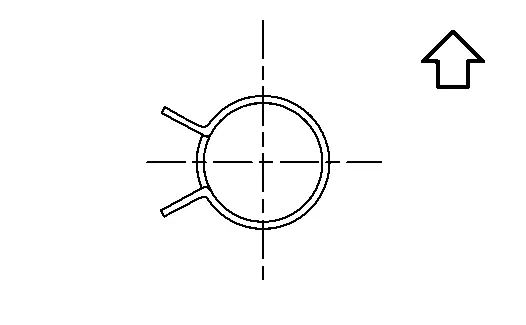
Engine side Vehicle upper left 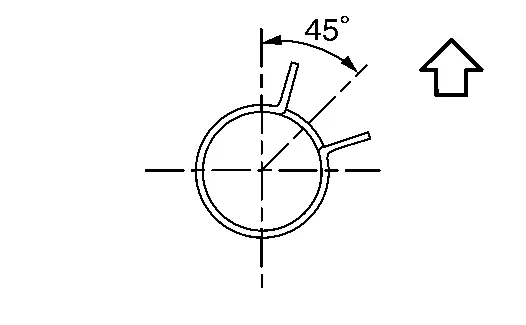
Radiator hose
(lower)Radiator side Vehicle left 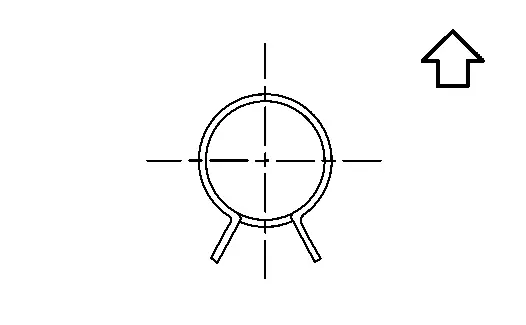
Engine side Vehicle lower right 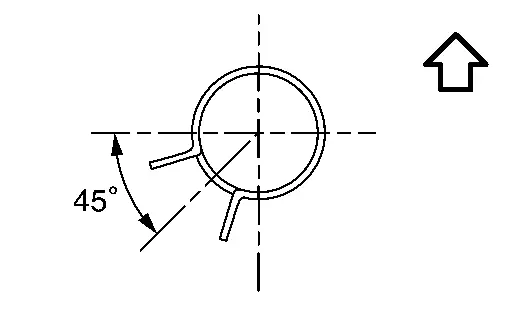
The direction of the hose clamp tabs must be within ±15°
 of the indicated position .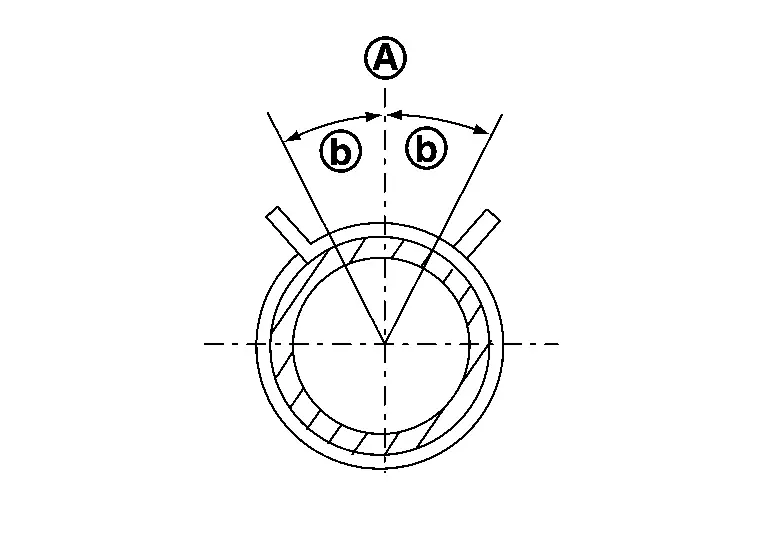
When installing hose clamp
, check that the distance “A� between the end of the radiator hose paint mark and the hose clamp is within the standard range.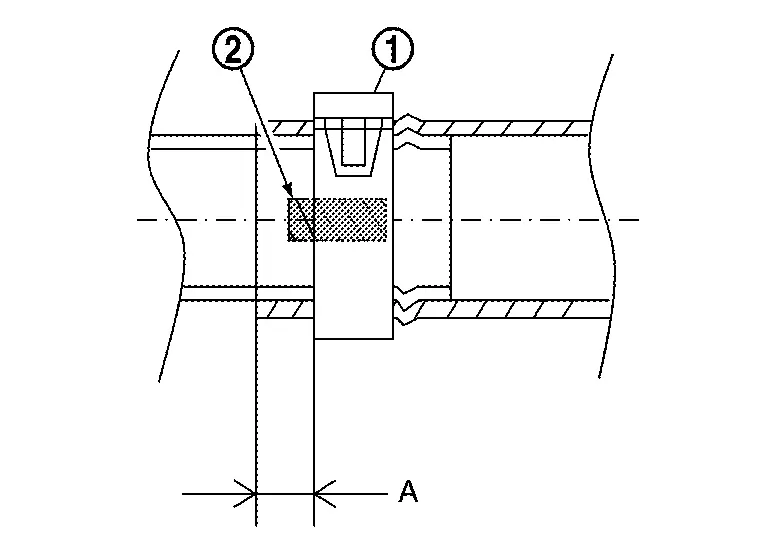
Dimension “A� : 3.0 - 7.0 mm (0.12 - 0.28 in)
 RADIATOR : Exploded View
Radiator drain cock O-ring Mounting rubber (upper) Collar Mounting rubber (lower) Engine coolant temperature sensor 2 Radiator Clamp Radiator hose (lower) Clamp Reservoir tank tube Reserv ...
 RADIATOR : Inspection (Removal & Installation)
INSPECTION AFTER INSTALLATION
Check for leakage of engine coolant using the radiator cap tester adapter (commercial service tool) and the radiator cap tester (commercial service tool). Refer to ENGINE ...
Other materials:
Diagnosis Procedure
CHECK AUTOMATIC BACK DOOR WARNING BUZZER
Check automatic back door warning buzzer.
Refer to DTC Diagnosis Procedure.
Is the inspection result normal?
YES>>
GO TO 2.
NO>>
Repair or replace the malfunctioning parts.
REPLACE AUTOMATIC BACK DOOR CONTROL UNIT
Replace automatic back door con ...
Exploded View
Front LH wheel sensor Bracket Steering knuckle : Vehicle front : N·m (kg-m, in-lb)
NOTE:
Front RH wheel sensor is symmetrically opposite of LH. ...
Basic information
WARNING
Never operate your Nissan Armada while the parking brake is engaged.
Driving with the parking brake applied can cause overheating, reduced braking
performance, and eventual brake failure, significantly increasing the risk of
an accident.
Do not release the parking brake of you ...

0.0102