Exploded View
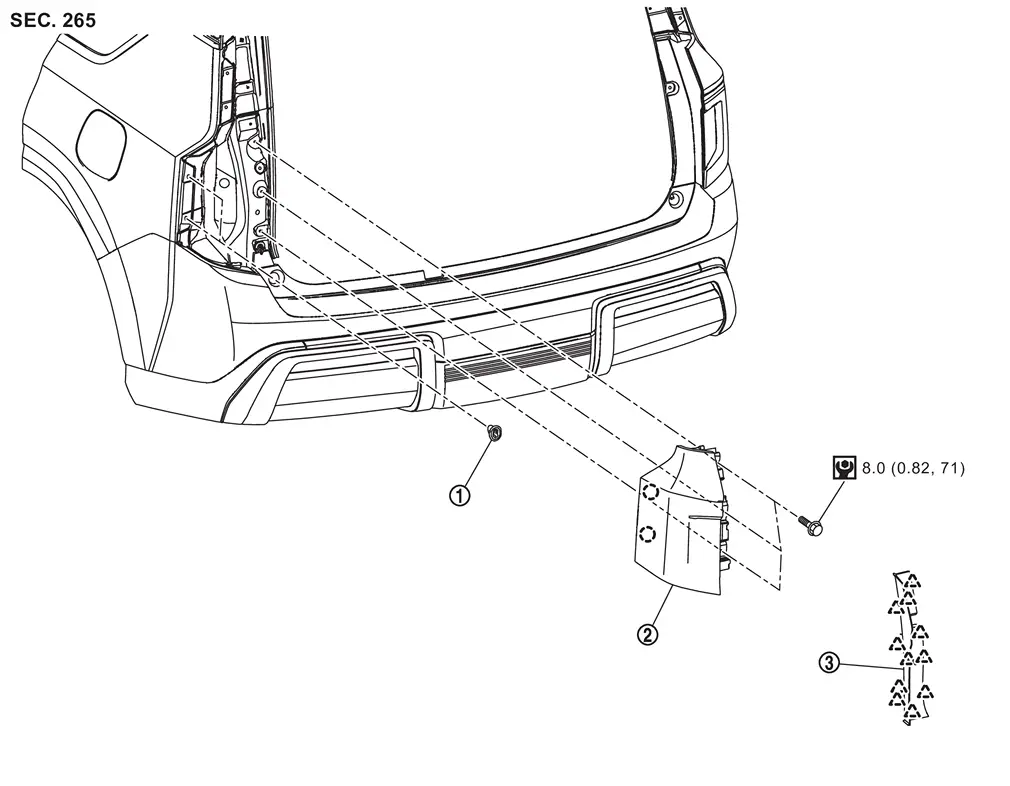
 |
Grommet |  |
Rear combination lamp |  |
Rear combination lamp cover |
 |
: Clip | ||||
 |
: Pawl | ||||
 |
: N·m (kg-m, in-lb) | ||||
Removal and Installation
CAUTION:
Disconnect the battery negative terminal or remove power circuit fuse when performing the operation for preventing electric leakage. Refer to Precautions for Removing Battery Terminal.
REMOVAL
Fully open back door.
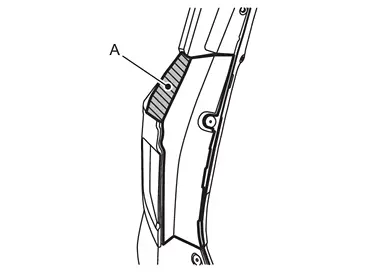
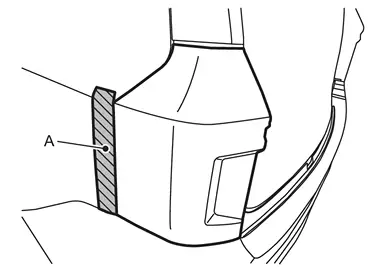
Apply protective tape (A) on the part to protect it from damage.
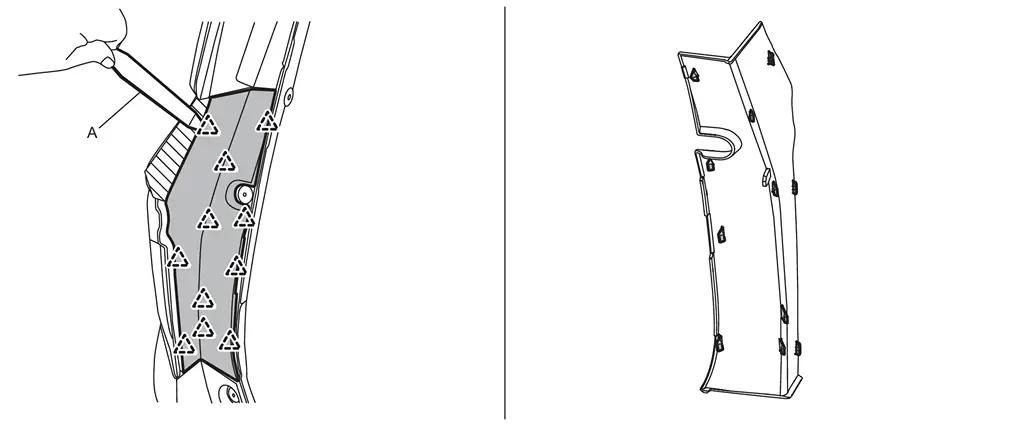
Disengage rear combination lamp cover fixing pawls using a remover tool (A), and then remove rear combination lamp cover.
|
: Pawl |
Remove rear combination lamp mounting bolts  .
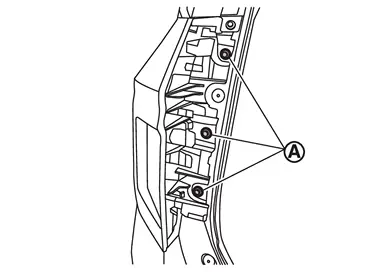
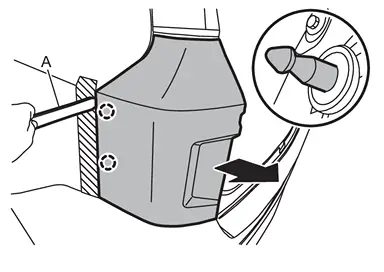
Apply protective tape (A) on the part to protect it from damage.
Disengage combination lamp fixing clips using a remover tool (A).
|
: Clip |
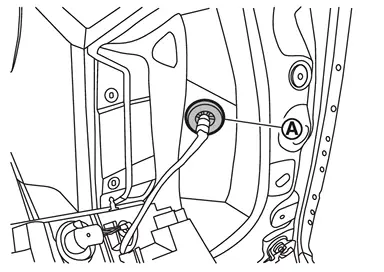
Remove grommet .
Disconnect rear combination lamp harness connector .
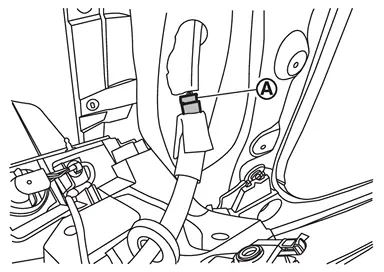
Remove rear combination lamp.
INSTALLATION
Note the following item, and then install in the reverse order of removal.
CAUTION:
Visually check clips for deformation and damage during installation. Replace with new ones if necessary.
Replacement
CAUTION:
Disconnect the battery negative terminal or remove power circuit fuse when performing the operation for preventing electric leakage. Refer to Precautions for Removing Battery Terminal.
TAIL LAMP/STOP LAMP
CAUTION:
Replacement of a single part is not possible due to the adoption of LED. For replacement, replace rear combination lamp as a set. Refer to Removal and Installation.
TAIL LAMP
CAUTION:
Replacement of a single part is not possible due to the adoption of LED. For replacement, replace rear combination lamp as a set. Refer to Removal and Installation.
STOP LAMP
CAUTION:
Replacement of a single part is not possible due to the adoption of LED. For replacement, replace rear combination lamp as a set. Refer to Removal and Installation.
REAR TURN SIGNAL LAMP
CAUTION:
Replacement of a single part is not possible due to the adoption of LED. For replacement, replace rear combination lamp as a set. Refer to Removal and Installation.
BACK-UP LAMP
CAUTION:
Replacement of a single part is not possible due to the adoption of LED. For replacement, replace rear combination lamp as a set. Refer to Removal and Installation.
REAR SIDE MARKER LAMP
CAUTION:
Replacement of a single part is not possible due to the adoption of LED. For replacement, replace rear combination lamp as a set. Refer to Removal and Installation.
Other materials
Seat adjustment using touch screen display
Example
The Nissan Armada offers an advanced and intuitive way to control seat adjustments
through its integrated touch screen display. This system enhances convenience by
allowing the driver to manage multiple seating functions quickly and efficiently
without relying solely on physical c ...
Brake Pad
Exploded View
Cylinder body
Inner shim cover
Inner shim
Inner pad (with pad wear sensor)
Return spring
Pad retainer
Torque member
Outer pad
Outer shim
Outer shim cover
: vehicle front
1: Apply MOLYKOTE® AS880N or siliconebased grease. ...
Shipping Mode Cancel Operation
Work Procedure
SHIPPING MODE CANCEL OPERATION
Ignition switch OFF.
Push in (switch on) the extended storage fuse switch. Refer to How To Check.
Ignition switch ON.
Ignition switch OFF and wait at least 2 seconds.
>>
GO TO 2.
SHIPPING MODE CANCEL CHECK
Ignition switch ON.
Check ...