Exploded View
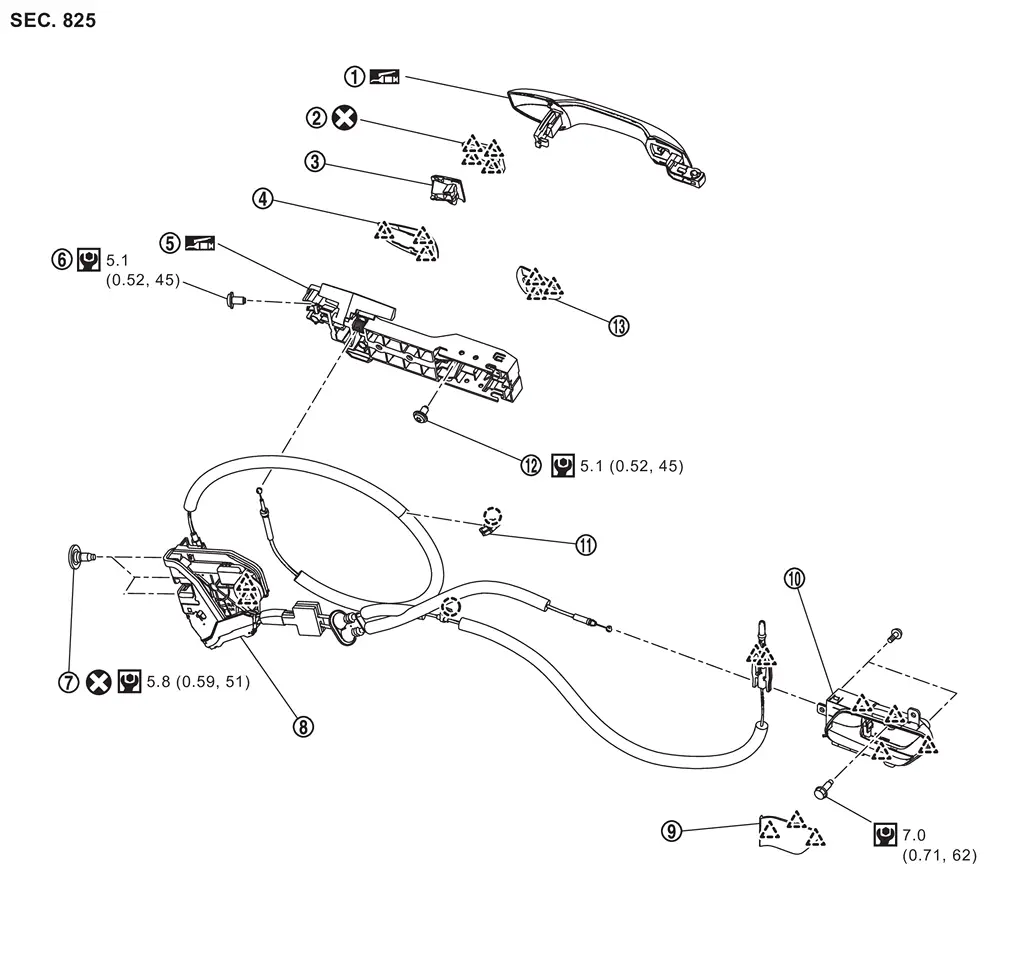
 |
Rear door outside handle |  |
Escutcheon cover |  |
Escutcheon base |
 |
Rear gasket |  |
Rear door outside handle bracket |  |
TORX bolt |
 |
TORX bolt |  |
Rear door lock assembly |  |
Inside handle cap |
 |
Rear door inside handle |  |
Rear door outside handle cable clip |  |
TORX bolt |
 |
Front gasket | ||||
 |
: Clip | ||||
 |
: Pawl | ||||
 |
: Always replace after every disassembly. | ||||
 |
: N·m (kg-m, in-lb) | ||||
 |
: Body grease | ||||
Rear Door Lock Assembly
Removal and Installation
REMOVAL
Remove rear door finisher. Refer to Removal and Installation.
Disconnect rear door lock assembly harness connector.
Disengage rear door lock knob cable fixing clip.
Remove rear door inner frame rear. Refer to Removal and Installation.
Remove rear door outside handle bracket. Refer to Removal and Installation.
Rear door lower sash lower. Refer to Removal and Installation.
Remove rear door lock assembly mounting TORX bolts.
Disengage rear door lock assembly fixing pawls, and then remove rear door lock assembly.
INSTALLATION
Note the following items, and then install in the reverse order of removal.
CAUTION:
-
Never reuse rear door lock assembly mounting TORX bolt. Always replace it with a new one when it is removed.
-
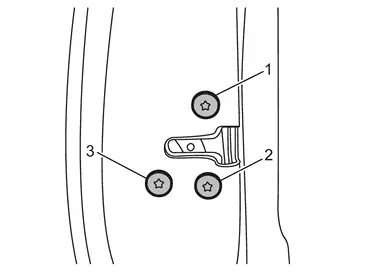
When installing, tighten mounting TORX bolts according to numerical order 1→3 as shown in figure.
-
When installing, be careful that cable is routed normally.
-
When connecting rear door inside handle cable to rear door inside handle, check that rear door inside handle cable is properly engaged with rear door inside handle.
-
When connecting rear door lock knob cable to rear door finisher, check that rear door lock knob cable is properly engaged with rear door finisher.
-
After installation, check rear door lock. Refer to Inspection.
Inspection
After opening and closing the door, check that door is fixed to the vehicle body normally.
Check the lock/unlock operation of door lock.
Rear Door Inside Handle
Removal and Installation
REMOVAL
Remove rear door finisher. Refer to Removal and Installation.
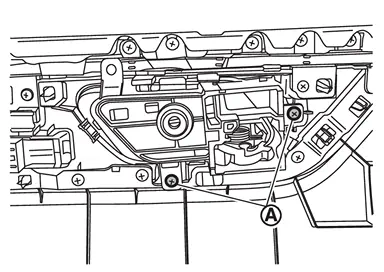
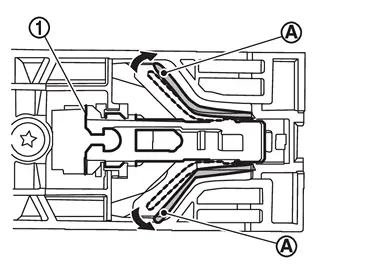
Remove rear door inside handle fixing screws  .
.
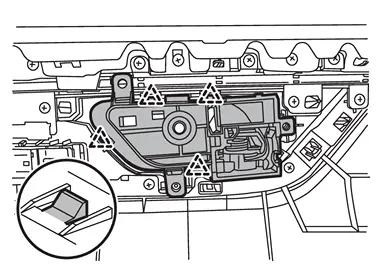
Remove rear door inside handle fixing pawls, and then remove rear door inside handle.
|
:Pawl |
INSTALLATION
Note the following items, and then install in the reverse order of removal.
CAUTION:
-
When connecting rear door inside handle cable to rear door inside handle, check that rear door inside handle cable is properly engaged with rear door inside handle.
-
After installation, check rear door lock. Refer to Inspection.
Rear Door Outside Handle
Removal and Installation
REMOVAL
Remove rear door finisher. Refer to Removal and Installation.
Remove rear door inner frame. Refer to Removal and Installation.
Disconnect rear door outside handle harness connector  , and then disengage rear door outside handle harness connector fixing clip (if equipped).
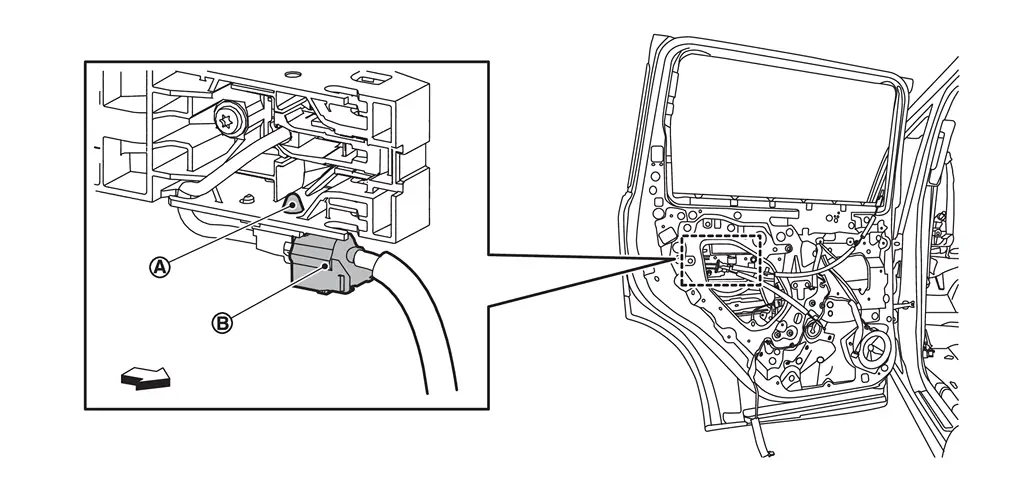
| : vehicle front |
Apply protective tape (A) on the part to protect it from damage.
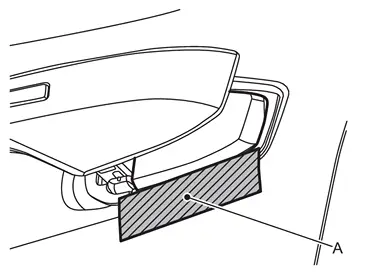
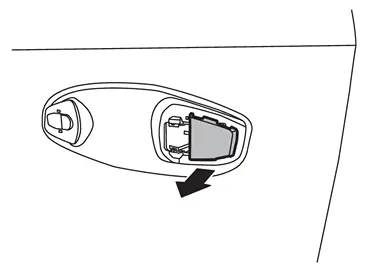
Insert a remover tool (A) at the notch of the escutcheon cover bottom and disengage fixing pawls, and then remove escutcheon cover.
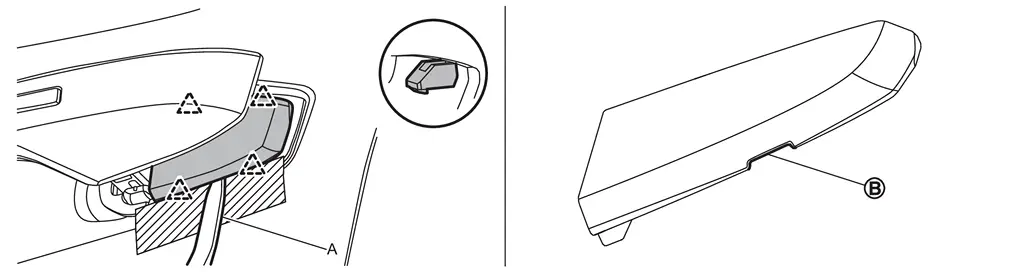
|
: Pawl |
 NOTE:
NOTE:
If escutcheon cover cannot be removed from the bottom, remove it from the top.
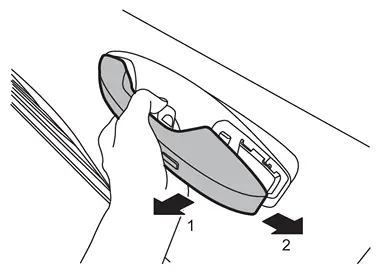
Slide rear door outside handle grip toward rear of vehicle and remove it according to the numerical order 1→2 indicated by arrows as shown in figure.
NOTE:
Expand the lib of rear door outside handle bracket indicated by arrows as shown in figure to remove the handle easily.
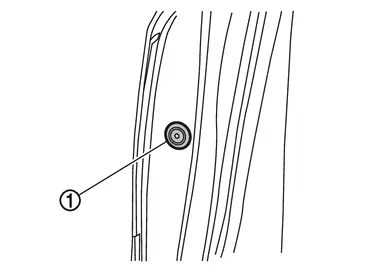
Remove door side grommet .
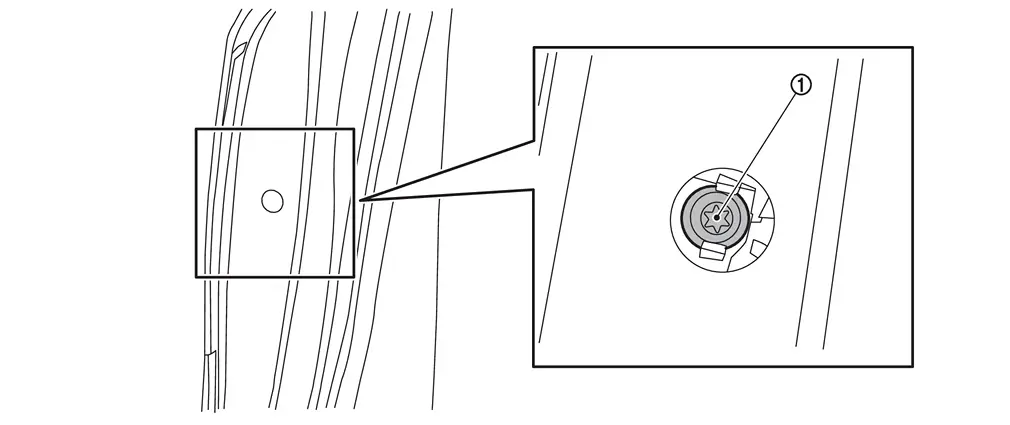
Loosen TORX bolt from grommet hole.
Remove escutcheon base from rear door panel.
Disengage front gasket and rear gasket fixing pawls, and then remove front gasket and rear gasket.
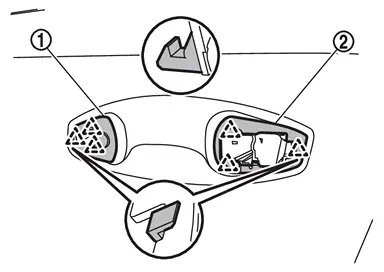
|
: Pawl |
Disengage rear door outside handle cable from rear door outside handle cable clip.
Loosen rear door outside handle bracket mounting TORX bolt .
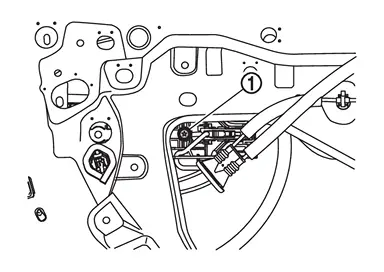
Slide rear door outside handle bracket toward front of vehicle and remove it.
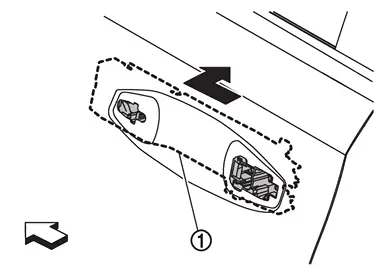
| : vehicle front |
Disconnect rear door outside handle cable from rear door outside handle bracket according to the numerical order 1→3 indicated by arrows as shown in figure.
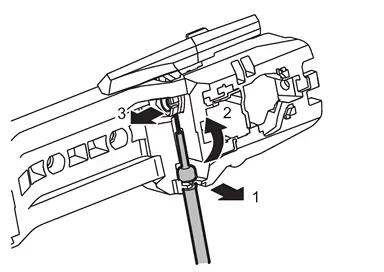
INSTALLATION
Note the following items, and then install in the reverse order of removal.
CAUTION:
-
Check rear door outside handle grip part for lubrication condition. Apply body grease if necessary.
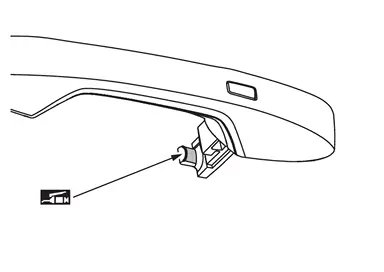
: Body grease -
Check rear door outside handle bracket parts for lubrication condition. Apply body grease if necessary.
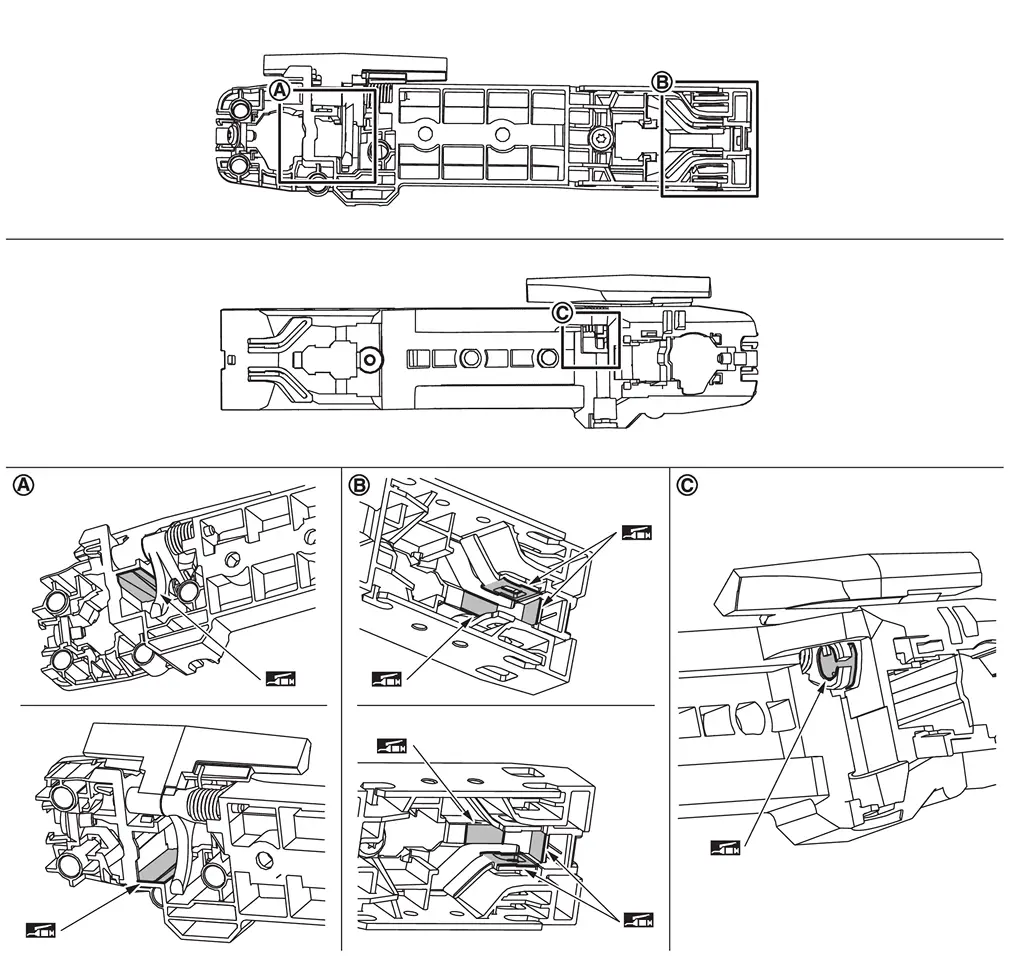
: Body grease -
When connecting rear door outside handle cable to rear door outside handle assembly, check that rear door outside handle cable is properly engaged with rear door outside handle assembly.
-
When installing rear door outside handle, be careful that rear door outside handle harness and body side harness are routed normally.
-
When installing, be careful that rear door outside handle cable is routed normally.
-
After installation, check rear door lock. Refer to Inspection.
-
Never reuse escutcheon cover. Always replace it with a new one when it is removed.
Other materials
Break-in schedule
CAUTION
During the initial 1,200 miles (2,000 km), it is essential to follow these
guidelines carefully to ensure optimal engine performance, long-term durability,
and maximum efficiency of your Nissan Armada.
Ignoring these break-in recommendations for your Nissan Armada may lead to
prematu ...
Tow Truck Towing
Tow Truck Towing
CAUTION:
To avoid the risk of minor injury or property damage : If the 12V battery has low or no voltage, the transmission cannot be shifted into neutral. To transport the vehicle, it must have all four wheels off the ground and placed on a flatbed or track system.
All applicabl ...
Writing of Calibration Data
Work Procedure
DESCRIPTIONIf only the around view monitor control unit is replaced, the calibration data stored in the camera can be written to the around view monitor control unit by selecting "Camera Calibration" of "Work Support" mode in CONSULT.WORK PROCEDUREWRITE CALIBRATION DATA
With CONSULT
...