Inspection
WARNING:
-
Jacking up or lift up the vehicle may the vehicle height to go down which cause a personal injury and/or damage to the air suspension component parts. Refer to Precaution for when Jacking and Lifting Up the vehicle with Electronic Air Suspension System.
LOOSENESS OF CONNECTED PART
Check each fixing bolt and nut for looseness using torque wrench. For each tightening torque, refer to Exploded View.
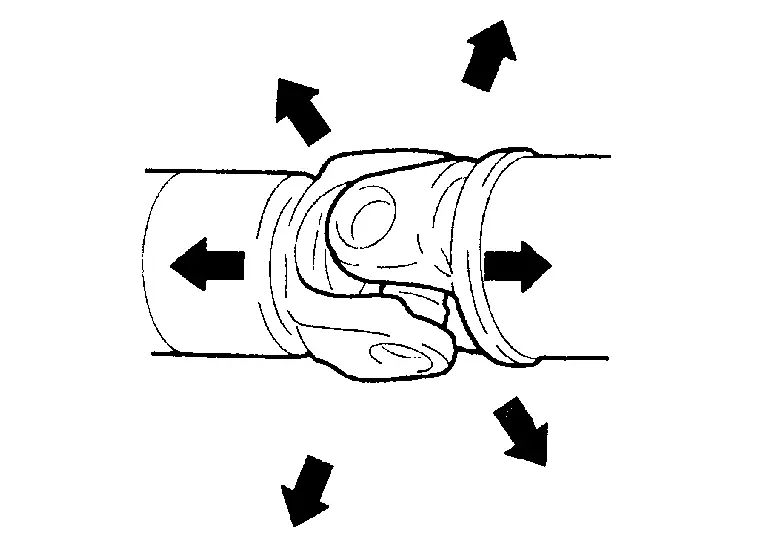
BACKLASH OF JOINT PART
Move the joint of propeller shaft up and down and from side to side (axial direction of shaft and right angle to shaft) to check that the joint has no backlash extremely. If the joint has a malfunction, remove propeller shaft and perform inspection.
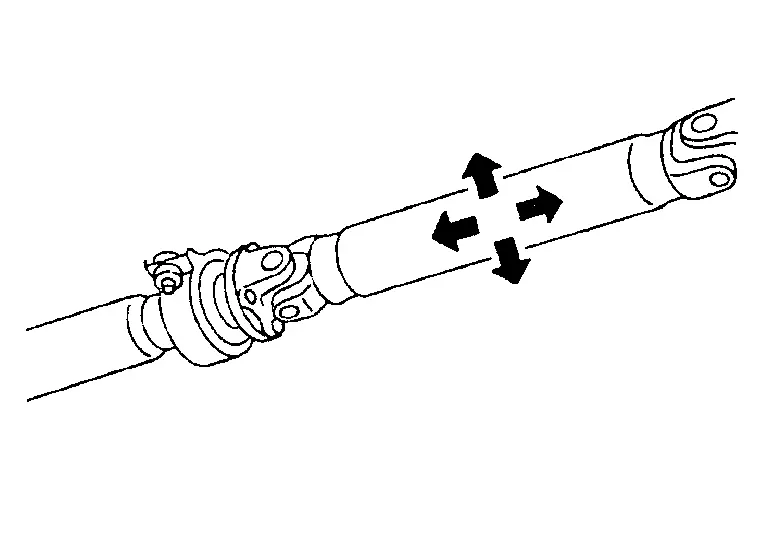
BACKLASH OF CENTER BEARING
Move the shaft near center bearing up and down and from side to side (axial direction of shaft and right angle to shaft) to check that the bearing has no backlash. If the bearing has a malfunction, remove propeller shaft and perform inspection.
APPEARANCE AND NOISE
-
Check propeller shaft tube surface for dents or cracks. If malfunction is detected, replace propeller shaft assembly.
-
If center bearing is noisy or damaged, replace propeller shaft assembly.
VIBRATION
If vibration is present at high speed, adjust the propeller shaft phase first.
Check the propeller shaft for bend and damage. If damaged, replace propeller shaft assembly.
Perform a cruise test drive to check the propeller shaft for runout. If vibration occurs, separate propeller shaft at final drive companion flange; then change the phase between companion flange and propeller shaft by the one bolt hole at a time and install propeller shaft.
If vibration is still detected, measure propeller shaft runout after removing it. Refer to Inspection.
Other materials
Additional Service When Replacing Air Suspension Control Module
Work Procedure
DescriptionVehicle specification needs to be written with CONSULT because it is not written after replacing the air suspension contorol module.For details the operation, refer to “CONSULT Operation Manual�.Work ProcedureWRITING VEHICLE SPECIFICATION AND VIN
With CONSULT
Perform wr ...
Bleeding Brake System
Description
CAUTION:
When the following operations are performed, always use CONSULT, for performing each air bleding of “WORK SUPPORT�. Refer to Work Procedure.
Work Procedure
CAUTION:
When performing the following operations, always use CONSULT. (It cannot be performed by any means other tha ...
Rear Door Assembly
Removal and Installation
CAUTION:
Perform work with 2 workers, because it is heavy weight.
Support door with a proper material and use protective tape or shop cloth to protect door and body from falling and damage when removing and installing door assembly.
REMOVALRemove rear door harness gromm ...