Removal & Installation
REMOVAL
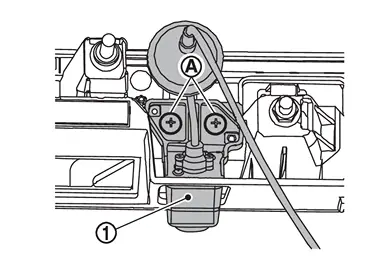
Remove back door finisher. Refer to Removal and Installation.
Remove the rear view camera mounting screws  , then remove the rear view camera
  .
.
INSTALLATION
Install in the reverse order of removal.
 NOTE:
NOTE:
Adjust the guide line position if the guide line position is shifted after installing the rear view camera (With 6 Speaker Models). Refer to REAR VIEW CAMERA : Adjustment.
Adjustment
With 6 Speaker Models
Adjust the guide line position if the guide line position is shifted after installing the rear view camera.
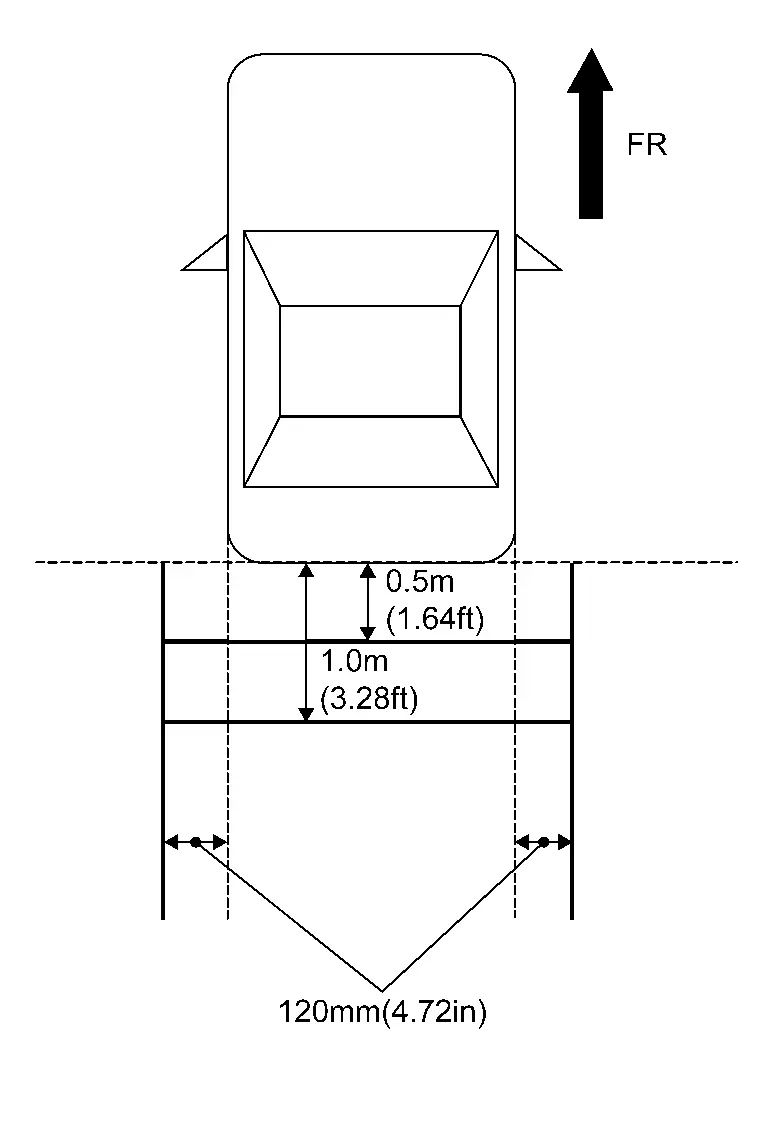
Draw lines on rearward area of the vehicle passing through the following points: 120 mm (4.72 in) from both sides of the vehicle, and 0.5 m (1.64 ft), 1.0 m (3.28 ft) from the rear end of the bumper.
Set into “Adjust offset of rear view camera� mode of Confirmation / Adjustment mode.
Rotate the center dial, and then select the guiding line pattern so that its angle is aligned with the correction line of the rear of the vehicle.
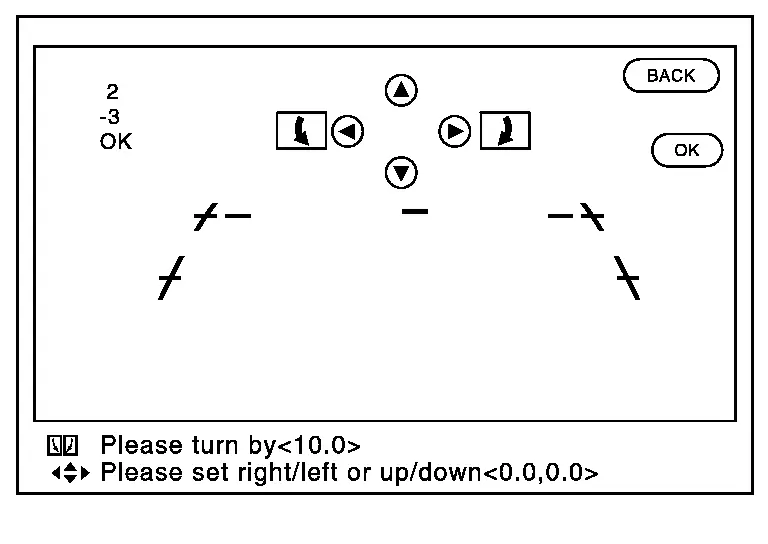
| Selected pattern | : (−10°) – (10°) |
Make fine adjustment to the correction line of the rear of the vehicle with up/down/left/right switches so that its position is aligned with the guiding line. Press “OK� switch and record the adjusted guiding line position to the camera control unit.
| Up/Down adjustment range | : (−10°) – (10°) |
| Left/Right adjustment range | : (−10°) – (10°) |
CAUTION:
Never operate other function such as pressing BACK while writing index data.
Other materials
Change of System Mode
Description
CAUTION:
When the following operations are performed, always use CONSULT, for performing "System mode change" of "Work support". Refer to Work Procedure.×: Required —: not required Procedure System mode change
Removing/installing ABS actuator and electric unit (control unit)
†...
Rear Automatic Air Conditioning System
Symptom Table
NOTE:
Perform self-diagnoses with CONSULT before performing the symptom diagnosis. If any DTC is detected, perform the corresponding diagnosis. Symptom Corresponding malfunction part Check item/Reference
Rear air conditioning system does not activate.
Rear A/C switch
Display un ...
Intelligent Key Low Battery Warning Does Not Operate
Diagnosis Procedure
CHECK INFORMATION DISPLAY
Check information display.
Refer to Work flow.
Is the inspection result normal?
YES>>
GO TO 2.
NO>>
Repair or replace the malfunctioning parts.
CHECK INTELLIGENT KEY BATTERY
Check Intelligent Key battery.
Refer to Component Inspection.
Is t ...