Removal and Installation
REMOVAL
CAUTION:
-
Perform lubricant return operation before each refrigeration system disassembly. However, if a large amount of refrigerant or lubricant leak is detected, never perform lubricant return operation. Refer to Perform Lubricant Return Operation.
-
When disconnect the A/C piping related parts, cap or wrap the joint of those parts with suitable material such as vinyl tape to avoid the entry of air.
Use a refrigerant collecting equipment (for HFO-1234yf) to discharge the refrigerant. Refer to Recycle Refrigerant.
Drain engine coolant from cooling system. Refer to ENGINE COOLANT : Draining.
Separate frame assembly and body assembly. Refer to Removal and Installation.
Disconnect front heater pipe assembly from rear cooler pipe assembly. Refer to Removal and Installation.
Disconnect low-pressure pipe from rear cooler pipe assembly. Refer to Removal and Installation.
Disconnect high-pressure pipe from rear cooler pipe assembly. Refer to Removal and Installation.
Remove mounting bolt  , and then disconnect low-pressure pipe and high-pressure pipe of rear cooler pipe assembly from rear evaporator pipe.
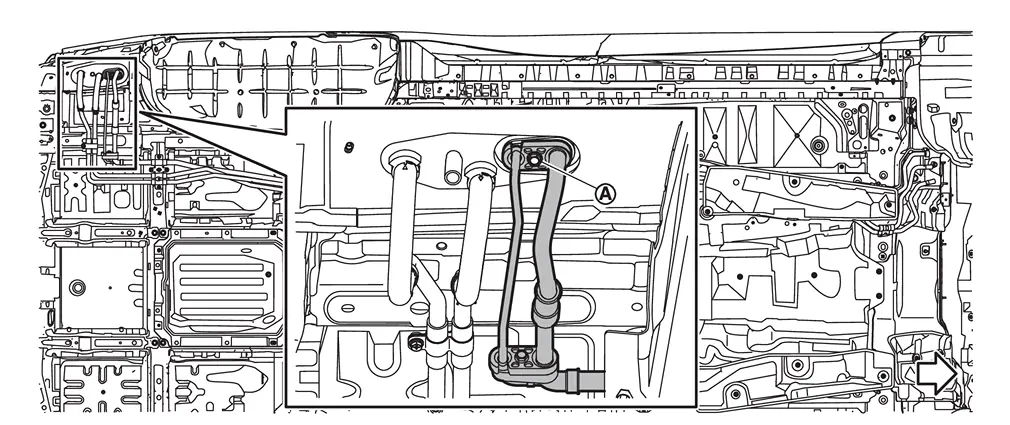
| : vehicle front |
Loosen clamps  , and then disconnect heater hoses of rear cooler pipe assembly from rear heater core.
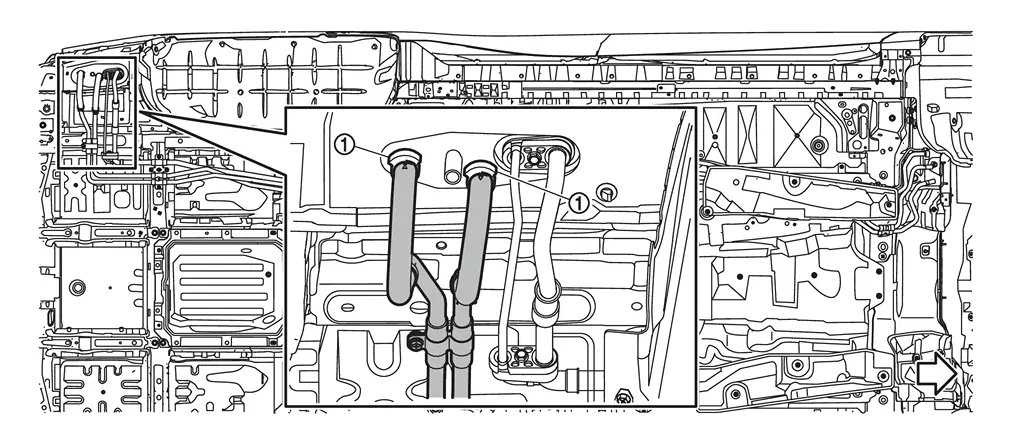
| : vehicle front |
Remove mounting nuts , and then remove heat shield plate.
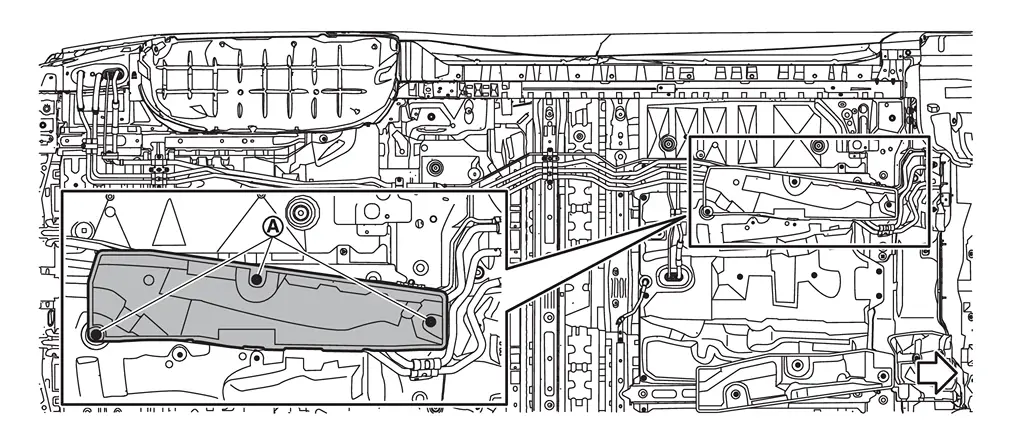
CAUTION:
-
Work when system is cool, as the exhaust system is hot just after stopping the engine.
-
Be careful not to cut hands on heat prate.
| : vehicle front |
Remove mounting nuts  and bolts
  , and then remove rear cooler pipe assembly from body.
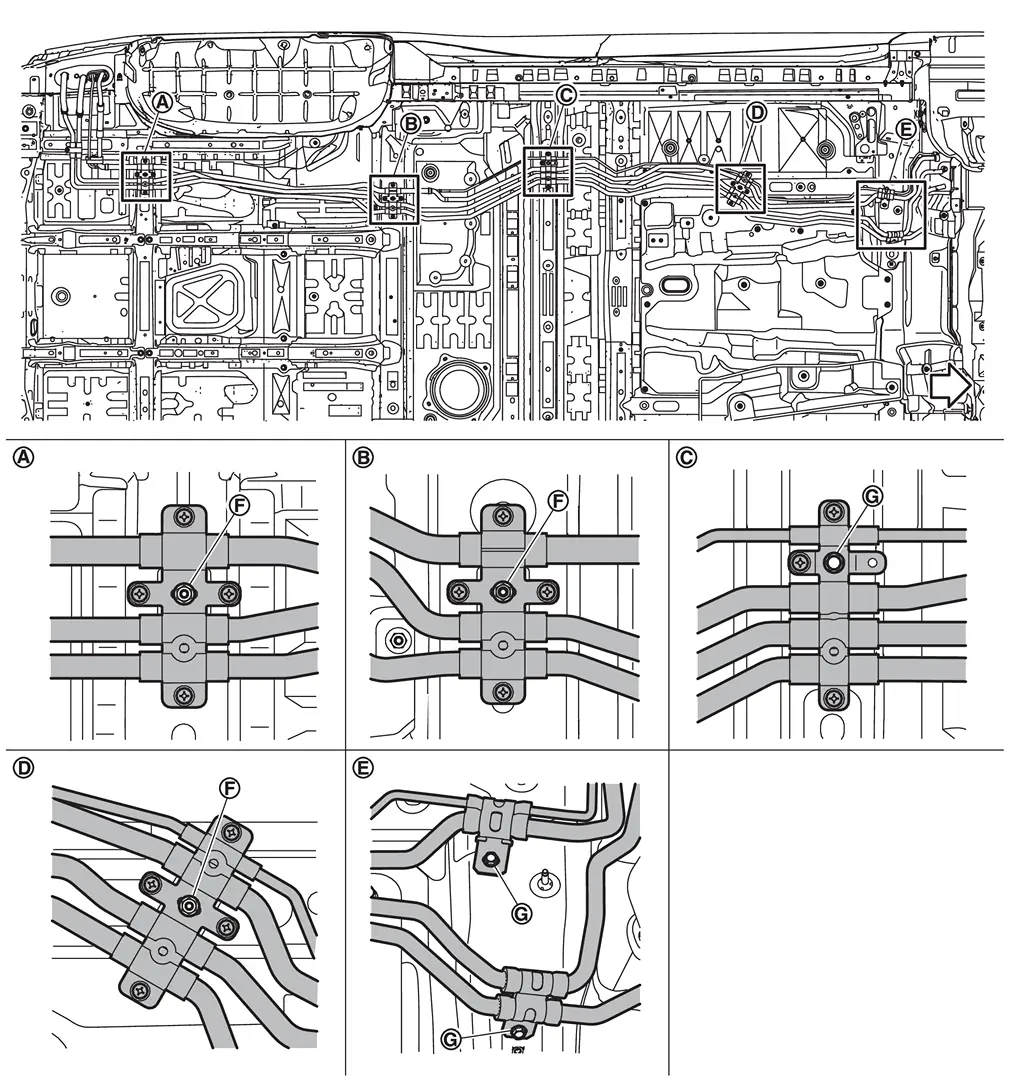
| : vehicle front |
INSTALLATION
Note the following items, and then install in the reverse order of removal.
CAUTION:
-
Securely insert each hose, and install clamp at a position where it does not interfere with the pipe bulge.
-
To prevent leakage of refrigerant, replace the O-ring with a new one. Apply a coat of compressor oil to the O-ring prior to installation.
-
Use a refrigerant collecting equipment (for HFO-1234yf) to charge the refrigerant. Refer to Charge Refrigerant.
-
Perform a check for refrigerant leakage when charging with refrigerant. Refer to Leak Test.
 NOTE:
NOTE:
When filling radiator with engine coolant. Refer to ENGINE COOLANT : Refilling.
Other materials
Exhaust System
Inspection
WARNING:
Jacking up or lift up the vehicle may the vehicle height to go down which cause a personal injury and/or damage to the air suspension component parts. Refer to Precaution for when Jacking and Lifting Up the vehicle with Electronic Air Suspension System.
Check exhaust pipes, ...
Rear Door Weather-Strip
Removal and Installation
REMOVALApply protective tape (A) to rear door panel around rear door weather-strip fixing clips for preventing damage.
Disengage fixing clips on the reverse side of rear door weather-strip using a remover tool (A).
: Clip
CAUTION:
Never damage rear door panel.
...
Preparations
Special Service Tools
The actual shapes of TechMate tools may differ from those of special service tools illustrated here.
Tool number
(TechMate No.)
Tool name Description
(NI-39570)
Chassis ear
Locates the noise
(NI-50397)
NISSAN Squeak and Rattle Kit
Repairs the cause of noise
C ...