Removal and Installation
WARNING:
- Jacking up or lifting up the vehicle may the vehicle height to go down which cause a personal injury and/or damage to the air suspension component parts. Refer to Precaution for when Jacking and Lifting Up the vehicle with Electronic Air Suspension System (With electronic air suspension).
- When checking under the vehicle or inside wheel house, always turn OFF the electronic air suspension function with the vehicle unladen and normal height, since the suspension may accidentally move and it can lead to personal injury. Refer to Precaution for Electronic Air Suspension System (With electronic air suspension).
REMOVAL
Without 12V Sub Battery
Drain engine coolant from cooling system. Refer to ENGINE COOLANT : Draining.
Remove front heater outlet pipe assembly. Refer to Removal and Installation.
Remove front road wheel tire RH. Refer to ROAD WHEEL TIRE : Removal & Installation.
Remove fender protector RH. Refer to Removal and Installation.
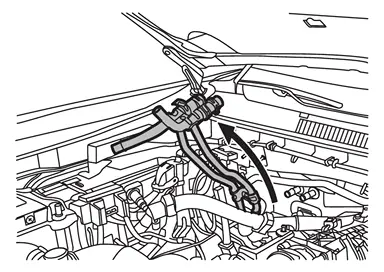
Remove front heater pipe assembly mounting nut  .
.
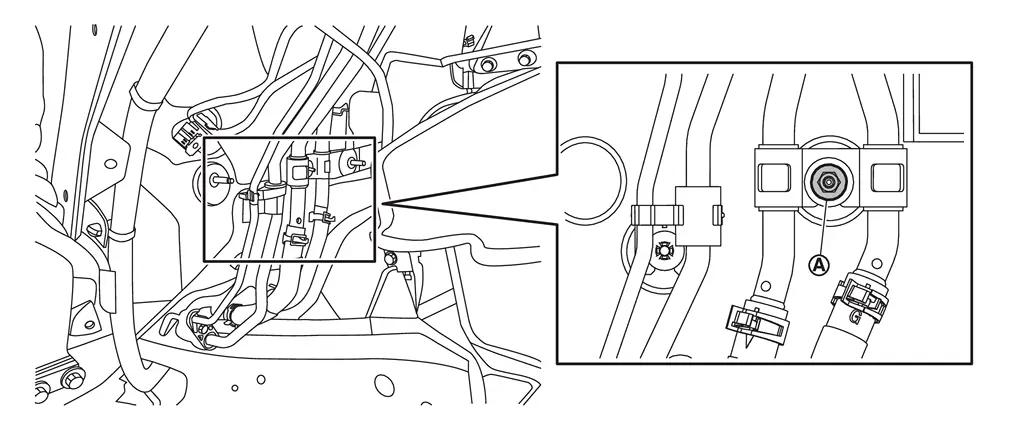
Loosen clamps  , and then disconnect front heater pipe assembly from rear cooler pipe assembly.
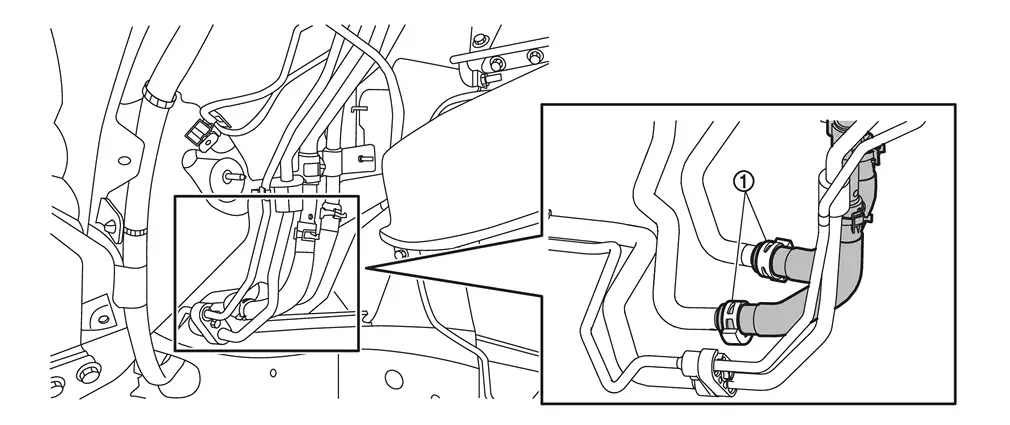
Loosen clamp , and then disconnect water hose 2 from front heater pipe assembly.
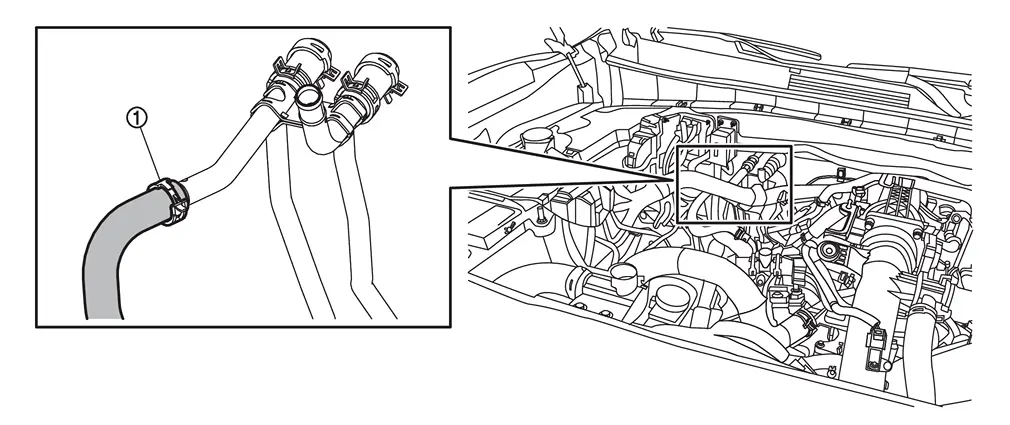
Loosen clamps , and then disconnect front heater pipe assembly from front heater core.
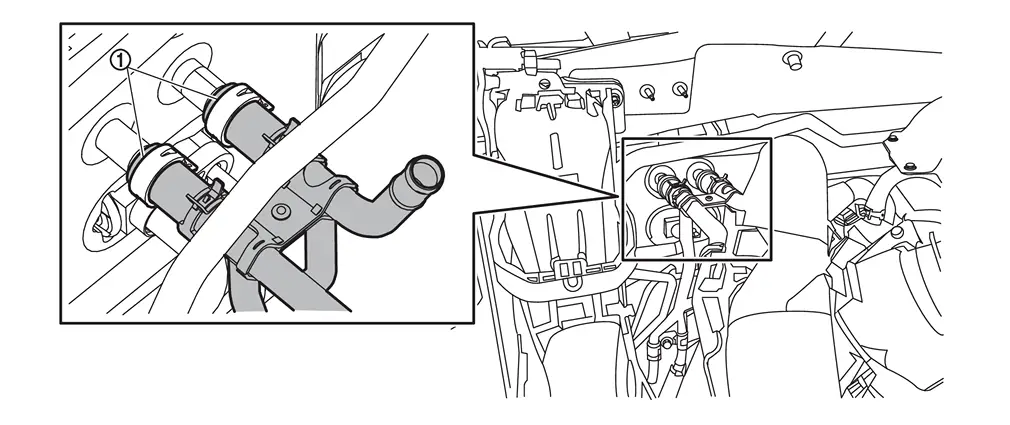
Remove front heater pipe assembly from vehicle.
With 12V Sub Battery
Drain engine coolant from cooling system. Refer to ENGINE COOLANT : Draining.
Remove front heater outlet pipe assembly. Refer to Removal and Installation.
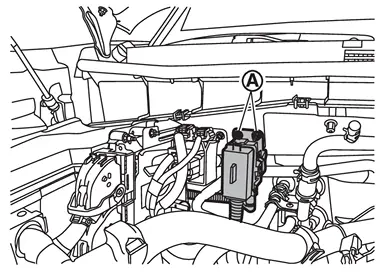
Remove mounting nuts , and then move 12V sub battery harness 1 to secure work space.
Remove front road wheel tire RH. Refer to ROAD WHEEL TIRE : Removal & Installation.
Remove fender protector RH. Refer to Removal and Installation.
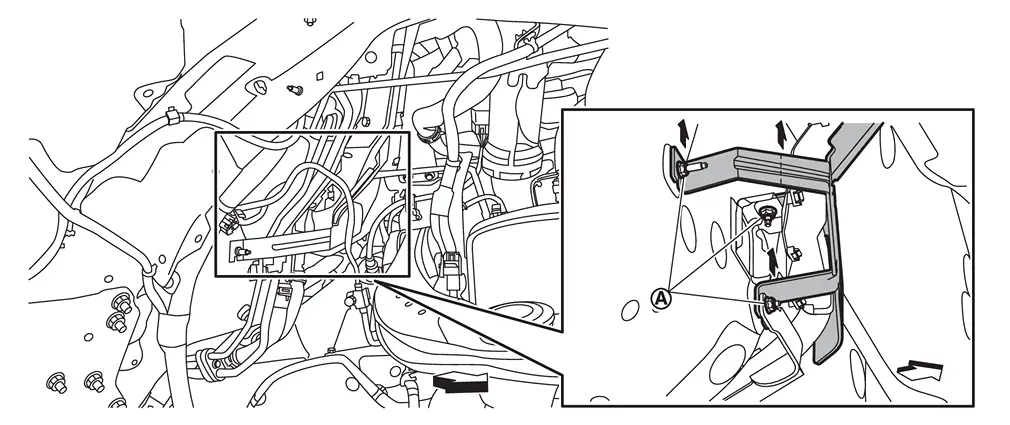
Remove mounting nuts , and then remove 12V sub battery harness 1 bracket from body.
| : vehicle front |
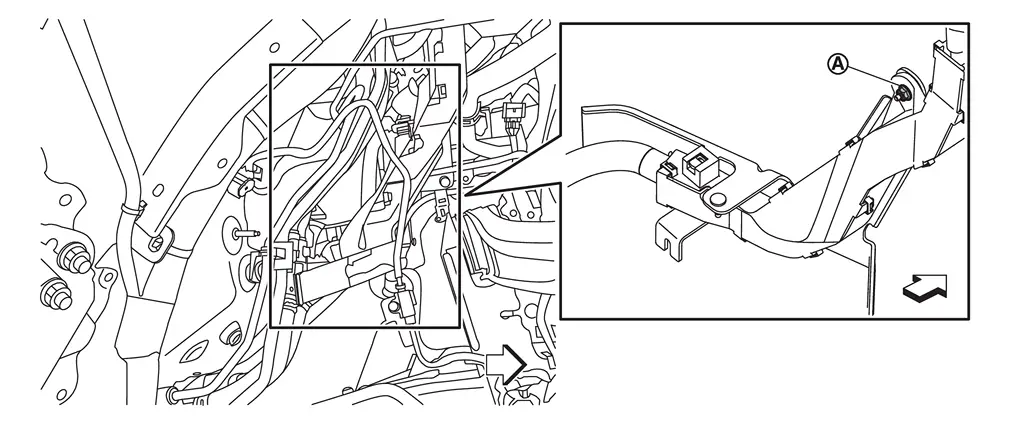
Remove 12V sub battery harness 1 mounting nut .
| : vehicle front |
Disengage fixing pawl, and then move 12V sub battery harness 1 bracket and 12V sub battery harness 1  to secure work space.
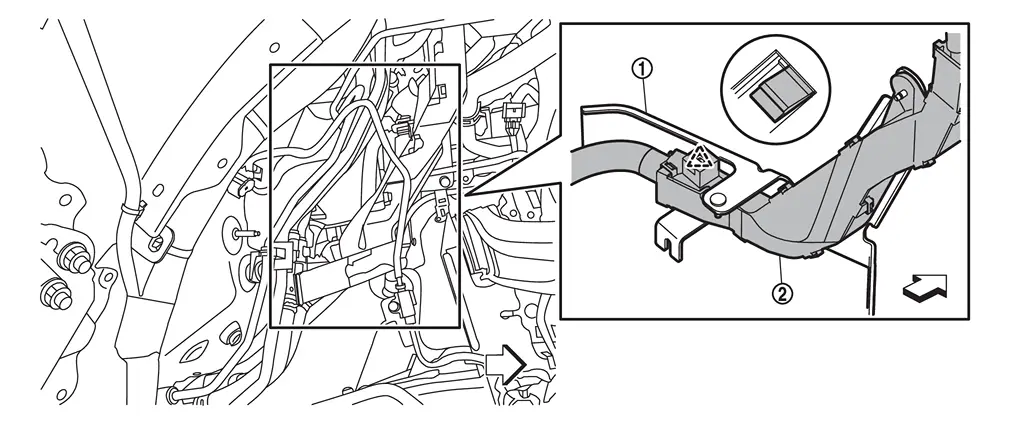
 |
: Pawl |
| : vehicle front |
Remove front heater pipe assembly mounting nut .
Loosen clamps , and then disconnect front heater pipe assembly from rear cooler pipe assembly.
Loosen clamp , and then disconnect water hose 2 from front heater pipe assembly.
Loosen clamps , and then disconnect front heater pipe assembly from front heater core.
Remove front heater pipe assembly from vehicle.
INSTALLATION
Note the following item, and then install in the reverse order of removal.
CAUTION:
Securely insert each hose, and install clamp at a position where it does not interfere with the pipe bulge.
 NOTE:
NOTE:
When filling radiator with engine coolant. Refer to ENGINE COOLANT : Refilling.
Other materials
Oil Pan (lower)
Exploded View
Drain plug
Drain plug washer
Oil pan (lower)
Comply with the installation procedure when tightening. Refer to Removal and Installation.
: N·m (kg-m, ft-lb)
: N·m (kg-m, in-lb)
: Always replace after every disassembly.
: Sealing point
...
Third Power Seat System
Symptom Table
Symptom Possible causeInspection item
All function does not operate
Fusible link
Fuse
Third seat control unit power supply/ground circuit
Check power supply and ground circuit (third seat control unit)
Third seat control unit RH: Refer to Diagnosis Procedure.
Third seat control u ...
Additional Service When Replacing Distance Sensor
Work Procedure
Always perform the distance sensor configuration after replacing the distance sensor.
Always perform the radar alignment after removing and installing or replacing the distance sensor.
CAUTION:
The system does not operate normally unless the distance sensor configuration and the r ...