Exploded View
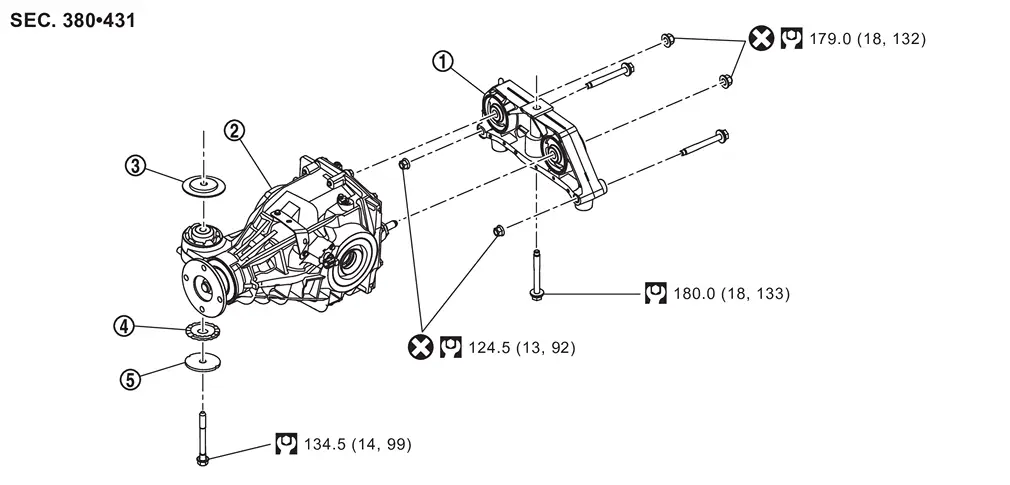
 |
Final drive mounting bracket |  |
Rear final drive assembly |  |
Upper stopper |
 |
Lower stopper |  |
Washer | ||
 : N·m (kg-m, ft-lb) : N·m (kg-m, ft-lb) |
|||||
 : Always replace after every disassembly. : Always replace after every disassembly. |
|||||
Removal and Installation
WARNING:
-
Jacking up or lift up the vehicle may the vehicle height to go down which cause a personal injury and/or damage to the air suspension component parts. Refer to Precaution for when Jacking and Lifting Up the vehicle with Electronic Air Suspension System.
REMOVAL
-
Drain gear oil. Refer to Draining.
-
Remove rear propeller shaft from final drive. Refer to Removal and Installation.
-
Remove drive shafts. Refer to Removal and Installation.
-
Remove rear supension member stay. Refer to Removal and Installation.
-
Remove breather hose from rear final drive assembly. Refer to Removal and Installation.
-
Disconnect differential lock position switch harness connector and differential lock solenoid harness connector.
-
Set a suitable jack to rear final drive assembly.
CAUTION:
Never place a jack under the rear cover.
-
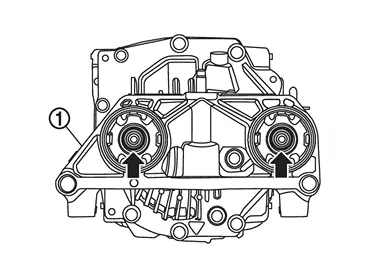
Remove rear final drive assembly mounting nuts (
 ) from final drive mounting bracket
  .
.
-
Remove rear final drive assembly mounting bolt (
) and remove rear final drive assembly .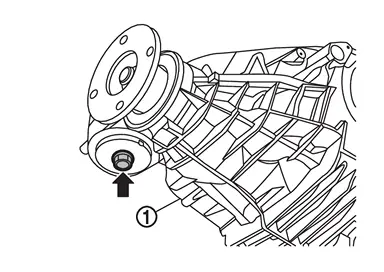
CAUTION:
Secure rear final drive assembly to a suitable jack while removing it.
-
Remove upper stopper, lower stopper, and washer.
-
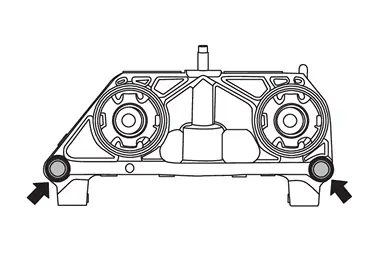
Remove final drive mounting bracket mounting bolts and nuts (
).
-
Remove final drive mounting bracket mounting bolt (
) and remove final drive mounting bracket .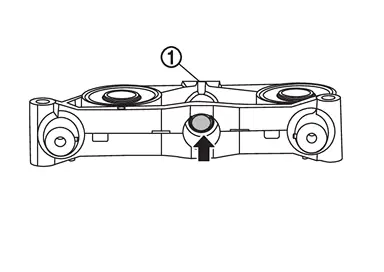
-
Remove bracket from rear final drive assembly. (if necessary).
INSTALLATION
Note the following, and install in the reverse order of removal.
-
For non-reusable parts, refer to Exploded View.
-
For each tightening torque, refer to Exploded View.
-
Perform inspection after installation. Refer to Inspection.
Inspection
INSPECTION AFTER INSTALLATION
Check the oil level and the oil leakage after installation. Refer to Inspection.
Other materials
Towing recommended by NISSAN
Four-wheel drive models
Four-wheel Drive (4WD) models
For the Nissan Armada equipped with four-wheel drive, the manufacturer strongly
recommends transporting the vehicle using towing dollies or, preferably, a flatbed
truck to ensure maximum protection of drivetrain components.
Using the c ...
Rear Stabilizer
Exploded View
Stabilizer bar
Stabilizer bushing
Stabilizer clamp
Front lower link
Stabilizer connecting rod
: N·m (kg-m, ft-lb)
Removal and Installation
WARNING:
Jacking up or lift up the vehicle may the vehicle height to go down which cause a personal injury ...
Door Mirror
Diagnosis Procedure
CHECK DOOR MIRROR MECHANISM
Check for the following.
Mechanism deformation or pinched foreign materials.
Interference with other parts because of poor installation.
Is the inspection result normal?
YES>>
GO TO 2.
NO>>
Repair or replace the malfunctioning parts ...